10-16-2013

A Canning Party

IMG_2455

IMG_3782

Tomatoes, Tomatoes, Tomatoes…Is there anything as glorious as homegrown tomatoes?

Back in August when the tomato vines were so heavily laden with ripening fruit I hosted a canning party. It was fun, glorious, and wonderful. And I passed on canning knowledge to 3 more people. I think my grandma’s would have been proud.

IMG_2595

IMG_2602

IMG_2621

I enjoy the process of canning and producing a tangible something. There is nothing like making spaghetti sauce, taco dip, or some shrimp scampi with your very own canned tomatoes. And I want to pass this enjoyment on to others. I want people to realize that canning and preserving isn’t as hard as you think it is. That it IS doable.

Take Lindsey (on the right) for example…I taught her how to pickle okra last summer and then last month she had a party and showed her daughter’s teacher how to pickle okra. I think that is so cool! We have to spread the wealth of knowledge that we have in our heads. My grandmothers, mom, sister-in-law…they shared it with me and now I’m simply passing it on.

SO GO CAN!!! And if you ever have a canning question or just need canning encouragement…let me know. I’m here to help.

Love,

Jessica

IMG_2594

09-11-2012

Cranberry & Almond Granola Bars

I thought you might be tiring of the same ‘ol descriptive words…amazing or yummy or delicious! So I thought I’d go all crazy and call these granola bars…Most Delicious!

These are SOoooo good that the hardest part is to stop eating the granola mix before you bake it. You know, so you could actually end up eating the finished product!

This recipe is inspired from Smitten Kitchen Thick & Chewy Granola Bars. I really liked how flexible her recipe was but I wanted to try making these without any corn syrup. I also lowered the sugar and omitted the salt so we could be justified when we eat half the granola bars in one sitting! And I require the peanut butter as it really helps the granola bar stay uncrumbly and contributes to the chewiness factor. Plus, I threw in coconut to counteract the lowered sugar.

And oh yeah, these are gluten free!

The list of characters….

Makes 16 granola squares

Ingredients

2 cups quick cooking oats, gluten free if necessary
1/2 – 2/3 cup organic sugar
2 cups nuts (I think slivered almonds are best and very kid friendly…but feel free to shake it up!)
1/2 cup dried fruit (myself, I’m a big cranberry fan)
1/2 cup shredded coconut
1/3 cup ground flax seed (optional)
1/4 cup peanut butter
5 tbsp unsalted butter, melted
1 tbsp H2O (I do not remember much from chemistry but I love using this abbreviation for water)
a little less than 1 oz of each: honey, maple syrup, and molasses (1/3 cup in total when all three are combined…just fill 1/3 measuring cup up with some of each)
Instructions

Preheat oven to 350 degrees. Butter a piece of parchment paper large enough to extend over a 9″x9″ baking pan. You want to be able to use the sides of the parchment paper to lift the baked granola out of the pan prior to cutting.

Place 1/3 cup of the oats into a food processor and chop until the oats reach flour like consistency. You are basically making oat flour. If desired, you could just use store bought oat flour but I like the do-it-yourself method.

In a large mixing bowl, combine the oat flour with remaining 1 and 2/3 cups oats and all other dry ingredients. In a separate bowl, stir together the melted butter, peanut butter, water, and the 1/3 cup mixture of honey, maple syrup, and molasses. (I hope the 1/3 cup makes sense…basically just put a tad of each into a 1/3 measuring cup).

Now comes the fun part! Pour the moist ingredients into the dry ingredients and mix together until well combined. You can use a plastic spatula, wooden spoon, or your hand for this part. I use my hand…easier to eat the stuff as I go along!

Now, STOP eating the granola and leave some for the granola bars!!!

Spread into the buttered parchment paper/baking pan.  And then press down the granola with your hands or a large spatula as much as possible. This is really important to help the granola bars stick together. Bake for 20 minutes, until slightly darkened on top. Remove from oven and once again, with a spatula, press the mixture down to help with the adhesiveness.

Do not remove the parchment paper from the pan for at least 30 minutes. This also helps the bars to  seal together. And if it’s really humid out, after letting the bars reach room temperature, place them into the fridge and allow to cool further for an hour or so more.

I’m telling you this so Kashi & Nature Valley will be jealous of how well your home made granola bars stay together!

Now, once you are ready to eat these bad boys, use a serrated knife to cut these in a sawing motion. Oh wait, you’ve already stolen a little bite…don’t worry…I have too when they come right out of the oven, but it’ll just be our secret!

Store bars in the refrigerator or freezer in a resealable bag. If frozen, simply allow the granola bar to sit out at room temperature for about 5 minutes. They’ll be cool, calm, and so satisfying!

Also, you can substitute chocolate chips for the dried fruit or drizzle chocolate on top if desired. I’ve found that cranberries and slivered almonds are my favorite way to go. When I’ve tried adding chocolate, the bars were still good but almost a little too rich or intense. So you may want to reduce the peanut butter a little if you add chocolate. Also, if you aren’t into dried fruit or chocolate then feel free to use all nuts. The basic amount is 2 to 3 cups total of nuts and dried fruit.

I’m really not kidding about how addictive these are. It is so hard to eat just one, so hard to put that spoon down once all the ingredients are combined…you just CAN’T STOP! Or, at least I can’t!

I hope ya’ll like these as much as my family does!

Love,

Jessica
07-09-2012

Tomato, Caramelized Onions, and Gorgonzola Pie

Happy (late!) 4th of July!! I hope everyone had a wonderful holiday and indulged in lots of food, laughter, and relaxation. Fisherman was on vacation and we had a wonderful Staycation. I feel like it was Christmas in July considering the copious amounts of food I ate over the last week.

So what have I been eating??? I’m so glad you asked! Fresh mahi mahi, roasted corn salad, pasta salad, BBQ, hmmmm….there isn’t a lot I haven’t consumed this past week. But my favorite dish was a Tomato Gorgonzola Pie that I adapted from a Gourmet Magazine Cookbook.

I probably shouldn’t admit this, since I am so proud to be Southern, but up until I made this tomato pie, I had never eaten one in my life. Crazy, isn’t it! And there’s no holding me back now.

The best part was that it took me no more than 45 minutes, start to finish. That includes the lets find where I hid the gorogonzola in the fridge and let me go pick some tomatoes and get side tracked into watering the garden. Sorry, this may be a long blog post….its just been a while since I’ve posted and I have all these thoughts I want to share with ya’ll, but I get distracted with kids and life and blah blah, okay back to the pie…

~~~

So to start, you’ll need a pie crust, Gorgonzola cheese, onions, and tomatoes….pretty simple, right!

After placing crust into your pie pan, place pie weights…or dry beans…onto the pie with aluminum foil to keep the middle of the pie from rising while you pre-bake the crust. You need to bake the crust beforehand since you only put it under a broiler once the ingredients are added.

Add some olive oil and your onions into a heavy pan and start the caramelizing process. I just LOOOVE caramelized onions! Even Fisherman loves & appreciates them and he isn’t the biggest foodie on the block.

Also, don’t be afraid to try caramelizing red onions. I did half white & half red the second time I made this and they tasted great. (And yes, I did make & eat this pie TWICE in the past week! Shows you how good it is!)

Good advice for caramelizing onions is to turn your back to them. Find something else to do, you don’t need to stir constantly, just every few minutes.

Now see all those brown bits of good onion residue? Scrape those bad boys up and stir in with the onions. They have all sorts of good flavor! And yep, this picture was from Pie #1 when I only used white onions.

Your piecrust should now be finished baking, so place caramelized onions in first…

…then your cheese, tomato, cheese layers…

…broil for a few minutes until cheese slightly browns, garnish with fresh basil and…

…Voila…Eat that pie up!!!

I hope you like as much as I did!!!

Jessica

Tomato, Caramelized Onions, and Gorgonzola Pie

Ingredients
1 9″ prepared pie crust
2 large onions (yellow or red), very thinly sliced
1 cup crumbled Gorgonzola cheese
5 medium sized ripe tomatoes, thinly sliced
Handful of fresh basil for garnishing

Preheat oven to 375 degrees.  Place pie crust into a glass pie pan. Line pie pan with aluminum foil and fill with pie weights/dried beans/or raw rice. Bake approximately 20 minutes until pasty is pale golden brown around rim. Remove weights and bake another 8 minutes until golden brown all over. If edge of crust looks to dark, place tin foil around the edges for remaining bake time.

While crust is baking, heat a few tablespoons of olive oil in a heavy skillet over medium heat and cook onions for approximately 20-25 minutes until they are caramelized in color. Sprinkle the onions with kosher salt a few times while cooking and stir every few minutes. As the onions begin to soften and brown, there will be residue at the bottom of the pan; stir these brown goodie bits into the onions.

Preheat oven broiler.

Spread caramelized onions over bottom of pie shell and top with 3/4 cup of the cheese. Arrange tomatoes, slightly overlapping, in circles over the cheese. Sprinkle tomatoes with kosher salt and fresh ground black pepper. Sprinkle remaining 1/4 cup of cheese over the tomatoes and drizzle a tablespoon of olive oil over the top.

Broil the pie until the cheese slightly browns, approximately 3 to 4 minutes. Garnish with fresh basil if desired.

06-09-2012

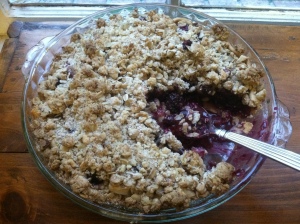
Blackberry and Blueberry Crumble Pie

I just have to say…I LOVE berry crumbles! They have to be one of the easiest desserts to make…Whip together a few ingredients, and voila! Today I used fresh from the farm berries but even in winter, crumbles taste great with frozen berries.

To try something different though, I added a pie crust which soaked up some of the juices and was still flaky and delightful.  And the ginger in this recipe adds a spicy kick for a little something more.  Hmmm…life is good!

Recipe Cost
Since most of the ingredients are on stock in my pantry, I only added the price of berries and a pie crust to come up with a total of $8 for this amazingly delish dessert. To buy a dessert this yummy at your local bakery, you’d spend close to $20. Quite the savings to make at home!

Ingredients
For the Pie Crust:
Knock yourself out making one from Grandma’s scratch recipe, or do as I do and buy refrigerated dough. One of these days, I’m going to figure out how to make a crust but for the moment, I am pretty intimidated on that front and blame it on my baking roller.  If you are just as intimidated with the daunting task of dough rolling, make sure to buy refrigerated not frozen pie crusts. Frozen pie crusts in those tin pans produce mushy crust; whereas a refrigerated one placed in your glass pie plate will produce a flaky and delectable crust.

For the Filling:
4 cups fresh blackberries and/or blueberries
1/2 cup sugar
1/4 cup flour
2 teaspoons lemon juice (~1/2 of a lemon)
1/2 Tbsp fresh minced ginger or 1 1/2 tsp grated ginger
1 Tbsp finely chopped fresh mint

For the Crumble:
1 cup flour
3/4 cup old fashioned oats
1/4 cup coarsely chopped hard nuts (almonds, walnuts, hazelnut, etc.)
1/4 cup granulated sugar
1/4 cup brown sugar
4 ounces butter, at room temperature
dash of kosher salt

For the crust ~ Preheat the oven to 350 degrees. Place pie crust in a glass pie plate and add dry beans to the top for a weight. Blind bake the pie crust for 10 minutes. Remove from the oven, remove beans or dry weights and allow to cool.

Don’t do like me and forget to add the weights/dry beans…the middle will puff up and the sides collapse into the middle!

For the filling ~ In a large, non-reactive bowl, stir together the sugar, flour, lemon juice, ginger, and mint. Next, gently mix in the berries and allow to sit for at least 10 minutes.

Pour into crust once crumble topping is made.

The berries took on a shiny sheen all by themselves. No matter the lighting, the photo looked like steam was rising.

For the crumble ~ In a mixing bowl, stir together the dry ingredients and then whisk in the butter.

You can also use a fork or your fingers. Basically, as the name implies, you just want the mixture to be crumbly looking. Place crumble mixture on top of berries in pie dish.

Bake in preheated oven for approximately 40 minutes, until golden brown.

ENJOY!!!

XoXo, Jess

Printable Recipe

Ingredients
For the Pie Crust:
9″ refrigerated pie crust

For the Filling:
4 cups fresh blackberries and/or blueberries
1/2 cup sugar
1/4 cup flour
2 teaspoons lemon juice (~1/2 of a lemon)
1/2 Tbsp fresh minced ginger or 1 1/2 tsp grated ginger
1 Tbsp finely chopped fresh mint

For the Crumble:
1 cup flour
3/4 cup old fashioned oats
1/4 cup coarsely chopped hard nuts (almonds, walnuts, hazelnut, etc.)
1/4 cup granulated sugar
1/4 cup brown sugar
4 ounces butter, at room temperature
dash of kosher salt

For the crust ~ Preheat the oven to 350 degrees. Place pie crust in a glass pie plate and add dry beans to
the top for a weight. Blind bake the pie crust for 10 minutes. Remove from the oven, remove beans or dry
weights and allow to cool.

For the filling ~ In a large, non-reactive bowl, gently mix together the sugar, flour, lemon juice, ginger,
and mint. Gently mix in the berries and allow to sit for at least 10 minutes. Pour into crust once crumble
topping is made.

For the crumble ~ In a mixing bowl, stir together the dry ingredients and then whisk in the butter. Y ou
can also use a fork or your fingers. Basically , as the name implies, you just want the mixture to be crumbly
looking. Place crumble mixture on top of berries in pie dish.

Bake in preheated oven for approximately 40 minutes, until golden brown.

04-30-2012

Do you CSA? Part 2

In case you missed my post, Do you CSA, click here, so the following will make more sense!

So I’ve finally made my decision…shopping at the Farmer’s Market from a plethora of vendors is just too much fun to pass up!

I know I could still buy from other vendors even if I have a CSA, but I’m on a budget here. If I spend my $20 with one farmer, then I’ll not have any MULA for the golden beets from Owl’s Nest or no fresh berries from Maple Ridge Farms. And it’s so much fun, each week, to speak with the different farmers, buy some baby crookedneck squash here and a fresh off the vine tomato there. (No, its not tomato season here at all, I am just anxiously awaiting the day!)

Thank you to EVERYONE that shared your comments, your thoughts, and feedback. I thought everyone would push me to the CSA so it was great to see all the varied opinions.

I’ve been working on recipes a lot lately so hopefully I can get some up soon. Think…swiss chard and ground pork stew, chicken & pork bolognese, quiche, pesto….hmmm…I love me some food.

Have a great day!

Jessica

04-20-2012

Plant a lettuce box for Earth Day

Want to celebrate Earth Day (Sunday) with your kids? What about…

Growing lettuce is so easy & simple and you get rewarded fresh food pretty quickly! Instant gratification seems to be a need of the kids I know.

You can either keep your lettuce small (above), which would then be called microgreens. Cut them at the very bottom every few days. You get more intense flavor this way.

Or allow to grow larger, as we’ve done with our romaine (Cinnamaron variety) below.

This is the first year I’ve tried micro-greens and they are tasty! You start these from regular seed but are just harvesting a lot more early & frequently.

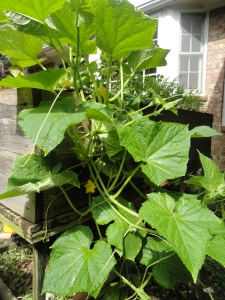
And perhaps throw in an extra veggie besides the lettuce? I’m trying to grow cucumber (Green Apple variety) upside down this year – and it appears to be working!

ENJOY your weekend outside with family, friends, and nature!

Love,

Jess

04-19-2012

Do you CSA?

Hello Father,

I have a confession. I love gardening, I love farmers, I love dirt. But I just can’t imagine joining a CSA. I want freedom of choice, to pick my veggies just the way I want, when I want. You see, God, signing up for a CSA requires commitment. And, I have come to realize that I don’t necessarily enjoy commitments. (I can’t even keep up with once a week pilates.) I do go to the Farmer’s Market faithfully and I shop at the local grocer each week. But I still feel unfaithful to the farmer by not participating in a CSA. Does my selfishness of wanting to choose my veggies each week mean I’m not really supporting the farmer? That rain or shine, drought or flood, he’ll have money to keep his farm afloat no matter how the produce turns out?

Help me out,

Jessica

****

I really am serious. Even though I encourage all my friends to participate in one, I have a huge commitment issue with CSA’s (Community Supported Agriculture). And until this past Tuesday I kept telling myself that if there was a farm that had a pick-your-own veggie CSA that I would participate. But then you find that ‘answer’ and realize, you’re still hesitant.

You see, I love going to the different vendors at the market and choosing a tomato here, a carrot bunch there, and a pile of lettuce greens at the next one. And my worry is this, if I commit to spending my $20/week with only one vendor – will I regret it? I definitely won’t regret the quality – its the best there is, but will I regret not getting to spend my $ with lots of vendors in lieu of spending it with one?

What do you think? Do you like your CSA? Do you have one where you choose your veggies or do you get an exciting surprise bag each week? Should I just go for it and try it out? And if you are a farmer…I’d love to know your thoughts on CSA participants versus farmer’s market buyers? Do you get as much $ from going to the Farmer’s Market or would you rather have it all in CSA participants?

Thanks for helping me with my dilemma! Jessica