07-08-2016

Friday’s TidBit: An Easy Trick to Reduce Acidity in Tomato/Spaghetti Sauces

When I started this blog 5 years ago, I really had no clue what I was doing.

I simply wanted to share recipes and encourage other people to live life locally.

Fast forward 5 years and there have been plenty of changes to both the way my blog looks and to how I write.

More & more I write about faith and less & less do I share recipes.

But more than anything, I have this desire to write but writing isn’t always my top priority.

I finally realized though, these thoughts in my head will never be more than just that: thoughts in my head…if I don’t do something about it and simply write.

So here’s my new goal: to write 2 blog posts a week. One post (perhaps on Tuesday’s?) will be deeper/reflective/insightful. The other post (hopefully on Friday’s) will be a fun fact I’ve learned, a quick recipe trick, a quote that was touching to me.

So there it is…perhaps writing down & publishing my goal will help me stay on track? I’ve never been great at habit setting. But if I want to be a better writer, if I want to grow as a writer, then I’ve got to take the first step and simply write more frequently.

Today’s First Friday Tidbit is all about making tomato sauce not have acidity.
Or at least lowering the acidity so it doesn’t cause heartburn.

IMG_6656 IMG_6551

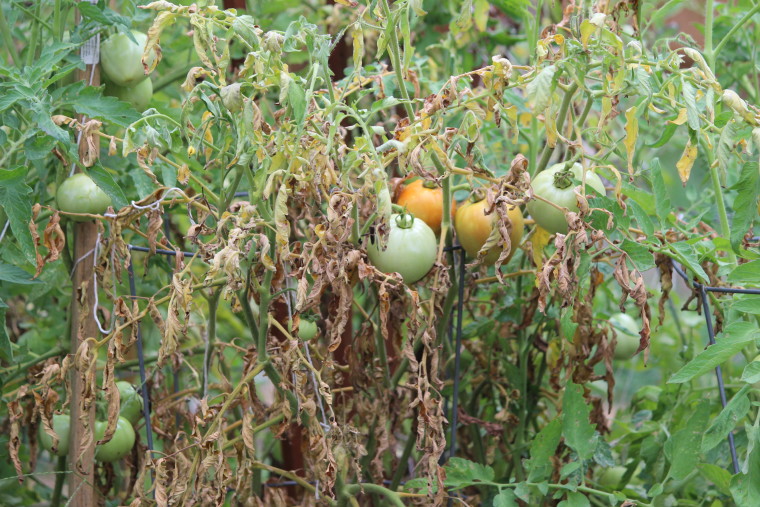
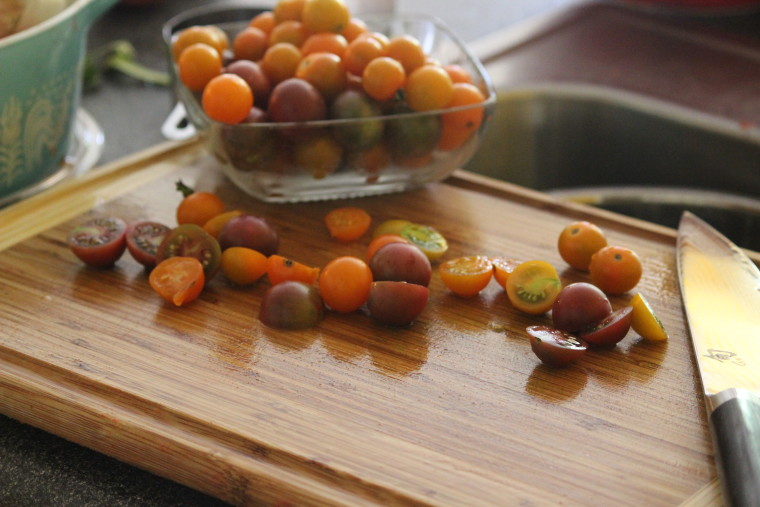
I grew up on a farm so it should come as no surprise that I adore tomatoes.

In my mind, summer = tomato.

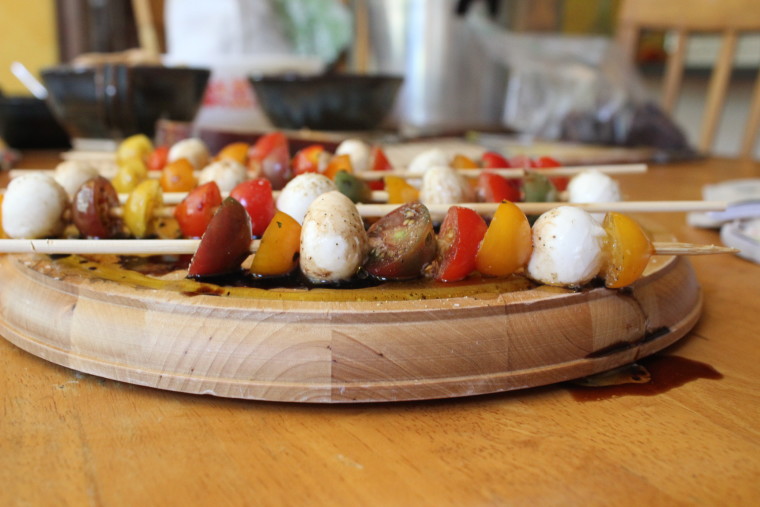
There’s tomato sandwiches on biscuits for breakfast, BLT’s for lunch, and caprese salad for dinner.

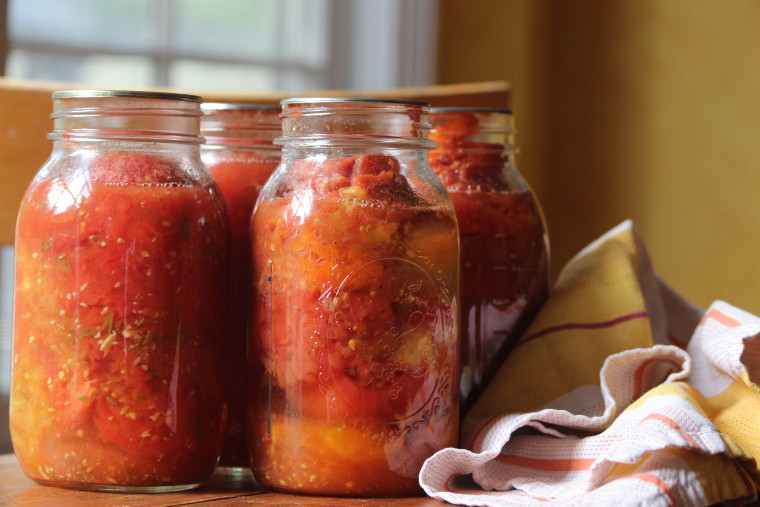
Then there’s the obligatory hours spent in the kitchen canning all those tomatoes so you can enjoy them in the winter.

It’s funny how adulthood rituals are often habits we learned in childhood.

I spent every summer of my childhood canning tomatoes and I’ll probably be spending my 38th birthday this month: canning tomatoes.

IMG_3782 IMG_5199 IMG_2587

Until recently everytime I had spaghetti sauce or any dish with cooked tomatoes, the acidity would cause the worst heartburn/indigestion. A few years ago, I even went to the doctor because I was worried about chest pains. It’s a bit humiliating when she simply says: I think it’s just heartburn.

Recently at the library I checked out The Clever Cookbook by Emilie Raffa at The Clever Carrot and ya’ll….
did you know you could reduce acidity in tomato sauce type recipes by using butter instead of oil??

It’s the best discovery of 2016 for me!

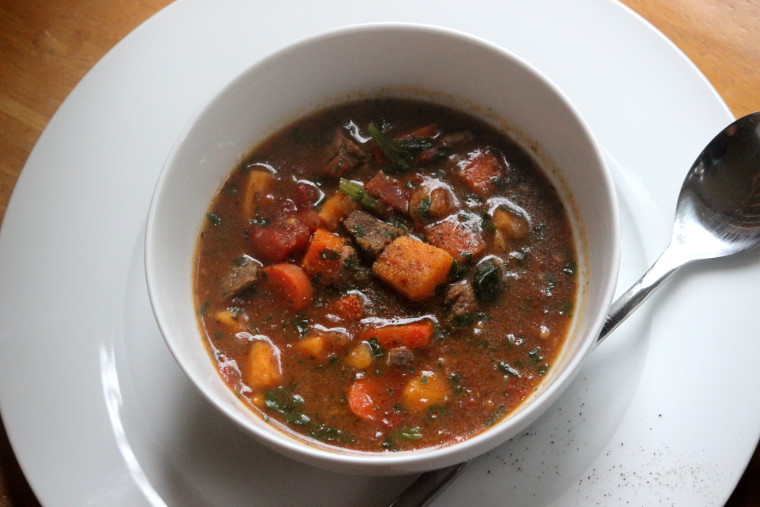
Her tomato sauce recipe was so simple but SO GOOD. It’s basically just using butter in place of the olive oil I’d normally use but it changed the chemical makeup so drastically that I was licking the tomato sauce bowl clean.

I realize most of us think tomato sauce is very basic and you can’t imagine wanting to drink it. But I promise, her recipe is that good.

I used the trick earlier this week when I made spaghetti sauce and I had no problem with heartburn.

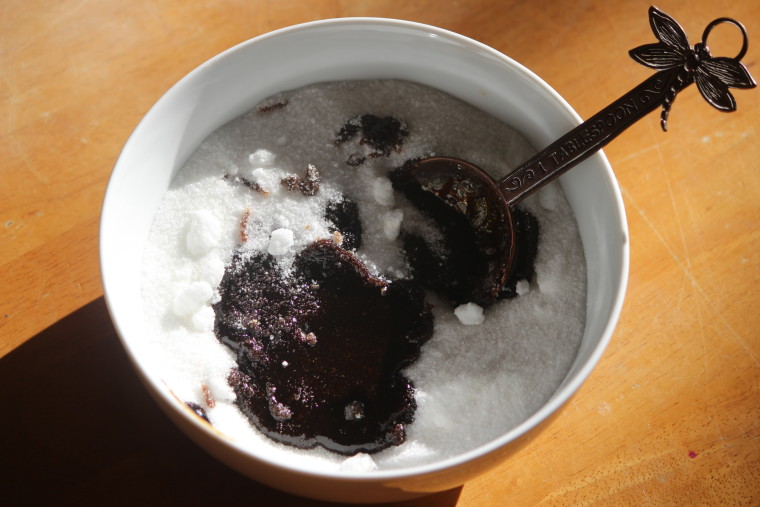
Simply use 2 – 3 TBSP of butter when sauteing onions or garlic before adding in canned tomatoes to make any tomato/spaghetti sauce dish less acidic.

It’s that easy ya’ll. Nothing complicated here in today’s Friday TidBit.

Thank ya’ll for reading my blog and being so encouraging! I hope you are able to find a cool place to be this weekend with temps in triple digits for many people. Thank God for air conditioning!

jessica

01-11-2016

Why you should NEVER attempt a new recipe at Christmas

I hope that you & yours had a sweet celebration of Christmas and New Year’s.

Even though I enjoy the season of Christmas I always find myself gleeful come January, when it’s time to put away all those Christmas trappings. I’m a bit of a minimalist and limit how much decor we put up each December, but it still seems to take over the house. I am secretly thrilled when everything is boxed back up for another 11 months.

JESSICA 130 JESSICA 139

This Christmas & New Year’s season I learned a vital lesson, that I’m really hoping I will remember in future years…

Don’t attempt a recipe for the first time at Christmas {or Thanksgiving or New Year’s}

Why is it, that we put all this pressure on ourselves {or maybe you are smarter than me and don’t do this to yourself!} to have an immaculately decorated house, perfectly selected gifts, and oh yes, amazing meals each time you find yourself at the table between December 24 & 25.

I could go on & on about my food failures over the last 4 weeks.

It all started when my husband came in from hunting the morning of Christmas Eve, took one look at my face and said “Did one of your recipes not work out?”

I lied.
I said, no, it’s all good.

In reality, the yet another failed attempt at gluten free cinnamon buns were already in the trash.
I should just give up trying to make them.
Every year I tell myself This Is The Year.
But really, I don’t think GOOD GF cinnamon buns exist.

IMG_2733 IMG_2438 IMG_2729

Then there were the gluten free pigs n’ a blanket I was planning for Christmas Eve.
I had already talked myself into being okay with barely edible gluten free crescent rolls.
I just needed GF lil’ sausages.
Unfortunately, I didn’t realize until Christmas Eve that only Wal-Mart carries them.
At least I made the wise decision to not go to Wal-Mart the day before Christmas.

JESSICA 183 IMG_2716 JESSICA 194

Then there were the the scalloped potatoes my husband requested for our Christmas lunch.
That couldn’t be too difficult, could it??
Well, when you don’t read the whole recipe until 30 minutes before Christmas lunch, you realize too late it will take an hour and a half to get them on the table.
And at that point, you are simply done. Mashed potatoes will do just fine.

JESSICA 207

But the real cooking failure was…

The Christmas Ham literally tasted like mush.

Serious.
I’m actually not being dramatic at all!

And if I had just read the recipe well beforehand, I would have realized one major hiccup.

The recipe was for an UNCOOKED ham.
Uncooked requires quite a different recipe than a Cooked Ham.
Mostly, that an already cooked ham only needs heated up.
Nope, not thinking here on my part.

So what did I do??? Followed that recipe to the T!

Marinated that COOKED ham for 8 hours in pineapple juice {which breaks down the fibers in UNCOOKED ham} then I preceded to cook the COOKED ham for 2 hours.

Once again, it literally tasted like MUSH!

It was so bad, that my father in law drove back to their house to get their Christmas Eve ham leftovers.

IMG_9091

And yes, I know I may tend a bit towards the dramatic.
No one else cares that they didn’t have homemade cinnamon buns or had to eat mashed potatoes or eat leftover ham. But me, I care.

So next year, I’m going to go the route my friends suggests….
doughnuts {not homemade!!} and coffee for Christmas breakfast and a grocery store catered dinner.

But if you happen to have a cinnamon bun recipe that is GF, I’d love to have it.
Because as much as I’d like to say I won’t ever attempt them again, I’m simply a gluten for punishment.

I hope your cooking adventures fared much better than mine!

Happy New Year’s,

jessica

10-27-2015

Roasted Potato Salad with Balsamic Tarragon Dressing

IMG_2322


This is the perfect side dish for a potluck meal, covered dish gathering, outdoor fall get together. It’s got the best texture and taste…crispy potatoes and bacon, velvety smooth potato interiors, and a sweet twangy dressing to finish it off!

Finding a potato salad that someone allergic to gluten and eggs can eat is not an easy feat. Plus, who doesn’t want a more healthy potato salad than the mayonnaise loaded version we normally settle for.

This potato salad is anything but settling. It is perfect!

Recipe Tips
If you have a convection oven, I recommend using that to ensure both sides are crispy. The easiest trick I’ve found for turning roasting potatoes is to use a fork. Test out one potato first. If it flips easily, without leaving half the crust on the roasting pan, then they are ready to be flipped. If it doesn’t easily turn over, put the potatoes back in the oven for another 5 minutes and try again.
If you use two roasting pans to bake these at the same time, make sure to swap out the baking sheets halfway through cooking time…i.e…your top baking sheet needs to go on the bottom rack halfway through and the bottom baking sheet needs to move to the top so it doesn’t spend all the time in the bottom of the oven which is normally hotter than near the top.

Roasted Potato Salad with Balsamic Tarragon Dressing

  • Potato Ingredients
  • 4 lbs red potatoes
  • 1 TBSP garlic powder
  • 1 TBSP onion powder
  • 2 TBSP paprika
  • 2 tsp dried tarragon
  • 2 tsp sea salt
  • 3 TBSP olive oil
  • Dressing Ingredients
  • 2 1/2 TBSP balsamic vinegar
  • 1 1/2 TBSP olive oil
  • 1 TBSP honey
  • 1 TBSP dijon mustard
  • 1/2 tsp sea salt
  • 1/2 tsp ground pepper
  • 1/4 tsp garlic powder
  • 1/2 tsp chopped fresh tarragon {sub in dried if that is all you have}
  • Final Ingredients
  • 5 pieces of bacon, cooked and finely chopped
  • 1/3 cup finely chopped scallions/green onions

Heat Oven to 450 degrees {Heat to 425 degrees if using convection}

Cut potatoes into roughly 2" chunks.

Place cut potatoes into a zipper topped bag {you may need to use 2 bags and split the ingredients in half}.

Add the spices {garlic powder through the sea salt} and the 3 TBSP olive oil. Shake well to coat the potatoes generously.

Place on a baking sheet {once again, you may need to use 2 baking sheets to get the potatoes roasted at one time}.

Bake in the preheated oven for 30-40 minutes, flipping the potatoes after an initial 20 minutes of baking. {see note above}

Once potatoes are roasted through and have a nice browning on both sides, remove from oven and place in a serving bowl along with the chopped bacon and scallions.

In a separate bowl or glass jar, whisk together the dressing ingredients until well combined.

Right before serving potato salad, pour dressing over the salad and toss well to combine.

IMG_2324


Enjoy!

jessica


10-20-2015

Cooking Tip #2: How to Easily Cut Open a Winter Squash

I’ll never forget the first Thanksgiving meal we hosted at our house. Newly married and ferociously excited to entertain, I encountered a problem of epic proportions.

No, it wasn’t the stress of a turkey taking an hour and a half longer than planned, to cook in that deep fryer vat of oil. And it wasn’t worrying over in-laws and parents spending time together.

No, my biggest worry was how to cut open a rutabaga without losing a thumb or slicing my wrist artery. Winter squash are one of the hardest things to cut open without damaging yourself in the process.

I survived the experience without a trip to the ER and have since perfected the method.

All you need is a crinkle cutter {they can be found for less than $10} and a meat tenderizer mallet.

IMG_2213

It’s so safe, you can actually let your children help.
Which I would never recommend if you are cutting winter squash the old fashioned way.

You’ll basically hammer the mallet on top of the crinkle cutter, so choose a cutter that can withstand a lot of pounding. Mine is from Pampered Chef {remember all those PC parties you attended back in the early 2000’s?} and even with a plastic handle – it has held up well.

Position the cutter on the side/middle of the squash and wedge in as much as you can. Then start whacking the top of the cutter with your meat mallet. The cutter will slowly begin to edge through the squash. 

The more dense the squash, the more pounding that is required. So a spaghetti squash isn’t as hard to cut through as a rutabaga. Once the squash is cut in half, you can more easily peel the squash and then begin cutting {with a real butcher’s knife} into the desired size.

You can even use this method to cut the top off of pumpkins!

IMG_7499

I hope this tip helps save your thumbs this fall & winter season!

jessica


10-17-2015

Cooking Tip #1: How to Make Brown Sugar

Yes, I do realize that yesterday I talked all about how I think white granulated sugar should be called CRACK.
And it should!

But I don’t want to be a hypocrite and pretend I never use granulated sugar. While I prefer coconut sugar and it is colored brown, it doesn’t always sub in well for brown sugar.

Hence, I still use granulated sugar from time to time but after finding that store bought brown sugar quickly becomes dry, I now make my own. You can easily do this with just molasses and granulated sugar!

I try to purchase organic or 100% cane sugar as it is non-GMO. If you purchase sugar that is not 100% cane sugar more than likely it is from GMO sugar beets. Molasses, stored in the fridge, never goes bad…or atleast not for a few years! And, I can use that molasses in these spectacular Ginger Molasses Cookies I make at Christmas time.

Here is some scientific learning for the day…during the normal refinement of sugar, molasses is extracted from the sugar. Then a very small amount is added back to the sugar, resulting in the brown sugar you find in stores.

Making brown sugar is as easy as combing sugar with a varying amount of molasses, dependent upon how dark you want the brown sugar to be. The normal ratio is 1 cup sugar combined with 2 tsp to 1 TBSP of molasses. {I prefer to use 1 TBSP because I love dark brown sugar and the taste of molasses. But only use a few teaspoons if you prefer light brown sugar.}

IMG_2193

In a large mixing bowl, incorporate the molasses into the sugar using a spoon or fork to mash it all together. This may take a few minutes, but eventually, it will look like this. The sugar can be stored in a zipper tight bag for a few months.

IMG_2195

Pretty simple!

jessica


Today is Day 17 of the #write31days challenge I am participating in.

10-16-2015

Replacing White {Crack} Sugar with Coconut Sugar

Despite what this picture makes you think…I actually don’t use a lot of sugar in our house.
IMG_2187

After my mother in law was diagnosed with Stage 4 breast cancer, I took a hard look at my families diet and nutrition. While we definitely had a fairly healthy lifestyle and most often ate homemade well balanced meals, we still consumed a tremendous amount of refined granulated sugar through cookies and desserts I made often.

Even though the mayo clinic states that cancer doesn’t feed on sugar; I still think it depletes our bodies of healthy vitamins and nutrients because our bodies were not created to process refined carbohydrates like sugar. So if your body uses essential vitamins to breakdown sugar then you eventually become deficient in the vital nutrients your body needs to remain healthy.

Plus, I just couldn’t get over the withdrawal symptoms a few friends experienced after they cut sugar completely out of their diet. Hence, why I call white granulated sugar “crack”.

So over the last year I’ve cut down immensely in how often we eat sweets. And now my go to sweeteners are coconut sugar, maple syrup, and honey.

But baking with coconut sugar can be tricky. Especially when you are also gluten free, vegan {just to avoid eggs}, and whatever other allergy I think I have on a given day!!

So here are two dessert recipes containing coconut sugar. Both these desserts are fantastic!
{And just so you know, I have a pretty high bar of what a fantastic dessert tastes like.}

Oh She Glows Toffee Oatmeal Cinnamon Bars
{I make these at least twice a month and have found that 15 minutes in the oven is plenty. If I bake for the full 18-20 minutes, mine burn. Or you could just skip the baking and eat the dough since there are no eggs. But you are forewarned….the dough is extremely addictive and I ate half a batch of dough in one sitting recently! These are also great if you substitute one of the tablespoons of coconut oil with one tablespoon peanut butter.}

IMG_1954

Against All Grain Real Deal Chocolate Chips
{It hasn’t been that long since a friend told me about this recipe and I’ve already found numerous occasions to try it out! I cannot believe there is a chocolate chip cookie out there without granulated sugar that tastes just as good as the Nestle Tollhouse Cookie. These are that good! They are pretty soft but so delish!}

Enjoy!

jessica

10-11-2015

Hungarian Beef Stew

For my friends that do not enjoy chopping vegetables and cooking for a few hours at a time…this is not the recipe for you!

But if your sweet spot is found in front of a stove this recipe was made for you!

IMG_1952

I’ll never forget the first time I had Hungarian Beef Stew years ago. There was a torrential rainstorm outside.  I had no idea what to make for dinner and didn’t want to venture to the store amidst the downpour and yucky weather. But the idea of whittling away a few hours on a lazy Sunday afternoon in my kitchen sounded delightful. For I’ve always found a cathartic release in chopping vegetable after vegetable and in stirring a pot of stew as it slowly simmers unhurriedly .

On this particular afternoon, the icing on top was that I could use pantry staples to make the stew. I didn’t have to put on galoshes and contend with my ever so often broken umbrella. Instead, I opened my cabinet & freezer doors, and was able to pull together everything I needed.

So here’s to my fellow kitchen foodies who find much contentment in making a meal to serve those they love.

Beef & Sweet Potato Stew

We can tomatoes every summer, so I use them for all my soups and stews. It is a great way to take advantage of summer ripeness in the dead of winter. But I understand not everyone ‘puts up’ as those from my childhood called canning. In place of home canned tomatoes, you can use whole peeled plum tomatoes, but you will need to use a kitchen shearing knife to cut the tomatoes up so they aren’t whole in your stew.

  • 1 large sweet potato, peeled and cut into 1/2" to 1" cubes
  • 2 large whole carrots, cut into 1/2" cubes
  • 1 cup chopped yellow or sweet onion
  • 2 large garlic cloves, minced
  • 1 lb beef stew meat, cut into 1/2" to 1" cubes
  • 2 tsp sweet smoked paprika
  • 1/2 tsp cardamon
  • 1/4 tsp coriander
  • 1/4 tsp ground chipotle pepper
  • 1/4 tsp ground chili powder
  • kosher salt & ground black pepper
  • 3 TBSP Gluten Free Flour mix {or even just brown rice flour}
  • 2 cups beef broth
  • 32 ozs canned tomatoes {see note}
  • 3 bay leaves
  • 4-6 slices cooked, chopped bacon
  • 1-2 cups finely chopped spinach

Heat a few teaspoons of olive oil in a dutch oven on medium heat until warm.

Add sweet potatoes and carrots, along with a sprinkling of salt & ground pepper.

Saute for 5 minutes, stirring every minute or so. Then add a dash more olive oil along with the onions and another sprinkling of salt & pepper. Saute the mixture, stirring as needed, for another 7-10 minutes until the onions are translucent.

As the vegetables cook, mix together in a small bowl the stew meat, spices, 1/2 tsp kosher salt, and 1/4 tsp ground pepper. Once meat is seasoned, add in flour and coat all pieces of the meat well.

Add stew meat, along with a bit more olive oil if needed, to the pan and allow to sear for 2-3 minutes. Add garlic and stir well with a wooden spoon.

Add the broth to the pan and using a whisk, scrape the bottom of the pan so all the little bits of brown 'stuff' comes up. This is what impacts huge flavor into your stew.

Once the bottom is sufficiently scraped, add in the canned tomatoes, bay leaves, and bacon.

Bring the stew to simmering {just a few bubbles pop up every minute or so} and allow to simmer for approximately 1-2 hours until the meat is tender.

Stir in the chopped spinach and taste to see if more salt or pepper is needed.

Enjoy!

jessica


{Day 11 of #write31days challenge.}

10-09-2015

PB & Chocolate & Hazelnut Dessert Bars with Sea Salt

It’s Friday and what better way to end the week than dreaming about a yummy gooey dessert that is easy to make and unstoppable to eat!

IMG_1096

I am sad though because I accidentally deleted a lot of the photos I had taken of this dessert {during multiple recipe trials} and I can’t test this recipe out yet again because it’s just THAT good and you can’t stop yourself from eating way more than you should. So the pictures you see are when I tested the recipe out using almonds. They were definitely good but I think the hazelnut version was even better.

The best part of this dessert is how adjustable it is. Don’t have enough chocolate on hand…no problem, just make less. {This recipe feeds a lot… you want the bars to be bite size because they are super decadent & rich!} Or did you decide to just demolish off the remaining chocolate while waiting for everything to freeze and now you have no chocolate for the top??? Don’t despair…just cut into tiny squares and devour. It’ll still be yummy!

Original inspiration for this recipe came from these homemade peanut butter chocolate cups. I was going to make them again but realized just spreading everything out on parchment paper would be way easier. Then I was testing out a different recipe and realized how much I loved coconut mixed with peanut butter. And the rest is history!

IMG_1102

Peanut Butter, Dark Chocolate, and Hazelnut Dessert Bars with Sea Salt

Notes
This recipe is very adaptable. It can easily be halved to make less or you can make the parchment paper a bigger size so that the dessert bars are not so thick. Or if you don’t like coconut flakes, then just leave them out of the peanut butter mixture. I like it for the texture it provides, but it is not essential.
Do not try substituting a silpat liner for the parchment paper. You do not want to have any off flavors from the liner coming out in the dessert.

  • 9 oz bag of Bittersweet Dark Chocolate Morsels
  • 2/3 cup coconut oil
  • 1/2 cup peanut butter
  • 1/4 cup unsweetened shredded coconut flakes
  • 2-3 TBSP maple syrup
  • 1/2 cup roughly chopped hazelnut, almonds, or any other nut you want to try
  • Kosher or Sea Salt (optional)

Cut a piece of parchment paper into roughly a 9x9 size and place on top of a baking sheet.

In a glass pyrex/mixing bowl, place chocolate and coconut oil, and melt in the microwave, stopping every 20 seconds to stir. When just a few pieces of chocolate remain, stop the microwave and stir until completely smooth.

Spread 1/2 of the chocolate mixture out onto the parchment paper; reserving the other half for the top of the dessert bars. Place baking sheet into the freezer for approximately 10 minutes, until hardened.

While waiting for chocolate layer to firm up, take another mixing bowl and mix together the peanut butter, coconut flakes, and maple syrup.

Once the chocolate layer has hardened, remove from freezer and using a plastic spatula, spread the peanut butter mixture on top of the chocolate.

Scatter chopped hazelnut over the peanut butter mixture and then press the nuts down.

Return baking sheet to the freezer for another 10 minutes.

Once peanut butter has hardened, spread the remaining chocolate mixture on top of the peanut butter. Or, you can drizzle the chocolate mixture on top if you don't have as much left as you thought you would.

If desired, sprinkle a tiny bit of sea salt on top of the chocolate.

Return dessert to freezer for another 10 minutes. Once completely hardened, take out of freezer, cut into bite sized squares, and then return back to freezer until ready to eat.

This dessert will melt if left out of freezer for a long time. But normally you are eating it so quickly, it won't matter!

Enjoy!

jessica


{Day 9!!! of the #write31days challenge. I can’t believe I’ve made it over a week of writing every day. YAY!}

09-18-2015

Gluten Free Lemon Blueberry Scones

Lately I’ve been craving carb loaded breakfasts. Belgium Waffles. Buttermilk Pancakes. And now… scones.

I wanted to have a basic recipe that I could use for either blueberries or orange & cranberry scones. We spent last weekend perfecting this scrumptious crumbly delight and will probably be trying them out again this Saturday.

The texture on these are just right.

A tad crumbly with a bit of sugar crunch in each delectable bite.

IMG_1158 IMG_1176 IMG_1202 IMG_1208 IMG_1217


Gluten Free Blueberry Lemon Scones

  • 2 cups ATK Gluten Free Flour Mix {or similar all purpose GF flour mix}
  • 1 1/2 tsp xanthum gum {omit if your flour mix already contains}
  • 1 tsp kosher salt
  • 1 TBSP baking powder
  • zest from 1 lemon
  • 1/3 cup sugar + 1 TBSP for sprinkling
  • 5 TBSP unsalted butter, cubed & very chilled
  • 1 large egg
  • 2/3 cup - 3/4 cup buttermilk {start with 2/3 cup but continue to add until dough pulls together but isn't overly sticky/wet}
  • 2/3 cup blueberries {frozen or fresh}
  • You can sub in 2/3 cup cranberries and zest from 1-2 oranges {depending upon size} in lieu of the lemon & blueberries.

Mix dry ingredients {flour through sugar} together in mixing ball.

Using a fork or pastry blender, 'cut in' the cubed butter into the flour mixture until coarse crumbs, roughly the size of peas, appear.

Add blueberries to mixture and stir gently.

In a small mixing bowl, whisk together the egg, vanilla, & buttermilk.

Make a well in the bottom of your flour mixture and pour in the liquid ingredients.

Gently stir with a wooden spoon until just barely mixed. If a few dry flour spots remain, that is great.

Line a baking sheet with parchment paper or Silpat liner and sprinkle lightly with GF flour mix.

Dump your scone dough onto the floured parchment paper.

Gently press your dough into a circular shape, roughly 1" in height.

Using a knife, cut the dough into 8 triangular pieces. Separate the pieces until a few inches apart and sprinkle sugar on top of each piece.

Place in the fridge for 30 minutes.

Bake in a preheated 400 degree oven for 18-20 minutes, rotating half way through.


*Quick Tip – Placing them in the fridge prior to baking firms up the butter that may have begun to melt. And the extra rest time helps eliminate the grittiness often associated with GF baked goods. However, if you are in a rush – the 30 minutes in fridge isn’t absolutely necessary.

I hope you enjoy these as much as we do!

jessica

06-09-2015

Chocolate Chip, Hazelnut, Toffee Cookies {Gluten Free}

IMG_0409

Before my days were tallied by how many dishes washed or just how long that 5 year old’s tantrum could last, I counted my days down making call after call, tracking minute by minute of phone time.

I was in software sales and we had to spend a lot of time on the telephone. By the time evening rolled around, I just wanted solitude. And for me that meant baking cookies. There is something therapeutic in creaming butter with sugar, pouring in more vanilla than called for, and eating more than one person’s share of raw cookie dough.

My favorite cookies I’ve ever made are Giada’s Chocolate Chip, Hazelnut, & Toffee Cookies.
Hands down, they are the best!

But then…

I found out it was gluten that had caused year’s of abdominal pain and I wasn’t interested in gritty tasting cookies that would spread out over the entire baking sheet. After countless attempts that stretched out over years, I thought I would never again have a cookie just as good as Giada’s recipe.

But fortunately, I kept trying and have finally crafted a gluten free version that is just as delish as the original!
IMG_0473
Tips & Tricks
Gluten free baking can be very tricky when it comes to using butter. Gluten free flours just do not soak up the fat in butter the same way that wheat flour does. For this reason, do not cream the sugars and butter using a stand mixer. Simply whisk together as indicated below.
If the gluten free flour blend you use already contains xanthum gum then you do not need to add the xanthum gum called for in the recipe.
This recipe is very versatile when it comes to the mix-in’s, if you would rather not have toffee or hazelnuts then use 1 cup of just chocolate chips, or try whatever your heart desires. I have used m&m’s in place of the chocolate chips and those turned out great as well.
If you are lucky enough to not have issues with gluten, then you can try substituting normal all purpose wheat flour in place of the gluten free flour blend.

Gluten Free Chocolate Chip, Hazelnut, Toffee Cookies

Yield: 24 Cookies

Ingredients

  • 8 TBSP unsalted butter
  • 1/2 cup granulated sugar
  • 1/2 cup brown sugar
  • 1 large egg
  • 1 TBSP vanilla
  • 1 cup old fashion rolled gluten free oats
  • 1 cup gluten free oat flour (purchase or create your own with a food processor)
  • 1/2 cup all purpose gluten free flour
  • 1/4 tsp xanthum gum
  • 1/2 tsp kosher salt
  • 1/2 tsp baking soda
  • 1 tsp ground cinnamon
  • 1/2 cup semi-sweet chocolate chips
  • 1/4 cup roughly chopped hazelnuts
  • 1/4 cup chopped English toffee candy {such as Heath toffee}

Instructions

  1. Melt butter in microwave using small glass bowl, set aside to cool.
  2. In a medium size bowl combine oats, oat flour, gluten free flour, xanthum gum, salt, baking soda, and cinnamon. Whisk well.
  3. In a large mixing bowl whisk together melted butter, and both sugars. Whisk until very well combined. Whisk in egg and vanilla.
  4. Using a large spatula, stir in flour mixture until well combined and then stir in chocolate chips, hazelnuts, and toffee.
  5. Place a dishcloth or plastic wrap over the bowl and allow to sit at room temperature for 30 minutes.
  6. Preheat oven to 350 degrees.
  7. Place parchment paper or a silpat liner on top of an unrimmed baking sheet. Using a cookie scoop or a spoon, portion out cookies approximately 1 1/2 TBSP size onto baking sheet and then flatten down slightly with your fingers.
  8. Bake for 10 minutes, rotating baking sheet half way through baking time.
  9. Transfer silpat or parchment paper to a wire rack so cookies can cool off and set.

IMG_0398

I hope you enjoy these as much as we did!

jessica