08-25-2014

The last four years…

IMG_5421
I’m staying up late tonight, hoping that with each drawn out breath, time will magically suspend itself. My baby girl goes to ‘real’ school tomorrow. And even though I thought I’d be super excited to have the house to myself, I am now wishing I had just one more day with her & I at home. I’m sad. I’ve already shed a few tears. And, I haven’t even made it to the day of drop-off!

When I went to Target tonight for one last sippy cup & the just right snack holder, it hit me that in the future it will be rare that I will need to use those cumbersome non-turning excessively heavy buggies made for moms like me. You know, the ones that fit two kids in the front and still leave you an entire buggy’s worth of space to add all those non-essential items that certainly seem beyond essential when surrounded by bright lights, red signs, and oh yes…screaming melting down children. One would think I’d be excited that the chances are slim I will need to haul two children with me to a store again. But no, that thought process actually made me tear up!

Whew, I can’t imagine what tomorrow morning’s gonna look like! I’m going back & forth between imagining me sobbing as I walk down the never ending hallway OR perhaps the principal will be dragging me down that hallway. Cause I’m not really sure I’m ready to leave little Miss Stella behind.

But Miss Stella, oh, she’s ready to move on. Every single morning she asks if today is THE DAY she gets to go to school. And tonight her last words before her head hit the pillow were “So tomorrow’s the day, right, Mom? Tomorrow I get to go to school?” I wish I could intonate her tone in that question. It’s so full of FINALLY, MOM, FINALLY I get to go to school with my big brother! I am finally a BIG kid!!

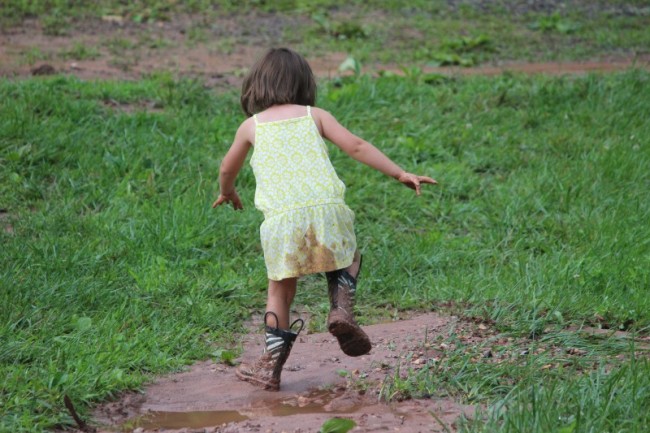
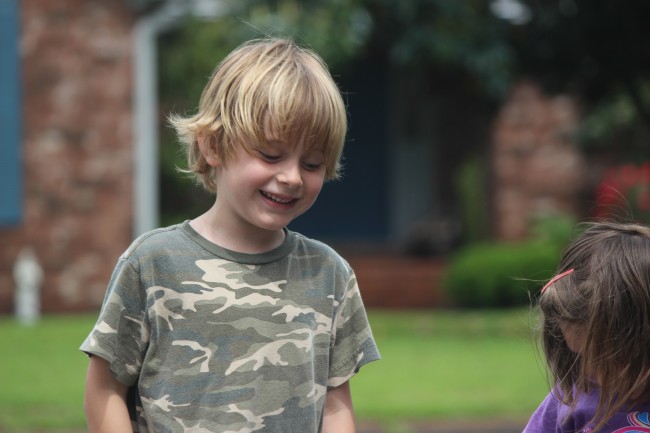
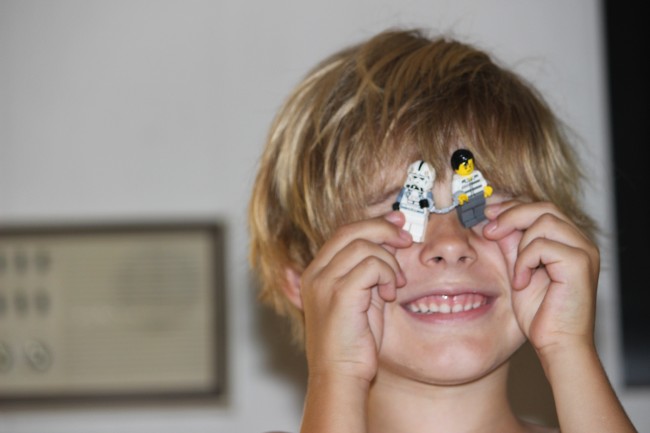
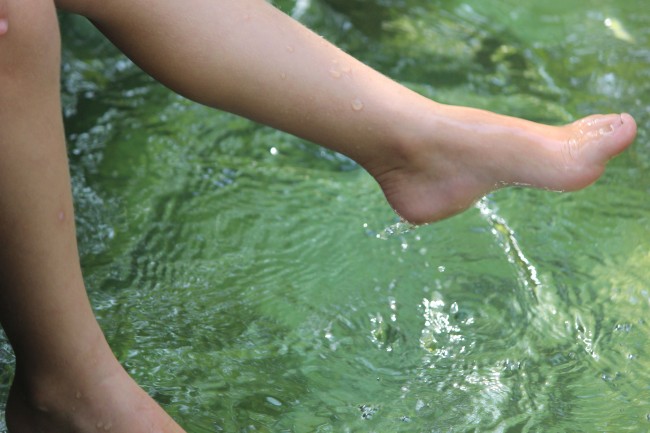
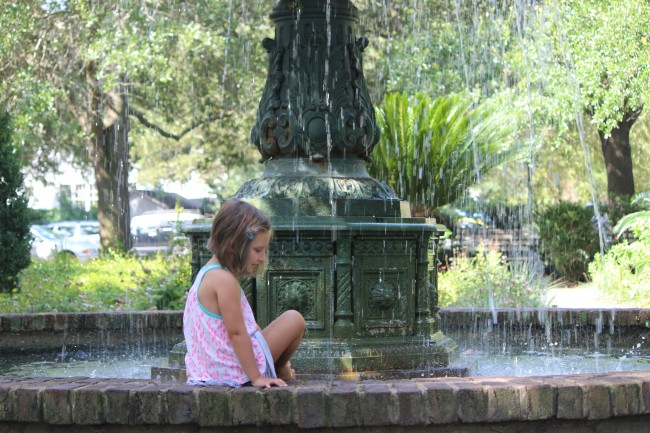
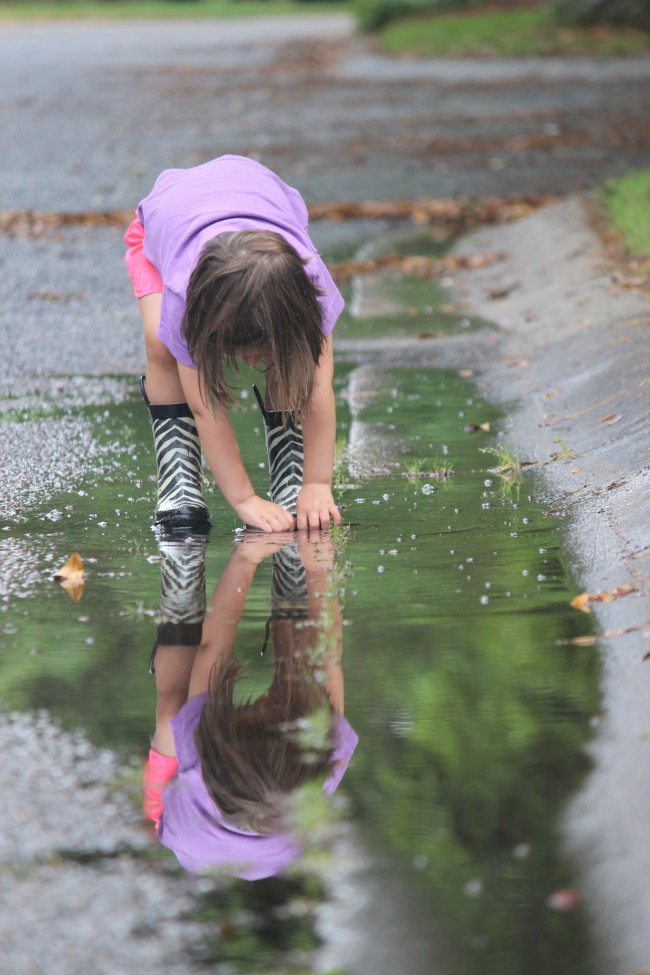
So this summer I tried to treasure every single precious second we spent together. Granted, there were moments I felt my patience wearing thin but overall it was a delightfully slow summer. It was about playing legos, impromptu trips to the beach, racing doll strollers down the hallway, trying to convince Mom that this time the lizard really wouldn’t die if we left him in a sealed up jar in the 100° heat. Hmmm, as of tonight, I am still not convinced that lizards can somehow live in a virtual oven!

IMG_6442 IMG_5905 IMG_6542 IMG_6549 IMG_6864 IMG_6862 IMG_5933

Unfortunately, time does not stop & the clock continues to tick-tock, tock-tick.

I’ll let you know how drop-off goes!

sig


07-08-2014

Brownie Ice Cream Pie

Ever made brownies that were just a tad crumbly or have more cookies on hand than you should could eat? Or, ever purchased way too much ice cream for the 4th because of that buy one get one sale?

IMG_6633

Well here, my friends, is the solution!

This was inspired by a much cleaner, more holistic Dessert Pizza by Angela at Oh She Glows. My version is definitely not clean eating or refined sugar free or any vegan thingamadoey. One day I do hope to try out Angela’s Dessert Pizza but yesterday I needed to use up some brownies and the over indulging ice cream that wouldn’t stop enticing me. It didn’t hurt that it was also Jared’s birthday and I was able to make a birthday dessert for him with ingredients I already had on hand.

IMG_6628

Ingredients
1 batch of already made brownies or chocolate chip cookies
1 pint chocolate ice cream, slightly chilled (not frozen)
1 pint vanilla ice cream, slightly chilled (not frozen)
1 batch Peanut Butter Shell Drizzle (from Oh She Glows)
1 batch Chocolate Ice Cream Shell
coconut oil

Recipe
Using a teaspoon of coconut oil, lightly grease the bottom & sides of a springform pan.

Crumble brownies or cookies onto bottom of springform pan. Using your palms, press the mixture down firmly and spread to sides of pan.

In a glass bowl, stir together the chocolate and vanilla ice creams until swirled together. Pour ice cream mixture onto the top of the brownie crust. Place ice cream pie into freezer and allow to freeze for 10-15 minutes.

Make one batch each of the peanut butter drizzle and chocolate ice cream shell. Place the peanut butter drizzle into a plastic zipper top bag and snip the corner. (This makes for easier drizzling! The chocolate syrup can easily be drizzled with a fork.)

Alternating between the peanut butter and chocolate toppings, drizzle each sweet concoction onto the top of the ice cream pie. Once all the toppings have been used up, place the pie back into freezer for at least 4 hours for everything to set nicely up.

Scrumptious!

resize


Enjoy ~

sig


07-03-2014

Heirloom Cherry Tomato and Mozzarella Skewers with Balsamic Vinegar

Looking for a quick & easy appetizer for the 4th of July? This tasty hor d’oeuvre is so simple to put together that I feel silly even typing up a recipe. But hopefully these tips & tricks will make this dish sublime!

IMG_2587


Ingredients
2 pints heirloom cherry tomatoes (a mix of different hues if possible)
1 lb of fresh mozzarella balls
extra virgin olive oil
balsamic vinegar
kosher or sea salt
fresh ground black pepper
fresh basil leaves (optional)

Recipe Tips & Tricks

Slice cherry tomatoes in half and place in glass bowl along with the mozzarella balls. Drizzle with a tablespoon or two of olive oil and then sprinkle on a generous teaspoon or two of kosher salt & fresh ground black pepper. Allow the ingredients to sit for 5 to 10 minutes.

What you are doing is helping draw the water out of the tomatoes and adding a salty brined flavor. This is what is going to make the dish out of this world! If you don’t salt & pepper the tomatoes for just 5 minutes prior to assembling, they just aren’t going to taste the same.

Using skewers, alternate adding tomatoes & mozzarella as you see fit! Add in whole leaves of basil for a great caprese salad appetizer. Or, you could chiffonade (aka…slice it pretty!) the basil and scatter on top but I think you’ll have more punch by leaving the basil leaves whole.

Next, drizzle olive oil & plenty of balsamic vinegar all over the concoction. Finally, add a generous sprinkling of kosher salt & fresh ground pepper. Make sure to sneak a taste to ensure the flavor is vibrant. If not, guess what…add more salt & pepper and another splash (or two) of balsamic vinegar!

IMG_2589Happy 4th of July!! I hope everyone has a great time celebrating, shooting off fire works, and eating plenty of sweet summertime food!

sig

02-26-2014

A Fresh Design & A New Business

Welcome to a whole new design for this site, a new web address (I lost ‘wordpress’ and added ‘the’), and a NEW BUSINESS!

I am thrilled with the new design and have to sing the praises of Jana from Little Web Writing Hood who was great to work with!

And for my first foray into the entrepreneurial world…I am starting a business where I teach people how to can & preserve food. I greatly enjoy the aspect of taking something that either I’ve grown or is from a local farm and getting to turn that into something that will last me for months. There is nothing like making spaghetti sauce in February with tomatoes that you canned last summer. If you’ve never tried canning before, I promise it is doable.


After years of fielding questions on canning, I’ve decided to offer canning parties where in the comfort of your home you & your friends get a hands on experience of ‘putting up’ food. In a festive environment you will be gaining an essential life skill and you’ll leave with at least 2 jars of canned goods.

Canning is not rocket science, but unless you’ve grown up doing it or watching your mom do it…you probably feel a bit nervous and worried about giving your family botulism! So, I’m here to unwrap the science of it. To help you feel confident that this is something you can do at home on your own. I am going to begin with offerings of “Pickles & Preserves” and “Canning Tomatoes” parties. And if there is a different produce you’d like to put-up, I can show you how do that too. Take a look at my Canning Parties page and if you have questions or would like pricing you can email me at thelocalgoodness@yahoo.com.

I’m excited!!

sig

07-15-2013

Chocolate Icecream Shell

IMG_2281

I have always assumed it would be near impossible to replicate the shell magic you get at your local grocery store. However, when Dale Esau came home from IceCream Sundae Day at school and announced “Mom, we had the coolest MAPLE SYRUP on our icecream…it hardens when you put it on the icecream!” I knew I had to find a way to make this. (And, yes, I knew I had to fess up that it wasn’t maple syrup he’d been eating!)

What I couldn’t believe was how incredibly simple it was to replicate!

Melt chocolate with coconut oil and you have one of the easiest syrups you’ll ever make. The secret is coconut oil solidifies once its temperature drops below 76 degrees F. So you temper the chocolate and oil in the microwave and once the ‘syrup’ touches the icecream it solidifies. And it tastes sinfully delicious, just like the stuff in the grocery store, minus all the artificial and unwanted ingredients!

Chocolate Icecream Shell
2-3 servings

2 Tbsp chocolate chips
1 Tbsp coconut oil

Combine ingredients in small glass bowl and microwave for 20 seconds. Stir and then microwave another 15 seconds. Stir well and then drizzle all over your icecream!

NOTES: This recipe does not double well, so stick with the quantities listed. Luckily, it is very simple to make should you need to eat more icecream! Also, depending upon your microwave, you may need to use less cooking time. You do not want your chocolate chips to be completely melted from the microwave. This is why you stir the final time. It all has to do with tempering the chocolate, etc. etc.

IMG_2284

Enjoy!!!

Jessica

P.S. I’m now attempting a syrup to make chocolate milk. The shell obviously wouldn’t work in milk, but as evidenced below, we had fun experimenting!

IMG_2294

06-04-2013

Strawberry Rhubarb Crumb

IMG_1846 IMG_1863

Hello! I know its been forever since I’ve posted. And again, my reason is time well spent with the kids. They are now 3 & 5 and so entertaining, endearing, and full of life. We went strawberry picking a few weeks ago and this recipe was a result.

The filling’s thick and gooey center has bites of sweetness and tartness and then you bite into the crumb and get the crunch of walnuts and a surprising hint of ginger that lingers softly. Be sure to make this when you are able to feed a crowd. Otherwise, its you & the pie and trust me, you aren’t going to be throwing it out. So for your summer ready beach body, I advise only making this when there are lots of people to consume it!

I suggest using spelt flour as it seems to be a suitable flour for those of us with wheat allergies but not celiac disease. If you need to avoid gluten all together, I would suggest a sorghum based gf flour mix. And if you don’t have stomach issues (lucky you!) then all-purpose flour would work fine here.

IMG_1956 IMG_1925 IMG_1929

Strawberry Rhubarb Crumb

10 servings

Crumb Topping
1 c GF oats
3/4 c white spelt flour
2/3 c white sugar
1/2 c chopped walnuts
6 tbsp chilled unsalted butter, cut into 1/2″ chunks
1 oz square crystalized candied ginger, finely chopped
large pinch of salt

Filling
3 c quartered strawberries
1 lb rhubarb, chopped into 1″ pieces
1/4 cup agave nectar
1/4 cup white sugar
1/4 cup brown sugar
1/4 cup cornstarch
3 tbsp minute tapioca pearls
2 tbsp triple sec
smigen salt
1 tbsp chilled unsalted butter, cut in tiny pieces

Crumb Instructions

Preheat oven to 375 degrees. Lightly butter a 9″ glass pie pan.

Combine flour, sugar and salt in medium bowl. Using fingers to incorporate, add in butter until it is crumbly. Mix in remaining ingredients. Chill in fridge as you prepare filling.

Filling Instructions

In large bowl mix together all filling ingredients except for butter. Toss ingredients well and allow to sit for ten minutes.

Place filling ingredients in buttered pie pan, then dot the top of filling with the tiny cubed pieces of butter. Next, pour chilled crumb topping all over pie filling.

Bake in preheated oven for 45-50 minutes until bubbling and golden brown on top.

NOTES: The butter, both in topping and filling, needs to stay chilled in fridge until added to recipe. Orange juice should be a good non-alcoholic replacement for triple sec. The oven broiler may be needed to reach golden brown all over. Don’t forget to watch broiler closely so it doesn’t burn!

Enjoi with some vanilla icecream!

Jess

p.s…I now have a huge appreciation for food stylist and photographers. Producing a good photo from a crumbling pie with melting icecream is NOT an easy feat!

09-04-2012

Au revoir summer 2012

Today’s the first day of pre-school and our oldest one, Dale Esau, is starting 4K!

And, I’ve learned some VERY shocking news…Next year, we’ll have to be at elementary school by 7:25AM! Are you serious? I guess that means my half sleeping on the couch from 6:30-8:30ishhh is probably not going to be happening so much in 2013. Therefore, I need to really appreciate these lazy morning hours, while I have ’em!

This summer we’ve had our share of lazy morning (okay, okay….all day) hours! We’ve been busy enjoying all the things summer brings… like popsicles, icecream, kettle corn at the farmer’s market, jaunts to the beach and pool, and playing tourists in our town.

So I wanted to share some photos with ya’ll of what we’ve been up to. I know I’ve posted extremely little and I’ve missed it. But there was just so much fun to be had with the computer turned off, that sometimes it was too hard to turn the computer on. This business of summer is winding down with our re-entrance into school and schedules, so here’s to hoping I’ll be blogging more often.

Sharing…is there anything more precious between siblings?

Road trip enthusiasm!

Inspecting dirt for worms, seriously…what we spent every single day doing this summer!

Catching fish together…the crazy outfit on DE is a make-shift trash bag poncho!

I’ve pickled probably 16 pints of okra so far and am hoping to put some more up this week. I LOVE pickled okra!

Berry Licious Lime Yogurt Popsicles

For the first time ever, I was able to can tomatoes from our garden!

Dale Esau planted these, unbeknownst to me, when I was working on another part of the garden. It was a pretty cool surprise to see them sprout and flourish. Since he planted them, they were his favorite veggie to eat all summer!

Chocolate Toffee Cupcakes for my birthday!!!

I cannot wait!!! to share with ya’ll this granola bar recipe. It is so delish, so addictive, and so gluten free!!!

Is there anything else that says summer better?

I hope you & yours had a fantastic summer!!! Here’s to being thankful for football season, falling leaves, pumpkins, and relishing this last year of sleepy mornings on the couch!

Love,

Jess

07-09-2012

Tomato, Caramelized Onions, and Gorgonzola Pie

Happy (late!) 4th of July!! I hope everyone had a wonderful holiday and indulged in lots of food, laughter, and relaxation. Fisherman was on vacation and we had a wonderful Staycation. I feel like it was Christmas in July considering the copious amounts of food I ate over the last week.

So what have I been eating??? I’m so glad you asked! Fresh mahi mahi, roasted corn salad, pasta salad, BBQ, hmmmm….there isn’t a lot I haven’t consumed this past week. But my favorite dish was a Tomato Gorgonzola Pie that I adapted from a Gourmet Magazine Cookbook.

I probably shouldn’t admit this, since I am so proud to be Southern, but up until I made this tomato pie, I had never eaten one in my life. Crazy, isn’t it! And there’s no holding me back now.

The best part was that it took me no more than 45 minutes, start to finish. That includes the lets find where I hid the gorogonzola in the fridge and let me go pick some tomatoes and get side tracked into watering the garden. Sorry, this may be a long blog post….its just been a while since I’ve posted and I have all these thoughts I want to share with ya’ll, but I get distracted with kids and life and blah blah, okay back to the pie…

~~~

So to start, you’ll need a pie crust, Gorgonzola cheese, onions, and tomatoes….pretty simple, right!

After placing crust into your pie pan, place pie weights…or dry beans…onto the pie with aluminum foil to keep the middle of the pie from rising while you pre-bake the crust. You need to bake the crust beforehand since you only put it under a broiler once the ingredients are added.

Add some olive oil and your onions into a heavy pan and start the caramelizing process. I just LOOOVE caramelized onions! Even Fisherman loves & appreciates them and he isn’t the biggest foodie on the block.

Also, don’t be afraid to try caramelizing red onions. I did half white & half red the second time I made this and they tasted great. (And yes, I did make & eat this pie TWICE in the past week! Shows you how good it is!)

Good advice for caramelizing onions is to turn your back to them. Find something else to do, you don’t need to stir constantly, just every few minutes.

Now see all those brown bits of good onion residue? Scrape those bad boys up and stir in with the onions. They have all sorts of good flavor! And yep, this picture was from Pie #1 when I only used white onions.

Your piecrust should now be finished baking, so place caramelized onions in first…

…then your cheese, tomato, cheese layers…

…broil for a few minutes until cheese slightly browns, garnish with fresh basil and…

…Voila…Eat that pie up!!!

I hope you like as much as I did!!!

Jessica

Tomato, Caramelized Onions, and Gorgonzola Pie

Ingredients
1 9″ prepared pie crust
2 large onions (yellow or red), very thinly sliced
1 cup crumbled Gorgonzola cheese
5 medium sized ripe tomatoes, thinly sliced
Handful of fresh basil for garnishing

Preheat oven to 375 degrees.  Place pie crust into a glass pie pan. Line pie pan with aluminum foil and fill with pie weights/dried beans/or raw rice. Bake approximately 20 minutes until pasty is pale golden brown around rim. Remove weights and bake another 8 minutes until golden brown all over. If edge of crust looks to dark, place tin foil around the edges for remaining bake time.

While crust is baking, heat a few tablespoons of olive oil in a heavy skillet over medium heat and cook onions for approximately 20-25 minutes until they are caramelized in color. Sprinkle the onions with kosher salt a few times while cooking and stir every few minutes. As the onions begin to soften and brown, there will be residue at the bottom of the pan; stir these brown goodie bits into the onions.

Preheat oven broiler.

Spread caramelized onions over bottom of pie shell and top with 3/4 cup of the cheese. Arrange tomatoes, slightly overlapping, in circles over the cheese. Sprinkle tomatoes with kosher salt and fresh ground black pepper. Sprinkle remaining 1/4 cup of cheese over the tomatoes and drizzle a tablespoon of olive oil over the top.

Broil the pie until the cheese slightly browns, approximately 3 to 4 minutes. Garnish with fresh basil if desired.

06-09-2012

Blackberry and Blueberry Crumble Pie

I just have to say…I LOVE berry crumbles! They have to be one of the easiest desserts to make…Whip together a few ingredients, and voila! Today I used fresh from the farm berries but even in winter, crumbles taste great with frozen berries.

To try something different though, I added a pie crust which soaked up some of the juices and was still flaky and delightful.  And the ginger in this recipe adds a spicy kick for a little something more.  Hmmm…life is good!

Recipe Cost
Since most of the ingredients are on stock in my pantry, I only added the price of berries and a pie crust to come up with a total of $8 for this amazingly delish dessert. To buy a dessert this yummy at your local bakery, you’d spend close to $20. Quite the savings to make at home!

Ingredients
For the Pie Crust:
Knock yourself out making one from Grandma’s scratch recipe, or do as I do and buy refrigerated dough. One of these days, I’m going to figure out how to make a crust but for the moment, I am pretty intimidated on that front and blame it on my baking roller.  If you are just as intimidated with the daunting task of dough rolling, make sure to buy refrigerated not frozen pie crusts. Frozen pie crusts in those tin pans produce mushy crust; whereas a refrigerated one placed in your glass pie plate will produce a flaky and delectable crust.

For the Filling:
4 cups fresh blackberries and/or blueberries
1/2 cup sugar
1/4 cup flour
2 teaspoons lemon juice (~1/2 of a lemon)
1/2 Tbsp fresh minced ginger or 1 1/2 tsp grated ginger
1 Tbsp finely chopped fresh mint

For the Crumble:
1 cup flour
3/4 cup old fashioned oats
1/4 cup coarsely chopped hard nuts (almonds, walnuts, hazelnut, etc.)
1/4 cup granulated sugar
1/4 cup brown sugar
4 ounces butter, at room temperature
dash of kosher salt

For the crust ~ Preheat the oven to 350 degrees. Place pie crust in a glass pie plate and add dry beans to the top for a weight. Blind bake the pie crust for 10 minutes. Remove from the oven, remove beans or dry weights and allow to cool.

Don’t do like me and forget to add the weights/dry beans…the middle will puff up and the sides collapse into the middle!

For the filling ~ In a large, non-reactive bowl, stir together the sugar, flour, lemon juice, ginger, and mint. Next, gently mix in the berries and allow to sit for at least 10 minutes.

Pour into crust once crumble topping is made.

The berries took on a shiny sheen all by themselves. No matter the lighting, the photo looked like steam was rising.

For the crumble ~ In a mixing bowl, stir together the dry ingredients and then whisk in the butter.

You can also use a fork or your fingers. Basically, as the name implies, you just want the mixture to be crumbly looking. Place crumble mixture on top of berries in pie dish.

Bake in preheated oven for approximately 40 minutes, until golden brown.

ENJOY!!!

XoXo, Jess

Printable Recipe

Ingredients
For the Pie Crust:
9″ refrigerated pie crust

For the Filling:
4 cups fresh blackberries and/or blueberries
1/2 cup sugar
1/4 cup flour
2 teaspoons lemon juice (~1/2 of a lemon)
1/2 Tbsp fresh minced ginger or 1 1/2 tsp grated ginger
1 Tbsp finely chopped fresh mint

For the Crumble:
1 cup flour
3/4 cup old fashioned oats
1/4 cup coarsely chopped hard nuts (almonds, walnuts, hazelnut, etc.)
1/4 cup granulated sugar
1/4 cup brown sugar
4 ounces butter, at room temperature
dash of kosher salt

For the crust ~ Preheat the oven to 350 degrees. Place pie crust in a glass pie plate and add dry beans to
the top for a weight. Blind bake the pie crust for 10 minutes. Remove from the oven, remove beans or dry
weights and allow to cool.

For the filling ~ In a large, non-reactive bowl, gently mix together the sugar, flour, lemon juice, ginger,
and mint. Gently mix in the berries and allow to sit for at least 10 minutes. Pour into crust once crumble
topping is made.

For the crumble ~ In a mixing bowl, stir together the dry ingredients and then whisk in the butter. Y ou
can also use a fork or your fingers. Basically , as the name implies, you just want the mixture to be crumbly
looking. Place crumble mixture on top of berries in pie dish.

Bake in preheated oven for approximately 40 minutes, until golden brown.