02-07-2014

Food Lion Frugal Cook-Off

originAL


UPDATE: I just found out that the cook-off is not open to the public due to space of the venue. So please just cheer me on virtually instead!

For the last month I have felt my world spinning faster than I would like and while I yearn for less matter to fill my brain, I realize that sometimes there are simply busy seasons in our lives.

Between a bathroom remodeling project that we are DIYing, launching a small business (yay! more details coming soon), and redesigning this blog (yay, again!) I feel that my somewhat orderly life is stretching me to the max. Life is a bit chaotic in its design but I try to keep things simple and focus on domestic and mom duties as my priorities. So these extra-curricular projects are throwing me for a loop.

What’s really kept me grounded though has been waking up around 5ish to have quiet time with Christ. I treasure those minutes, that hour, before my children wake. Time to have a mug of hot tea, envelope myself in scripture, and journal my prayers to Him. My time with Him renews me, encourages me, and reminds me to seek His guidance throughout the day.

So what’s a girl to do when a friend & fellow blogger sends her an email about a food cook-off? And not just any food cook-off but a FRUGAL food cook-off! She excitedly requests to be included! And then she prays about it. And then she feels bad that she didn’t seek God’s guidance first to see if she should be signing up. And then she realizes that, in all things, God can bring goodness…bring Him glory. So she tries to remind herself that God gave her passions and enthusiasms in life for a reason. It’s a really nice gift when you’re given the opportunity to do something you love…so perhaps she should just cherish this fun & exciting event!

So to the point of this post….

I am thrilled to be one of the contestants in Charleston’s Food Lion Frugal Cook-Off on 19 February. As any close friend of mine knows, I love food more than almost anything. Really. I have to work really hard on having conversations that do not revolve around food. And, I LOVE TO SAVE $. My favorite conversations sans food include me saying…”guess how much I just saved!” So this cook-off should be really neat. And challenging. And scary. I mean, do I really know how to cook good food without an arsenal of spices at the ready? What do I do if they hand me a pork tenderloin? (I don’t know that I’ve ever made a tender tenderloin…ever…not once!)

Oh, and did I mention that just by participating I will get a $100 gift certificate to share with one of you! And if I win, then the gift certificate becomes $250!

I’ll be back in touch after the event to let you know how it goes!

Jess

sig

11-14-2011

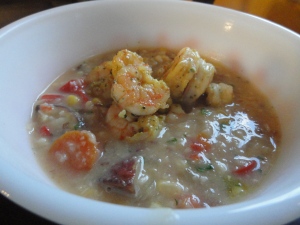
Shrimp Chowder

I have an admission I need to make….I can sometimes be a perfectionist…and I am always a procrastinator…so sometimes I have these ideas in my head of how I want my blog pages to be perfect but that takes time and then I get overwhelmed and decide to just ‘work on it tomorrow’ and then finally it’s two weeks later and I’ve barely updated any of the pages. So, its going to take me a while to get the pages and my blog to look like the picture in my head. But I’ve realized, that doesn’t mean I can’t keep posting. So… I’m going to try to add content to the pages each week or so and will try to write a new post each Sunday – Thursday evening. I hope you enjoy these recipes and thoughts in my head.

This next recipe…Shrimp Chowder is so yummy.

Don't I look divine?

The best part is that there is no milk  – none – and is still really creamy!  (The secret is in pureeing the starchy ingredients!)

NOTE: This recipe does require a bit of chopping veggies. If time allows, I suggest chopping earlier in the day so you don’t feel rushed when making this for dinner. I promise though, it is worth all the chopping!

Ingredients

1 lb local shrimp
1/2 to 1 cup chopped yellow onion
1 cup thinly sliced or chopped carrots
1 cup chopped red bell pepper
4 cloves garlic, chopped
3 cups frozen corn
2 lbs baby red potatoes
3 cups chicken stock, click here for a homemade stock recipe
2 tbsp chopped fresh cilantro
kosher salt
ground black pepper
crushed red pepper or ground cayenne pepper

Recipe 

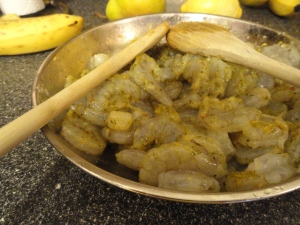
Preheat oven to 425 degrees. Peel shrimp and devein. Rinse and then dry off with paper towels. Place in small bowl and drizzle with olive oil and sprinkle with salt and pepper. If desired, add some dried spices to them…I used a french herb mix I had on hand. Place shrimp in fridge.

Fresh from the Charleston Harbor

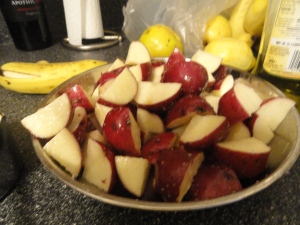
Place chopped potatoes in a small bowl and generously drizzle with both olive oil and kosher salt.

Roast potatoes in preheated oven for 25-40 minutes. While potatoes roast, use a food processor to puree 2 cups of corn with 1 cup chicken broth. Set this aside for later.

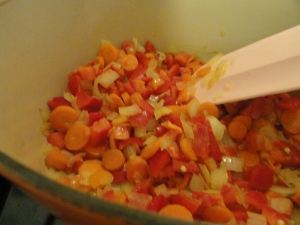
Next, heat 1-2 tsp of olive oil over medium heat and saute onion and carrots for 10 minutes, stirring often. Add bell pepper, sprinkle kosher salt over mixture and stir.

Let the mixture cook for a while so everything is very tender.

Cook another 5 more minutes and then stir in minced garlic to the mixture. Saute for 1 more minute, then stir in corn puree, remaining 1 cup of corn kernels, and 1 cup chicken stock. Turn the heat down to low.

At this point your potatoes are probably finished roasting…Here is what mine looked like…

Crunchy on the outside and soft on the inside

So now place 1/2 of those potatoes into a food processor and puree with the remaining 1 cup of chicken stock.

The puree will be very thick!

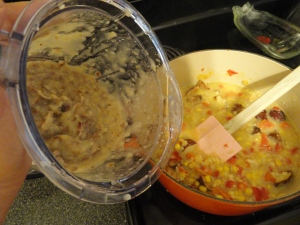
Pour the puree into the soup with the remaining roasted potatoes. (If desired, cut the remaining roasted potatoes into smaller bite size pieces with kitchen shears.) Add the chopped cilantro and season generously with kosher salt and fresh ground pepper. Allow to simmer on low heat. If your chowder is too thick, add water or chicken stock to reach desired consistency.

What the chowder will look like before the shrimp is added.

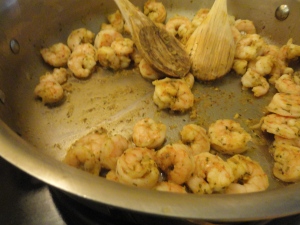
With the chowder slightly simmering, place a saute pan over medium heat and add approximately 2 tsp olive oil. Cook the shrimp in this pan until just cooked through – a few minutes on each side. The shrimp will end up cooking a bit more in the chowder so you don’t want them to get overdone in the saute pan.

Once the shrimp are cooked, transfer to the chowder and allow to simmer on low heat for 5 minutes. Taste soup again and season with salt and pepper as necessary.

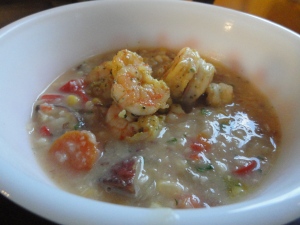
Now it’s time to serve it up and enjoy!

I need to learn a new word for "Enjoy"!

I sprinkled cayenne pepper on mine as I love a kick. I hope you enjoy this dish as much as I do!

Jessica

PS…for budget calculations…this recipe comes out to $15-$20 to make and that includes shrimp at $7/lb. You should get 6 to 8 servings out of this recipe.

10-26-2011

The cost of a chicken

Last week at my local grocer I stood before the freezer door contemplating the cost of a whole chicken. It’s $1.69/lb at Harris Teeter but here it was approximately $4/lb. Wow! But I knew that if I got the chicken from HT I wouldn’t be able to eat it because I can’t stomach the thought of the conditions those chicken were raised in. Plus, I think ‘real’ farm raised chicken has more flavor and simply tastes better.

So I decided to buy that $4/lb chicken determined to make the most out of every ounce.

That brings me to share my love of quality chicken stock. Stock is so versatile. You can use it in homemade soups, rice, grits, sauces….just about anywhere. But, quality stock comes at a price. At the average grocery store it’s about $3.39 for 32 ozs. At the local grocer I frequent, there homemade chicken stock is $4.50 for 32 ozs. That may not be bad if I only used stock once in a while but I use way more than that. So below are my math calculations of how buying local can be done on a budget.

$13.62 – cost of local whole chicken compared to $6.50 of inferior whole chicken

What I got from it:

I was able to get 8 servings of meat from this chicken. We used in enchiladas and roasted chicken with veggies and mashed potatoes.

128 ounces of chicken stock. This equates to $18 of stock from the local grocer.

So I believe, I more than made up for the higher cost of the chicken!

My recipe for making chicken stock:

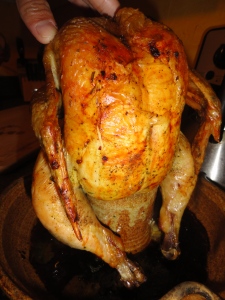
I personally like to roast my chicken first as I think it makes the meat more moist and its a lot easier to pull chicken off the bone than to ‘rummage’ through the stock for it. We have a beer can chicken pottery dish that allows you to fill the middle container with, you guessed it….beer, or any other juice/liquid you prefer. You roast this for approximately 75 minutes at 375 degrees. Once roasted, it should look like this…

Roasted Beer Can Chicken

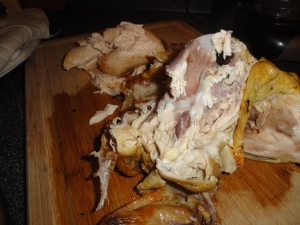
You’ll next want to pull all the chicken off the bones and chop up, as needed, for other recipes.

Now place all the bones and skin from the chicken carcass into a stockpot.  NOTE: You WILL NOT put the chicken into the stock.

And yes, you have to get your hands dirty! But I promise after the first time you do this, you’ll be ashamed of how much chicken you’ve wasted in the past! Or at least I was! I remember buying rotisserie chicken from the grocery store and only pulling meat from the breasts and then chucking everything else. Not smart!

Pull all the meat off the chicken

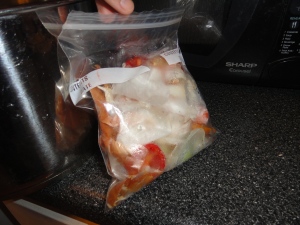
Next, you’ll want to add some veggies to impart extra depth.  You can either add in chopped up onions, garlic, carrots, mushrooms, etc. Or you can use leftover veggies scraps from your week of cooking. I save the peels and ends of veggies and store in the freezer in a Ziploc bag. Then, all I have to do is take out of the freezer and place into the stock pot. 

Vegetable peels and such stashed in the freezer

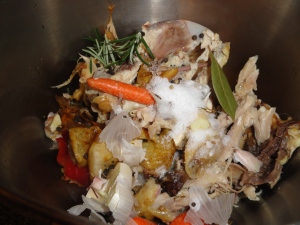
All these veggies will provide really great flavor

Next, add in whole peppercorns (ground pepper works too), a dash of salt, two or three bay leaves, and sprigs of fresh herbs (here I included rosemary).

The salt in this recipe is completely optional

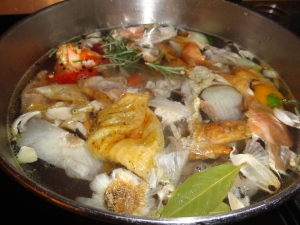
Fill the stock pot with water, leaving about three inches of space at the top. You can use a strainer to put the bones and veggies in but I’ve found this leaves less room for water, therefore, less stock in the end. On medium heat, bring to a slow simmer and reduce heat as necessary to keep this at a slow simmer. I’m constantly adjusting the temp so it will simmer and not boil. Maybe you’ll be better at this than me! Allow to simmer for approximately 1 to 3 hours – depending upon how much time you have. This is a good recipe for when you have nothing else going on and will be at home for a while.

Once complete, strain off the liquid from the solids and then allow the stock to cool down. Once cool, place in the refrigerator overnight.

Leave just about this much room at the top

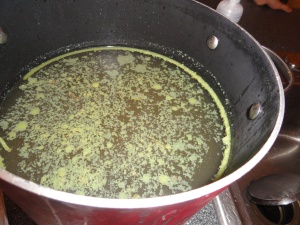
Here’s a picture of my chicken stock the next morning. The fat will rise to the top and you’ll want to skim that off.

Voila....chicken stock the next morning

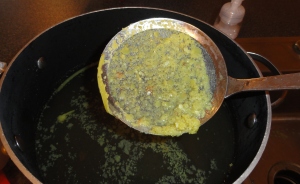
Mesh strainer used to remove fat solids

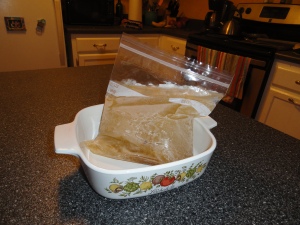
Now you are ready to put into containers and freeze! I use either quart size Ziploc bags or plastic containers, that can be frozen. I place anywhere from two to four cups in a container. Once you’ve gotten them labeled with the amount and the date, place in the freezer. The stock will store for 3 months in the freezer.

So the next time you need stock for homemade chicken noodle soup, it’s as easy as opening up the freezer door!

Frozen Chicken Stock

Also, don’t be afraid to start small in this recipe! Local chicken, in my opinion, is best but that doesn’t mean I’ve never used a rotisserie chicken from the grocery store for this recipe. You can use the bones the same way you would here. I would recommend though not using the skin as it will probably have lots of sodium from the seasoning they use on the chicken.

So make some stock and send me a picture!

10-19-2011

Last Farmer’s Market of the Year

Yesterday marked a sad day in the life of my kiddos and I….the last Farmer’s Market of the Year…and most importantly our access to fresh kettle popcorn! The kids & I LOVE going to the farmer’s market on Tuesday’s with the top priority of that sweet and salty goodness. So yesterday we of course ate as much popcorn as our bellies could hold and then managed to get some great greens and fruit to use in dishes this week.

When going to a Farmer’s Market I think it very important to have a limit on how much you will spend there. With all the great looking produce you can easily walk away with a ton of produce and a ding in your wallet. Which isn’t bad if you plan on preserving some of the produce. But if not, then it is important to have a limit and stick to it! Here is where my $20 went to and how I plan to use these ingredients.

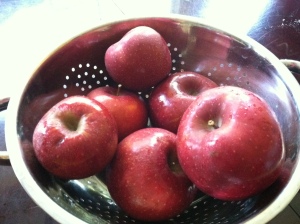
NC Apples

8 apples from a NC orchard

  • Apple Crumb Pie (Will include link when I can find this recipe)
  • Snacking
  • Collard Greens (Click here to view the recipe I use. I add 1 apple, chopped, at the same time as the garlic.)

Farmer's Market Goodies

6 pickling cucumbers

  • Snacking
  • Pasta Salad

2 heads of Boston lettuce

  • Salads

1 bunch of swiss chard

  • Salad
  • Collard Greens (Click here to view the recipe I use. I add 1 to 2 cups chopped swiss chard with the collard greens.)

2 red bell peppers

  • Collard Greens (Click here to view the recipe I use.)
  • Pasta Salad
  • Shrimp Quesadillas (Click here to view the recipe I use. I substitute 1/2 cup chopped bell pepper in place of jalapeno.)

And of course, our $3 bag of kettle popcorn!

Let me know what you are finding at your area Farmer’s Market (or perhaps in your very own garden)!

PS…The Mt. Pleasant Farmer’s Market has ended but the downtown Charleston Farmer’s Market on Saturday mornings will run into December. If you haven’t been, check it out and take your kids. It’s a lot of fun!