10-28-2011

A great weekend activity…make caramel apples with your kids

Need an easy activity to do this weekend with your pre-schooler while your toddler naps? Need something to take to that Halloween party (or two)? Want to share some sweet goodies with your friends? Then search no further…

Gooey Ooeey Yummness….That is how I’d describe a caramel apple. It’s simply delicious! And perfect for fall when apples are in abundance and Halloween is just a few days away. Yesterday, my little helper (aka my 3 year old son) and I made a batch of caramel apples and delivered them to his little buddies for them to enjoy. I am sure their parents were thrilled with the extra sugar showing up on their doorstep during Halloween season!

I’ve heard that making caramel is not as hard as you think but I just did not have the patience for that so we used bagged caramel. I know, I know…hardly local or homemade. But my apples were from a GA orchard – so that counts, right?

TIPS:

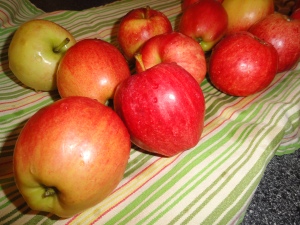
To begin with, you’ll want to find the smallest apples you can. The apples I started with seemed too small to me but as it turns out, so glad I used those. After making 12 or so of the small ones I still had enough caramel to coat 2 more apples and all I had remaining were pretty large. The popsicle sticks were not sturdy enough to hold the apples and it was a lot harder to twirl them to get the caramel just right. I used an heirloom variety (can’t remember the name) but I think anything with a little tartness and firmness will taste great with the creamy sweetness of the caramel.

The smaller the apples, the better

After washing apples you should scrub them to help the caramel stick. This is very important if there is wax on the apples. If using a local variety they probably do not have wax on them but it still helps by producing a bit of grain on the apples. One website actually suggested rubbing them with sandpaper! I had no clean sandpaper but if you do, try it out and let me know what you think!

For the sticks I used Popsicle sticks I found at Michael’s. I found it was easiest to ‘skewer’ the apple with a chopstick and then I had my little helper put the Popsicle sticks in them. It was still hard for a little one but he enjoyed trying! Also, a good job for your kiddos is to remove the plastic wrapping from the caramels. I was actually surprised my son only sampled one caramel while doing this. He has more self-control than I do!

And most importantly, be patient with yourself!!! It may take a few tries to figure out how to coat the apples and keep the caramel on there or how to get any nuts on them. On my first try I took the pot off the stove to coat the apples but the sauce cooled down way too quickly so after the first two apples, the caramel was too thick to coat properly. Thus, I recommend keeping the sauce on low heat.

Recipe:

(If you want to double this recipe, I suggest making in separate batches so the caramel sauce doesn’t get too thick while waiting for you to coat all those apples.)

6 small apples from a local or regional orchard

1 bags of caramel candies

4 tbsp water

popsicle sticks and chopsticks

1/2 cup of toppings: pecans, m&ms, crushed oreos, etc. (optional)

Parchment or wax paper

Lightly butter parchment or wax paper and place atop a long serving tray or cookie sheet. Rinse apples and scrub with a vegetable brush (or sandpaper)! Remove stems and then skewer with Popsicle sticks. Place apples on top of paper and place tray into refrigerator.

If using pecans, roughly chop and set aside.

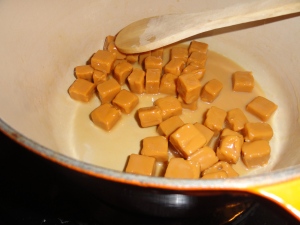
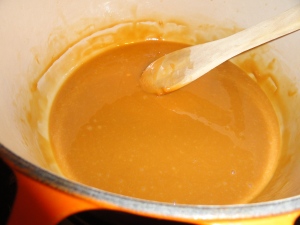
Remove plastic wrappers from caramel candies and place in a large dutch oven with 4 tbsp water. Melt on medium low heat, stirring very frequently.

Stirring the caramel is a good job for your little one

Forget the apples...I'll just use a spoon and pretend you are soup!

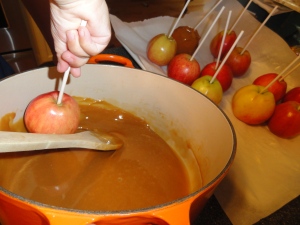
Once the caramels are completely melted, reduce the heat to low and begin coating the apples. I found it worked best to tilt the pan so all caramel was at the bottom and then coat the apple by turning a few times with it submerged in caramel sauce. After taking the apple out of the sauce I twirled the stick in different directions so that it held. Next, I would hold straight up (like you were going to eat it) and then after a few seconds turn over so the caramel will hold in the opposite direction. Don’t be afraid to drizzle some caramel onto the top and bottom center areas with a spoon if having a difficult time getting the caramel to stick in those areas. 

Swirl and Twirl...This is the trick

Once coated and somewhat stable you will coat with nuts or other toppings. I placed my nuts in a medium sized Pyrex bowl and rotated the apples around until all covered. Make sure you do this as soon as you finish each apple. If you wait until all the apples are completed the caramel will be too firm for the nuts to stick onto.

If able to resist eating immediately, place completed apples back on tray and refrigerate for 5 to 10 minutes. This allows the caramel to ‘set’ a little more.

Now go ahead and enjoy!

Even if they don't look like the State Fair's, they are still really tasty!

YUMMMM

If you want to wrap these goodies up, simply place on a small square of parchment/wax paper and press the paper onto the apple. Place in a treat bag and wrap with a cute ribbon. Now you are all set to make someone’s day!

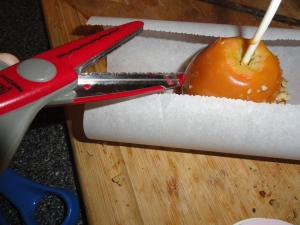
Cut the parchment paper with craft scissors for a cute touch!

Ready for Delivery

Happy Halloween!

10-26-2011

The cost of a chicken

Last week at my local grocer I stood before the freezer door contemplating the cost of a whole chicken. It’s $1.69/lb at Harris Teeter but here it was approximately $4/lb. Wow! But I knew that if I got the chicken from HT I wouldn’t be able to eat it because I can’t stomach the thought of the conditions those chicken were raised in. Plus, I think ‘real’ farm raised chicken has more flavor and simply tastes better.

So I decided to buy that $4/lb chicken determined to make the most out of every ounce.

That brings me to share my love of quality chicken stock. Stock is so versatile. You can use it in homemade soups, rice, grits, sauces….just about anywhere. But, quality stock comes at a price. At the average grocery store it’s about $3.39 for 32 ozs. At the local grocer I frequent, there homemade chicken stock is $4.50 for 32 ozs. That may not be bad if I only used stock once in a while but I use way more than that. So below are my math calculations of how buying local can be done on a budget.

$13.62 – cost of local whole chicken compared to $6.50 of inferior whole chicken

What I got from it:

I was able to get 8 servings of meat from this chicken. We used in enchiladas and roasted chicken with veggies and mashed potatoes.

128 ounces of chicken stock. This equates to $18 of stock from the local grocer.

So I believe, I more than made up for the higher cost of the chicken!

My recipe for making chicken stock:

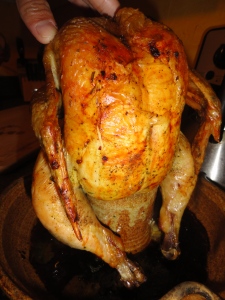
I personally like to roast my chicken first as I think it makes the meat more moist and its a lot easier to pull chicken off the bone than to ‘rummage’ through the stock for it. We have a beer can chicken pottery dish that allows you to fill the middle container with, you guessed it….beer, or any other juice/liquid you prefer. You roast this for approximately 75 minutes at 375 degrees. Once roasted, it should look like this…

Roasted Beer Can Chicken

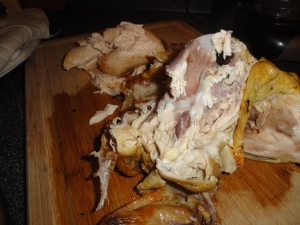
You’ll next want to pull all the chicken off the bones and chop up, as needed, for other recipes.

Now place all the bones and skin from the chicken carcass into a stockpot.  NOTE: You WILL NOT put the chicken into the stock.

And yes, you have to get your hands dirty! But I promise after the first time you do this, you’ll be ashamed of how much chicken you’ve wasted in the past! Or at least I was! I remember buying rotisserie chicken from the grocery store and only pulling meat from the breasts and then chucking everything else. Not smart!

Pull all the meat off the chicken

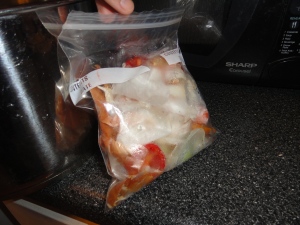
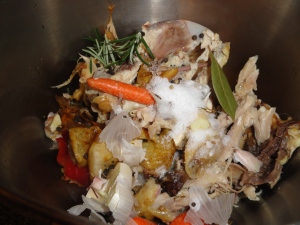
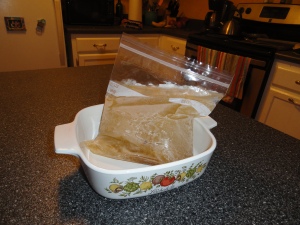
Next, you’ll want to add some veggies to impart extra depth.  You can either add in chopped up onions, garlic, carrots, mushrooms, etc. Or you can use leftover veggies scraps from your week of cooking. I save the peels and ends of veggies and store in the freezer in a Ziploc bag. Then, all I have to do is take out of the freezer and place into the stock pot. 

Vegetable peels and such stashed in the freezer

All these veggies will provide really great flavor

Next, add in whole peppercorns (ground pepper works too), a dash of salt, two or three bay leaves, and sprigs of fresh herbs (here I included rosemary).

The salt in this recipe is completely optional

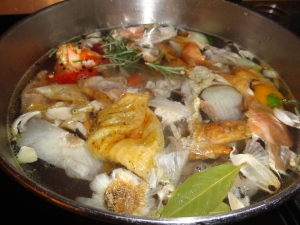
Fill the stock pot with water, leaving about three inches of space at the top. You can use a strainer to put the bones and veggies in but I’ve found this leaves less room for water, therefore, less stock in the end. On medium heat, bring to a slow simmer and reduce heat as necessary to keep this at a slow simmer. I’m constantly adjusting the temp so it will simmer and not boil. Maybe you’ll be better at this than me! Allow to simmer for approximately 1 to 3 hours – depending upon how much time you have. This is a good recipe for when you have nothing else going on and will be at home for a while.

Once complete, strain off the liquid from the solids and then allow the stock to cool down. Once cool, place in the refrigerator overnight.

Leave just about this much room at the top

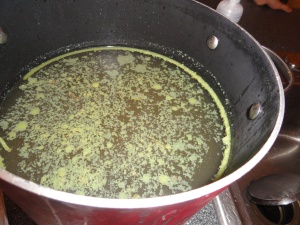
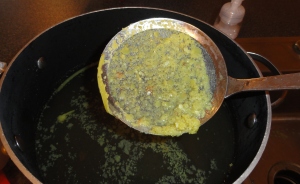
Here’s a picture of my chicken stock the next morning. The fat will rise to the top and you’ll want to skim that off.

Voila....chicken stock the next morning

Mesh strainer used to remove fat solids

Now you are ready to put into containers and freeze! I use either quart size Ziploc bags or plastic containers, that can be frozen. I place anywhere from two to four cups in a container. Once you’ve gotten them labeled with the amount and the date, place in the freezer. The stock will store for 3 months in the freezer.

So the next time you need stock for homemade chicken noodle soup, it’s as easy as opening up the freezer door!

Frozen Chicken Stock

Also, don’t be afraid to start small in this recipe! Local chicken, in my opinion, is best but that doesn’t mean I’ve never used a rotisserie chicken from the grocery store for this recipe. You can use the bones the same way you would here. I would recommend though not using the skin as it will probably have lots of sodium from the seasoning they use on the chicken.

So make some stock and send me a picture!

10-21-2011

What not to do when making a quiche!

Sometimes my love of food and cooking gets me into trouble and my family has to have take-out because I got a little to creative with a recipe and voila – it’s not what I was hoping for!

About a year ago, I saw a quiche in a local deli that had apples, bacon, cheddar….which all sounded great together. Well, perhaps there quiche was scrumptious, but I’m telling you….my attempt at this creation was close to a disaster!

Maybe, it was simmering apples in apple cider vinegar….what made me think vinegar would taste good mixed with eggs?

Maybe, it was the pepperjack I substituted for the cheddar since that was all I had at home?

Maybe, it was the rosemary the recipe called for, that in my gut I didn’t see how it could work, but why not try?

Or maybe, it was the pecans I decided to put in there because sometimes quiches are so soft and wouldn’t it be nice to have a crunch somewhere in that bite????

Needless to say – my creation, while pretty nice looking – I think, was pretty gross tasting. One bite and I spit it out. My poor husband actually swallowed his bite, took another (brave man), and then suggested we get take-out. The entire quiche, minus 2 bites, went into the trash.

Hence, I’ve decided, the more simple the recipe – sometimes the better. Especially, when it comes to quiche. AND – do not use pepperjack in a quiche!

Photos of my less than perfect quiche…

Not as great tasting as it may look

Why couldn't you taste better?

PS…that stuff that looks like sausage….nope, not sausage…its the pecans after being baked in eggs! No wonder they didn’t taste good.

Recipe for a tried & true quiche that I promise – is a keeper!

Ingredients

5 large eggs, lightly beaten

1 cup whole milk or half and half

1/2 tsp salt

1/4 tsp pepper

1/4 – 1/2 tsp nutmeg

2 cups chopped fresh baby spinach

1/2 pound bacon, cooked and chopped

1 cup grated cheddar cheese

1 9″ deep dish pie crust (frozen or refrigerator) Tip: if buying frozen I suggest the brand name as it usually is a tad more deeper than the store brand crust. Not sure why, but I have a hard time getting all the egg liquid in there when I buy the store brand crust. If you buy the refrigerated pie crust you will just fit into a 9″ pie plate at home.

One other note…I do not actually measure my salt and pepper when adding to this recipe. I just use a dash of this and that. I think the amounts above are probably close to how much I put in there. Also, I always use kosher salt! I could write a whole post on salt but in the end, I just believe you should always use kosher salt when cooking or baking.

Preheat oven to 375 degrees. In a mixing bowl, whisk together beaten eggs, milk or half and half, salt, pepper, and nutmeg. Next place chopped spinach, chopped bacon, and grated cheese in bottom of pie crust. Pour the egg mixture on top of those ingredients. Bake for approximately 40 minutes until top is browned and egg mixture is set.

10-19-2011

Last Farmer’s Market of the Year

Yesterday marked a sad day in the life of my kiddos and I….the last Farmer’s Market of the Year…and most importantly our access to fresh kettle popcorn! The kids & I LOVE going to the farmer’s market on Tuesday’s with the top priority of that sweet and salty goodness. So yesterday we of course ate as much popcorn as our bellies could hold and then managed to get some great greens and fruit to use in dishes this week.

When going to a Farmer’s Market I think it very important to have a limit on how much you will spend there. With all the great looking produce you can easily walk away with a ton of produce and a ding in your wallet. Which isn’t bad if you plan on preserving some of the produce. But if not, then it is important to have a limit and stick to it! Here is where my $20 went to and how I plan to use these ingredients.

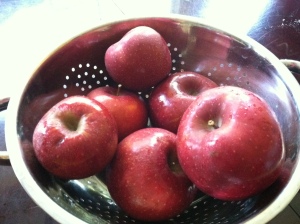
NC Apples

8 apples from a NC orchard

  • Apple Crumb Pie (Will include link when I can find this recipe)
  • Snacking
  • Collard Greens (Click here to view the recipe I use. I add 1 apple, chopped, at the same time as the garlic.)

Farmer's Market Goodies

6 pickling cucumbers

  • Snacking
  • Pasta Salad

2 heads of Boston lettuce

  • Salads

1 bunch of swiss chard

  • Salad
  • Collard Greens (Click here to view the recipe I use. I add 1 to 2 cups chopped swiss chard with the collard greens.)

2 red bell peppers

  • Collard Greens (Click here to view the recipe I use.)
  • Pasta Salad
  • Shrimp Quesadillas (Click here to view the recipe I use. I substitute 1/2 cup chopped bell pepper in place of jalapeno.)

And of course, our $3 bag of kettle popcorn!

Let me know what you are finding at your area Farmer’s Market (or perhaps in your very own garden)!

PS…The Mt. Pleasant Farmer’s Market has ended but the downtown Charleston Farmer’s Market on Saturday mornings will run into December. If you haven’t been, check it out and take your kids. It’s a lot of fun!

10-18-2011

Shrimp – it’s whats in season…

Shrimp & Grits...Delicous!

So here in Charleston, SC we’re knee deep into shrimping season and I’m lucky to have an avid fisherman for a husband. We end up with an abundance of shrimp in our freezer, so over the next few months you’ll probably see more than a fair share of shrimp recipes on the blog. Tonight I made my version of shrimp and grits – perfect for fall weather when the temps are falling and the breeze is blowing.

If an item is local there will be an * next to the ingredient. View Local Food Sources to find where and how you can obtain local ingredients.

Ingredients for the Shrimp and Sauce:

1 lb local shrimp*

1/2 cup chopped onion

3 garlic cloves, minced

1/4 cup Lemon Juice

1/2 cup White Wine

28 ozs diced tomatoes with juice*

12 ozs frozen sliced okra

8 ozs frozen corn kernels

1 tsp. fresh herbs such as tarragon, basil, thyme, etc.*

Parmesan or Cheddar cheese

Cracked red pepper

Recipe for the  Shrimp:

Peel & devein shrimp – I have a Crab Zipper for this and LOVE it! I can peel & devein a pound of shrimp in 5-7 minutes!

The Crab Zipper

Marinate in Italian Seasoning of your choice for at least 30 minutes. While sauce is cooking, saute drained shrimp in a separate pan over medium heat for only a few minutes each side. Shrimp cook very quickly and once pink I like to remove as they will cook a little more once I add them into the sauce. Cooking the shrimp separately from the sauce allows them to be seared on outside and retain more juices inside.

Recipe for the Sauce:

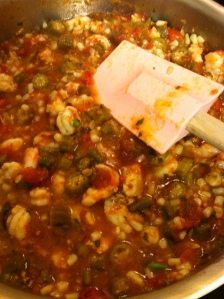
Heat approximately 1 tbsp olive oil in a large saucepan over medium heat. Add diced onions and saute for approximately 5 minutes, stirring occasionally. Add a dash of salt and continue to cook another minute or two before adding minced garlic. You are looking for the onions to turn translucent in color.  Once garlic has been added, saute for 1 minute. Add diced tomatoes, lemon juice, white wine, and okra and bring to slight simmer. Reduce heat to medium low and simmer for approximately 15 minutes. Add corn, prepared shrimp, and 1 tsp. of chopped fresh herbs. Simmer for 3 minutes until corn and shrimp are heated through. Season to taste with salt and pepper.

Simmering Sauce

Ingredients for the Grits: 

1 cup grits *

4 cups Chicken Broth*

2 cups warm water

1 cup Cream, half & half, or whole milk*

Recipe for the Grits:

Bring 3 cups chicken broth to boil and gradually whisk in grits. Whisk well to avoid clumps. Reduce heat to low and allow grits to simmer for approximately 20 – 25 minutes, stirring occasionally. You will continually add more broth or water to grits as they become thicker. When last 5 minutes of cooking remains, stir in cream. Once off heat, season with salt & pepper to taste.

Spoon grits into each bowl and place sauce & shrimp over grits. Sprinkle with cheese and cracked pepper for a kick. Enjoy!