02-07-2014

Food Lion Frugal Cook-Off

originAL


UPDATE: I just found out that the cook-off is not open to the public due to space of the venue. So please just cheer me on virtually instead!

For the last month I have felt my world spinning faster than I would like and while I yearn for less matter to fill my brain, I realize that sometimes there are simply busy seasons in our lives.

Between a bathroom remodeling project that we are DIYing, launching a small business (yay! more details coming soon), and redesigning this blog (yay, again!) I feel that my somewhat orderly life is stretching me to the max. Life is a bit chaotic in its design but I try to keep things simple and focus on domestic and mom duties as my priorities. So these extra-curricular projects are throwing me for a loop.

What’s really kept me grounded though has been waking up around 5ish to have quiet time with Christ. I treasure those minutes, that hour, before my children wake. Time to have a mug of hot tea, envelope myself in scripture, and journal my prayers to Him. My time with Him renews me, encourages me, and reminds me to seek His guidance throughout the day.

So what’s a girl to do when a friend & fellow blogger sends her an email about a food cook-off? And not just any food cook-off but a FRUGAL food cook-off! She excitedly requests to be included! And then she prays about it. And then she feels bad that she didn’t seek God’s guidance first to see if she should be signing up. And then she realizes that, in all things, God can bring goodness…bring Him glory. So she tries to remind herself that God gave her passions and enthusiasms in life for a reason. It’s a really nice gift when you’re given the opportunity to do something you love…so perhaps she should just cherish this fun & exciting event!

So to the point of this post….

I am thrilled to be one of the contestants in Charleston’s Food Lion Frugal Cook-Off on 19 February. As any close friend of mine knows, I love food more than almost anything. Really. I have to work really hard on having conversations that do not revolve around food. And, I LOVE TO SAVE $. My favorite conversations sans food include me saying…”guess how much I just saved!” So this cook-off should be really neat. And challenging. And scary. I mean, do I really know how to cook good food without an arsenal of spices at the ready? What do I do if they hand me a pork tenderloin? (I don’t know that I’ve ever made a tender tenderloin…ever…not once!)

Oh, and did I mention that just by participating I will get a $100 gift certificate to share with one of you! And if I win, then the gift certificate becomes $250!

I’ll be back in touch after the event to let you know how it goes!

Jess

sig

11-06-2012

Take your child to vote today

Hello long lost friends….I really am out here in this world. I’ve just been taking a sabbatical from blogging to spend more time with the kids. And its been nice. But I do miss blogging and my head is often thinking “Oh, that would be a cool blog post”…

So today is the day. YAY!!!

Or actually, tomorrow is the day. You see, tonight while we are sleeping in sweet slumber a magical fairy will descend upon our twisting roads and picks up ALL those pesky VOTE FOR ME signs.

Obviously, I’m in la la land. But if you are feeling in the mood to remove a sign or two or even more, and you live in the Lowcountry, you can actually receive money to an awesome local restaurant….Triangle Char & Bar. How cool is this….for each political sign you bring in for recycling, they give you a $1 credit to be used there.

I’m not a very political person and lately have been questioning if voting even matters. Who knows?  But it is a really neat experience to share with my school age child and I do firmly believe that some votes really do matter…like your school board vote or if you live in California, voting for GMO labeling.

So get out there and exercise your right to vote today! And if it isn’t too much of a challenge, take your child with you so they can learn about the democratic process. And if you live in California….PLEASE vote for GMO labeling!

Have a great day!
Jess

07-20-2012

Peach Jam (no pectin)

It’s Canning Week at Simple Bites, so I’m linking up there and sharing a recent canning experience…

Having two young kids in our house = A LOT of jam & preserves consumption…

And while we could keep Smucker’s in business for the next eighteen years, I figure they’ll do just fine without us, and so, I make our own jam.  I much rather prefer the taste of my homemade preserves, and this way, I get to control what goes into them.

So a few weeks ago, I had a 1/2 bushel of organic peaches show up at the front door from our local grocer, love KTC!, and they were so yummy and delish, juicy and fresh!

But, I had no fruit pectin in the house and to be honest, I was bound & determined to not buy any. The first ingredient is typically maltdextrin or dextrose. Now granted, those are not the worst types of sugars to put into your body. But sometimes, a girl just wants it au natural! My grandma didn’t have artificial pectin to put in her peach jam, so I was pretty sure I could find a way to make do without. And girl, did I ever! You simply need time. Not something we always have on our side these days, but its pretty neat to make something the same way your grandparents did.

(And, I simply KNOW you are wondering…pectin is a naturally occurring substance found in fruit which is what makes the jam ‘set’ or reach the desired gelling consistency. Foregoing artificial pectin (for fruits with very low natural pectin) requires more cooking time prior to canning, but it also reduce the amount of sugar called for. So really, a plus plus scenario! No artificial crapness & less sugar!)

Okay, now back to reality and a simple recipe you can make at home yourself!

Peach Jam

Ingredients
1/2 bushel ripe peaches
3 cups organic sugar
1 cup honey

Yields ~ 9 half pints

First off, you’ll need to peel the peaches first and I promise, its not as hard as you may think. Simply score an ‘x’ on the underside of each knife and place into a roiling boil of water. After 30-60 seconds you’ll see the skin start to peel away from this ‘x’. Plunge peaches into ice cold water and the peel will be super easy to remove.

I need a video here to show you how easy it is, but just trust me!

Place quartered peaches into a food processor and blend until slightly pureed.

This is where I begin to fall in love, all over again, with my NINJA processor. Oh wait, I never fell out of love with it! It is my go-to kitchen appliance. I LOVE IT!!!

Now add your sugar & honey. And then pour yourself a glass of chilled white wine.

You’ll need the wine, since this next process takes an hour plus, but once again, worth it to not have to use store bought pectin. When you begin the process the consistency looks pretty soupy and runny.

Foam will begin to appear but after 15-20 minutes the foam will begin to disappear. You can also skim off if desired. That is too much work for me, so I just leave it!

In about an hour and fifteen minutes, you will have a thick and gelled consistency. Notice, it’s so thick that it has a hard time getting through the slots in the spoon. This is the consistency you are looking for.

Ladle into hot jars, leaving 1/4″ headspace. Cover with lids & rings. And then process for 10 minutes in a hot water bath.

For complete canning process tips, I recommend Ball’s online guide.

Thanks for humoring my no pectin kick! I definitely use pectin at times but sometimes it’s neat to do something the oooolllllld school way.

So what’s been your favorite canning recipe this summer?

Happy Canning!

Jess
~~~

Peach Jam
Yields ~ 9 half pints

Ingredients

1/2 bushel peaches
3 cups organic sugar
1 cup honey

Preparation

Fill a heavy stockpot with water and bring to a roiling boil. Nearby, place a large bowl filled half full with very cold ice water. Score an ‘x’ on the bottom of each peach.

Blanche peaches for 30-60 seconds in boiling water and then plunge into the ice water. Once slightly cooled, remove skin from peach, pull apart from the stone pit, and place into a food processor or blender. Once all peaches have been peeled, chop the peaches, in processor, until chunky or slightly pureed.

Place chopped peaches into a heavy stockpot, adding sugar and honey. Bring to a slow boil over medium heat. Reduce heat to medium low and simmer for approximately one hour and fifteen minutes; until jam has reach desired gelling ‘set’ consistency. Stir every few minutes while it cooks. Also, approximately ten to fifteen minutes into the simmering process, you can (optional) remove foam from the top of mixture with a metal slotted spoon.

Once desired consistency is reached, ladle hot jam into hot, sterilized half-pint canning jars, leaving a 1/4 inch headspace.  Wipe jar rims and cover with lids & rings. Process filled jars in a boiling water bath for 10 minutes.

*Note* I was extremely exhausted when I began this recipe and ended up only getting 1/2 of the peaches peeled and chopped before calling it a night. To retain the bright peach color overnight, I put a few teaspoons of asorbic acid (vitamin C powder) in with the pureed mix and refrigerated until I could begin again the next morning. I am happy to report, the color stayed beautiful and the taste was unaltered. 

04-30-2012

Do you CSA? Part 2

In case you missed my post, Do you CSA, click here, so the following will make more sense!

So I’ve finally made my decision…shopping at the Farmer’s Market from a plethora of vendors is just too much fun to pass up!

I know I could still buy from other vendors even if I have a CSA, but I’m on a budget here. If I spend my $20 with one farmer, then I’ll not have any MULA for the golden beets from Owl’s Nest or no fresh berries from Maple Ridge Farms. And it’s so much fun, each week, to speak with the different farmers, buy some baby crookedneck squash here and a fresh off the vine tomato there. (No, its not tomato season here at all, I am just anxiously awaiting the day!)

Thank you to EVERYONE that shared your comments, your thoughts, and feedback. I thought everyone would push me to the CSA so it was great to see all the varied opinions.

I’ve been working on recipes a lot lately so hopefully I can get some up soon. Think…swiss chard and ground pork stew, chicken & pork bolognese, quiche, pesto….hmmm…I love me some food.

Have a great day!

Jessica

04-18-2012

What to do with all these strawberries???

(You’ll probably think I’m crazy after you read the following first sentence, or maybe you already think I am!, but I promise….there are many uses for strawberries!)

I just got back from picking 35 pounds of strawberries!!!!!! Yes, I’m sure you are thinking….what in the world would make someone pick that many and how in the world will she eat them all???

Well, here goes… Last summer we picked about 20 pounds of strawberries and they lasted us about 8 months. So this year, I’m trying to get enough to last us the whole year through. Think I have enough??

The reason I do this, is because U-Pick farms have strawberries at a much lower price, you get more nutrients from the fruit because there is minimal time from farm to table, you get dirt in your toes (have you figured out yet that I really like dirt?), and it provides a great outdoor activity for the kids!

So how much lower is the price?? Maple Ridge Farms, the U-pick farm I LOVE, has their strawberries at $1.50/pound and if you buy more than 20 pounds, the price is $1.25/pound! So its’ a no-brainer for me! Pick away!!

But what to do with all of these strawberries? By the time we get home I am seeing red, red, and more red, and I begin to ponder…maybe I really am crazy?

#1. Berry Jam…the best part about making jam is that the berries do not have to be fresh, you can use frozen. So just freeze, see below for notes on that, and then save making jam for a day when you have more time.

#2. Fruit Smoothies…we make fruit smoothies all the time. We just throw in whatever berries and fruit we have on hand, add some yogurt, and 100% juice, and puree away.

#3. Eat them frozen, straight from the bag…(blaming a little sister for going through the strawberries so fast last year – she  probably ate 2 gallon size bags by herself in the 6 weeks she lived with us!)

#4. Let defrost and eat with a fork….yes, they will be mushy and your kids might protest but why not start early teaching kids about the seasonality of eating local produce and if they want to eat strawberries in December, then there has to be a compromise….they’ll still get that same flavor but the consistency will be different.

#5. Berry Muffins

#6.  Top homemade Belgium waffles with them and icecream

#7. Cobbler, Pies, Scones, the dessert list could go on & on

#8. Strawberry soup perhaps??? Not really sure of any other ideas at this point!

To preserve the fruit, you first rinse off in a cold water bath in your sink, then you hull them with a magic strawberry huller and then slice to desired size and place in a gallon sized ziploc freezer bag.

And yes, we do have a stand alone freezer in our garage that we use for storage.

If you live in the Lowcountry and have a strawberry craving, I suggest Maple Ridge Farms in Canadys, SC…they have the perfect soil for growing sweet fruit and their strawberries are not dusty & dirty because they do not have the sandy soil you find on the islands around Charleston. The farm is in Colleton County, about an hour drive from Charleston, but I think its well worth it. Fritz and his wife are so down to earth and enjoy talking to you about how they farm the land.

The strawberries should be around for another month and at this point, near the end of the season, they are sweeter!

Other U-Pick Farms in the Charleston area…Ambrose Farms and Boone Hall Plantation.

For U-Pick Farms throughout the US, check out the Pick Your Own website.

You may have decided I’m crazy for picking 35 pounds, but hopefully this post will inspire you to pick some berries this summer!

And if you have any suggestions of how I can use up all these strawberries, I’d love to hear!!!

Happy Fruit Eating Season!

Jessica

12-23-2011

Chocolate Chocolate Chip Cookies for Santa

If the Santa and Elves in your household enjoy chocolate then this recipe is for you! Its got semi-sweet grated chocolate plus milk chocolate chips. And, if you love oatmeal in cookies, this recipe delivers on that too! This is one of my favorite cookies…I’ve been known to devour 2 dozen in 2 days, all by myself! So be careful…they are addictive!

Pure Chocolate Delight!

Mrs. Field’s Chocolate Chocolate Chip Cookies
If you Google this recipe you’ll find lots of different variations and an interesting story of how the recipe came to be. I’ll save the story telling for someone else but this variation came from a friend’s mom a few year’s back. The chocolate has been scaled back and the recipe is halved. Even with halving the recipe it still makes 4-5 dozen cookies. But that’s good right…the more for you to eat?

Ingredients

1 cup, 8 oz, unsalted butter, softened
1 cup organic cane sugar
1 cup brown sugar
2 brown eggs, preferably farm raised, slightly beaten
1 to 2 tsp pure vanilla extract
2 cups organic all purpose flour
2 1/2 cups quick 1-minute oatmeal
1/2 tsp kosher salt
1 tsp baking powder
1 tsp baking soda
12 oz bag milk chocolate chips
4 oz chocolate semi-sweet bars

Notes

To soften butter, leave out at room temperature for 30 – 45 minutes. You don’t want to microwave it as that messes with the make up of the molecules so the cookies don’t have the right texture. Also, organic flour (or at least the brand I use, King Arthur) has a higher protein make up of the flour which limits how much the cookies spread while baking. Also, I’ve found that if you use 1-minute oatmeal versus old fashioned you will have more moist cookies. And if you slightly beat the eggs before hand it ensures you get no shell in your dough and also distributes the egg more evenly into the dough, in my opinion!

Recipe
Preheat oven to 375 degrees and line cookie sheets with parchment paper or Silpat liners.

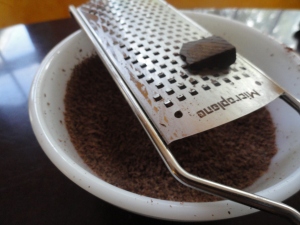
Grate chocolate bars into a medium size bowl.

Measure oatmeal and blend in food processor.

Next, cream together butter and sugars. When I first started baking a lot, I would wonder “how do I know when it is ‘creamed'”. Well this is what I consider ‘creamed’ to look like and takes 3 to 5 minutes to achieve.

Add beaten eggs and vanilla. Next, add the flour and oatmeal mixture. Then mix in chips and grated chocolate.

Spoon the dough into tablespoon size and place on cookie sheet and bake for 6 minutes at 375 degrees. The few minutes pass quickly so set an oven timer for these cookies! Transfer to baking rack as soon as cookies are set enough. And ENJOY!

Now, the best part…Lick that bowl clean!

I’d love to know, what cookies do you bake at Christmas each year?

Jessica

12-08-2011

2 Strikes for Greens

So my quest to be adventuresome and try new greens hasn’t resulted in the home run I was hoping for.

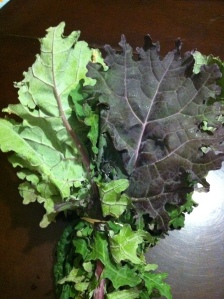
This past weekend, I tried making a swiss chard and cheese frittata which probably would have been fine if I hadn’t substituted kale for chard! I used my ‘not sure what this is’ green but yesterday I found out it was definitely kale. My wonderful husband said it tasted good but when I suggested giving some to the neighbors to try (maybe their taste buds are different than mine and they would enjoy it?) my husband promptly said, “let’s just leave it here”. So obviously, he just tries out my concoctions to humor me!

Now we know this is kale!

My not so great kale and cheddar frittata

I wasn’t about to let one strike keep me down though. I cleaned up my counters, retied my apron, and tried again with a Bok choy stir fry…but once more, another strike!

I don’t know why but I CANNOT find a good stir fry recipe. I am just not good at making that type food, even when I have a recipe. It simply lacks something, some type of secret pizzazz that I can’t figure out.

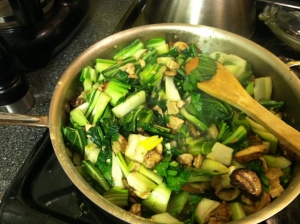
The stir fry had pork, mushrooms, Bok choy and lots of minced garlic and ginger. But it needed something more in the sauce. Maybe I should have started with some onions or used fish sauce (which I detest) or did a little Asian dance??? Simply put, it was bland. However, the Bok choy was delicious and I will 100% definitely use it again…in my next attempt at making a not mediocre stir fry!

The gorgeous Bok choy was the shining star in this unfortunately bland stir fry

I haven’t given up hope yet though! My next attempts with greens are to make kale chips and a soup of Cabbage, White Bean, and Kielbasa. I’ll let ya’ll know how they turn out….wish me luck! Jess

PS…thanks for humoring my baseball wording throughout this post. I’m not really much of a baseball fan but today it just kept coming up in my head so thought I’d include! Have a great afternoon!

12-01-2011

Greens, Greens, and MORE Greens

So, if you’ve read today’s earlier post, you’ll find that I have 4 different types of greens on hand at the moment!!!!! Think that is just a little too much? Well, I do! So I need your help – I’m not sure what all the different types of greens are – and am hoping someone out there might. I know I’ve got some Bok Choy in there but have never cooked with it and would love a recipe for that too.

Any takers on what this is?

I really want to figure out what the above green is…I am hoping you can cook it just like spinach or arugula. The leaves are more tender than traditional greens, such as collards, kale, etc.

On that note… During our winters in Charleston, we have greens in abundance but Southern Style collard greens are quickly becoming BORING! So, imagine what a glorious sight this book was at the library tonight!

Hopefully, I can find some good recipes in this book to share with you. And if you have any creative ways to use greens, please pass them along.

Your Faithful Greens Eater,
Jessica

12-01-2011

Greens for the land of Husker’s

Hello!!! I hope all of you had wonderful Thanksgivings and ate lots of healthy foods! My family and I went on a week long trip to visit extended family in the land of cornfields, pivots, and cows….aka…Nebraska. And oh yes, the land of Huskers!

We had such a fantastic time but I do have to say, eating healthy wasn’t #1 on my priority list. (Imagine at every meal….blueberry pie, pecan pie, cherry pie, not to mention – everyone’s favorite…pumpkin pie! And oh yes, in the land of Husker’s they categorize corn and potatoes as vegetables. Ha!) When I haven’t had greens in a while my body begins to crave them and sometimes that makes me go just a tad overboard. Hence, I now have 4 heads of various greens in my fridge, 10 tangerines on the counter, and a smothering of other fall veggies and fruits in my crisper!

Today’s recipe takes advantage of fall greens, creamy blue cheese grits, and very flavorful pork!

I am definitely not a photo genius but today’s pictures are on the very poor side. The grits came out a little runny when I made the recipe tonight (blaming husband for throwing away the recipe). I also hope that when you sit down to enjoy this meal you’ll have on lovely serenading music in the background. The background noise my husband and I enjoyed was our son yelling that it wasn’t time to eat but time for more FOOTBALL! Obviously, he still wishes to be back in Husker country.


I made the same recipe a few weeks ago with local greens and think the picture is a little better than tonight's.

All of the ingredients, except for the greens (because I was too impatient to wait a day), were local. Here are prices on how to serve up this winter goodness on a budget.
1 lb Local Pork Tenderloin: $10
20 ozs Fresh Spinach: $6
4 ozs Local Blue Cheese: $4
1 cup Local Milk: $1 (way overestimated)
1 1/2 cups Local Grits: $1
2 cups Homemade Chicken Stock: Free

Total Cost: $22/4 servings = $5.50 a person

Recipe

Ingredients for Pork Tenderloin
1 lb local pork tenderloin
1/2 cup lemon juice (2 lemons)
grated lemon zest from 1 to 2 lemons
1/4 cup olive oil
3 garlic cloves, minced
2 tsp fresh tarragon, chopped
3 tsp fresh rosemary, chopped
2 tsp dijon mustard

Recipe for Pork Tenderloin
In a small bowl, whisk together all the ingredients except for the tenderloin. Pour marinade into a gallon sized Ziploc bag and add tenderloin. Place in refrigerator for 4 – 8 hours.

When ready to cook, preheat oven to 400 degrees. Next, coat a shallow baking dish with olive oil and remove the tenderloin from the marinade. Throw marinade away and place tenderloin in baking dish. Bake in preheated oven for 15 – 20 minutes, until the internal temperature reaches 140 degrees. Remove from oven and place on a rectangle of aluminum foil, folding tightly all around to allow the pork to rest and become really juicy. Allow to sit for 10 minutes. When you cut into the pork, it will still be pink inside but is safe to eat. (Please disregard my pictures of my pork – my meat thermometer needed to be thrown away years ago – so I ended up overcooking mine. But even overcooked, it was still really flavorful. This marinade is my go-to marinade for pork tenderloin. You can really taste the lemon, mustard, and herbs in each bite.)

Ingredients for Grits
1 1/4 cups local grits
1 1/2 – 2 cups homemade chicken stock
1/2 – 1 cup water
1/2 cup local milk or cream
4 ozs local blue cheese

Recipe for Grits
Over medium heat, bring 1 1/2 cups stock and 1/2 cup water to a rapid boil. VERY SLOWLY whisk in the grits while stirring constantly. (This slow process and the constant stir is important to having no lumps in your grits). Lower the heat to medium low and simmer for 20 minutes, stirring every few minutes. Add in additional stock and/or water if consistency is not looking creamy enough. After those 20 minutes, you will add in 1/2 cup of the milk/cream and simmer for another 10 – 15 minutes. Once desired consistency is reached, remove from heat and stir in blue cheese. Season with kosher salt and fresh ground pepper as needed. (When cooking grits, don’t be afraid to add in additional liquid if your grits look a little too dry before they are finished cooking).
Ingredients for Greens
20 ozs fresh greens – spinach or arugula (see below)
2 garlic cloves, minced
olive oil

Recipe for Greens
Over medium heat, saute minced garlic in olive oil for 1 minute. Add fresh greens and a few drops of water. Allow to cook for approximately 5 minutes, until almost wilted through. Season with kosher salt and fresh ground pepper as needed.

(I tried this last week with collard greens and even though I sauteed for about 15 minutes they were still not tender enough, in my opinion. However, I think that if I had left out more of the ‘rib’ of the collards they would have been just fine. So you may want to give collard or kale a try in this recipe. If so, let me know how it turns out!)

Now serve up & ENJOY!!!

Jessica


11-14-2011

Shrimp Chowder

I have an admission I need to make….I can sometimes be a perfectionist…and I am always a procrastinator…so sometimes I have these ideas in my head of how I want my blog pages to be perfect but that takes time and then I get overwhelmed and decide to just ‘work on it tomorrow’ and then finally it’s two weeks later and I’ve barely updated any of the pages. So, its going to take me a while to get the pages and my blog to look like the picture in my head. But I’ve realized, that doesn’t mean I can’t keep posting. So… I’m going to try to add content to the pages each week or so and will try to write a new post each Sunday – Thursday evening. I hope you enjoy these recipes and thoughts in my head.

This next recipe…Shrimp Chowder is so yummy.

Don't I look divine?

The best part is that there is no milk  – none – and is still really creamy!  (The secret is in pureeing the starchy ingredients!)

NOTE: This recipe does require a bit of chopping veggies. If time allows, I suggest chopping earlier in the day so you don’t feel rushed when making this for dinner. I promise though, it is worth all the chopping!

Ingredients

1 lb local shrimp
1/2 to 1 cup chopped yellow onion
1 cup thinly sliced or chopped carrots
1 cup chopped red bell pepper
4 cloves garlic, chopped
3 cups frozen corn
2 lbs baby red potatoes
3 cups chicken stock, click here for a homemade stock recipe
2 tbsp chopped fresh cilantro
kosher salt
ground black pepper
crushed red pepper or ground cayenne pepper

Recipe 

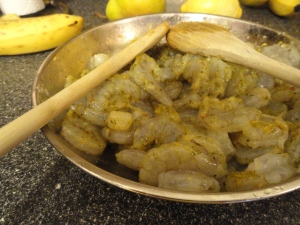
Preheat oven to 425 degrees. Peel shrimp and devein. Rinse and then dry off with paper towels. Place in small bowl and drizzle with olive oil and sprinkle with salt and pepper. If desired, add some dried spices to them…I used a french herb mix I had on hand. Place shrimp in fridge.

Fresh from the Charleston Harbor

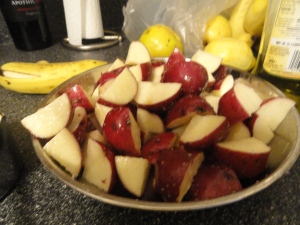
Place chopped potatoes in a small bowl and generously drizzle with both olive oil and kosher salt.

Roast potatoes in preheated oven for 25-40 minutes. While potatoes roast, use a food processor to puree 2 cups of corn with 1 cup chicken broth. Set this aside for later.

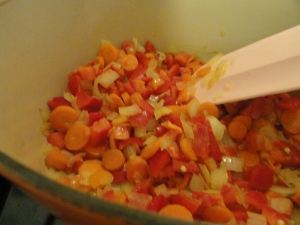
Next, heat 1-2 tsp of olive oil over medium heat and saute onion and carrots for 10 minutes, stirring often. Add bell pepper, sprinkle kosher salt over mixture and stir.

Let the mixture cook for a while so everything is very tender.

Cook another 5 more minutes and then stir in minced garlic to the mixture. Saute for 1 more minute, then stir in corn puree, remaining 1 cup of corn kernels, and 1 cup chicken stock. Turn the heat down to low.

At this point your potatoes are probably finished roasting…Here is what mine looked like…

Crunchy on the outside and soft on the inside

So now place 1/2 of those potatoes into a food processor and puree with the remaining 1 cup of chicken stock.

The puree will be very thick!

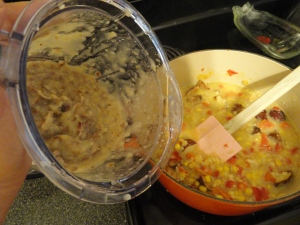
Pour the puree into the soup with the remaining roasted potatoes. (If desired, cut the remaining roasted potatoes into smaller bite size pieces with kitchen shears.) Add the chopped cilantro and season generously with kosher salt and fresh ground pepper. Allow to simmer on low heat. If your chowder is too thick, add water or chicken stock to reach desired consistency.

What the chowder will look like before the shrimp is added.

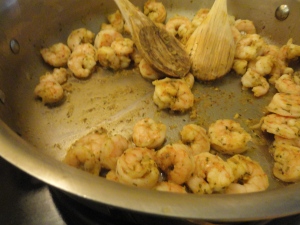
With the chowder slightly simmering, place a saute pan over medium heat and add approximately 2 tsp olive oil. Cook the shrimp in this pan until just cooked through – a few minutes on each side. The shrimp will end up cooking a bit more in the chowder so you don’t want them to get overdone in the saute pan.

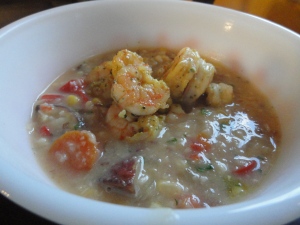
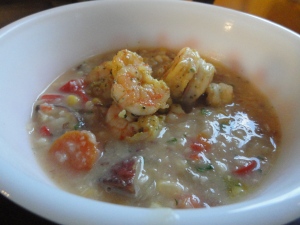
Once the shrimp are cooked, transfer to the chowder and allow to simmer on low heat for 5 minutes. Taste soup again and season with salt and pepper as necessary.

Now it’s time to serve it up and enjoy!

I need to learn a new word for "Enjoy"!

I sprinkled cayenne pepper on mine as I love a kick. I hope you enjoy this dish as much as I do!

Jessica

PS…for budget calculations…this recipe comes out to $15-$20 to make and that includes shrimp at $7/lb. You should get 6 to 8 servings out of this recipe.