Need an easy activity to do this weekend with your pre-schooler while your toddler naps? Need something to take to that Halloween party (or two)? Want to share some sweet goodies with your friends? Then search no further…
Gooey Ooeey Yummness….That is how I’d describe a caramel apple. It’s simply delicious! And perfect for fall when apples are in abundance and Halloween is just a few days away. Yesterday, my little helper (aka my 3 year old son) and I made a batch of caramel apples and delivered them to his little buddies for them to enjoy. I am sure their parents were thrilled with the extra sugar showing up on their doorstep during Halloween season!
I’ve heard that making caramel is not as hard as you think but I just did not have the patience for that so we used bagged caramel. I know, I know…hardly local or homemade. But my apples were from a GA orchard – so that counts, right?
TIPS:
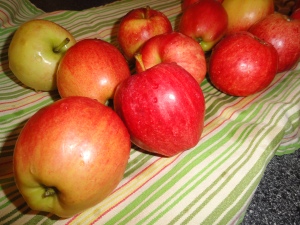
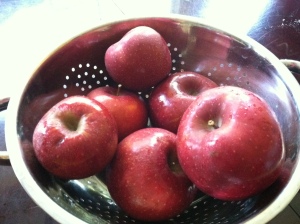
To begin with, you’ll want to find the smallest apples you can. The apples I started with seemed too small to me but as it turns out, so glad I used those. After making 12 or so of the small ones I still had enough caramel to coat 2 more apples and all I had remaining were pretty large. The popsicle sticks were not sturdy enough to hold the apples and it was a lot harder to twirl them to get the caramel just right. I used an heirloom variety (can’t remember the name) but I think anything with a little tartness and firmness will taste great with the creamy sweetness of the caramel.
After washing apples you should scrub them to help the caramel stick. This is very important if there is wax on the apples. If using a local variety they probably do not have wax on them but it still helps by producing a bit of grain on the apples. One website actually suggested rubbing them with sandpaper! I had no clean sandpaper but if you do, try it out and let me know what you think!
For the sticks I used Popsicle sticks I found at Michael’s. I found it was easiest to ‘skewer’ the apple with a chopstick and then I had my little helper put the Popsicle sticks in them. It was still hard for a little one but he enjoyed trying! Also, a good job for your kiddos is to remove the plastic wrapping from the caramels. I was actually surprised my son only sampled one caramel while doing this. He has more self-control than I do!
And most importantly, be patient with yourself!!! It may take a few tries to figure out how to coat the apples and keep the caramel on there or how to get any nuts on them. On my first try I took the pot off the stove to coat the apples but the sauce cooled down way too quickly so after the first two apples, the caramel was too thick to coat properly. Thus, I recommend keeping the sauce on low heat.
Recipe:
(If you want to double this recipe, I suggest making in separate batches so the caramel sauce doesn’t get too thick while waiting for you to coat all those apples.)
6 small apples from a local or regional orchard
1 bags of caramel candies
4 tbsp water
popsicle sticks and chopsticks
1/2 cup of toppings: pecans, m&ms, crushed oreos, etc. (optional)
Parchment or wax paper
Lightly butter parchment or wax paper and place atop a long serving tray or cookie sheet. Rinse apples and scrub with a vegetable brush (or sandpaper)! Remove stems and then skewer with Popsicle sticks. Place apples on top of paper and place tray into refrigerator.
If using pecans, roughly chop and set aside.
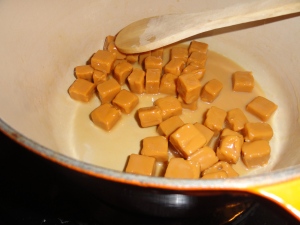
Remove plastic wrappers from caramel candies and place in a large dutch oven with 4 tbsp water. Melt on medium low heat, stirring very frequently.
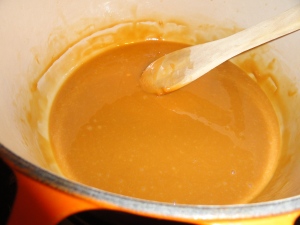
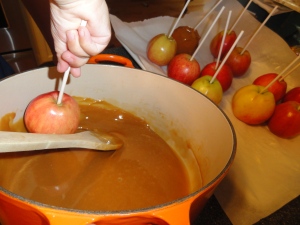
Once the caramels are completely melted, reduce the heat to low and begin coating the apples. I found it worked best to tilt the pan so all caramel was at the bottom and then coat the apple by turning a few times with it submerged in caramel sauce. After taking the apple out of the sauce I twirled the stick in different directions so that it held. Next, I would hold straight up (like you were going to eat it) and then after a few seconds turn over so the caramel will hold in the opposite direction. Don’t be afraid to drizzle some caramel onto the top and bottom center areas with a spoon if having a difficult time getting the caramel to stick in those areas.
Once coated and somewhat stable you will coat with nuts or other toppings. I placed my nuts in a medium sized Pyrex bowl and rotated the apples around until all covered. Make sure you do this as soon as you finish each apple. If you wait until all the apples are completed the caramel will be too firm for the nuts to stick onto.
If able to resist eating immediately, place completed apples back on tray and refrigerate for 5 to 10 minutes. This allows the caramel to ‘set’ a little more.
Now go ahead and enjoy!
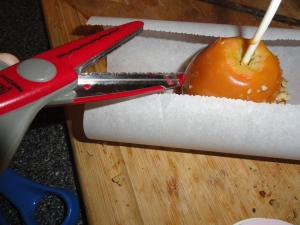
If you want to wrap these goodies up, simply place on a small square of parchment/wax paper and press the paper onto the apple. Place in a treat bag and wrap with a cute ribbon. Now you are all set to make someone’s day!
Happy Halloween!

