08-02-2012

Pesto Pesto Pesto

Let’s see if this equation is correct…

French fries and pizza sauce can count as a serving of vegetables, rightttttttt?

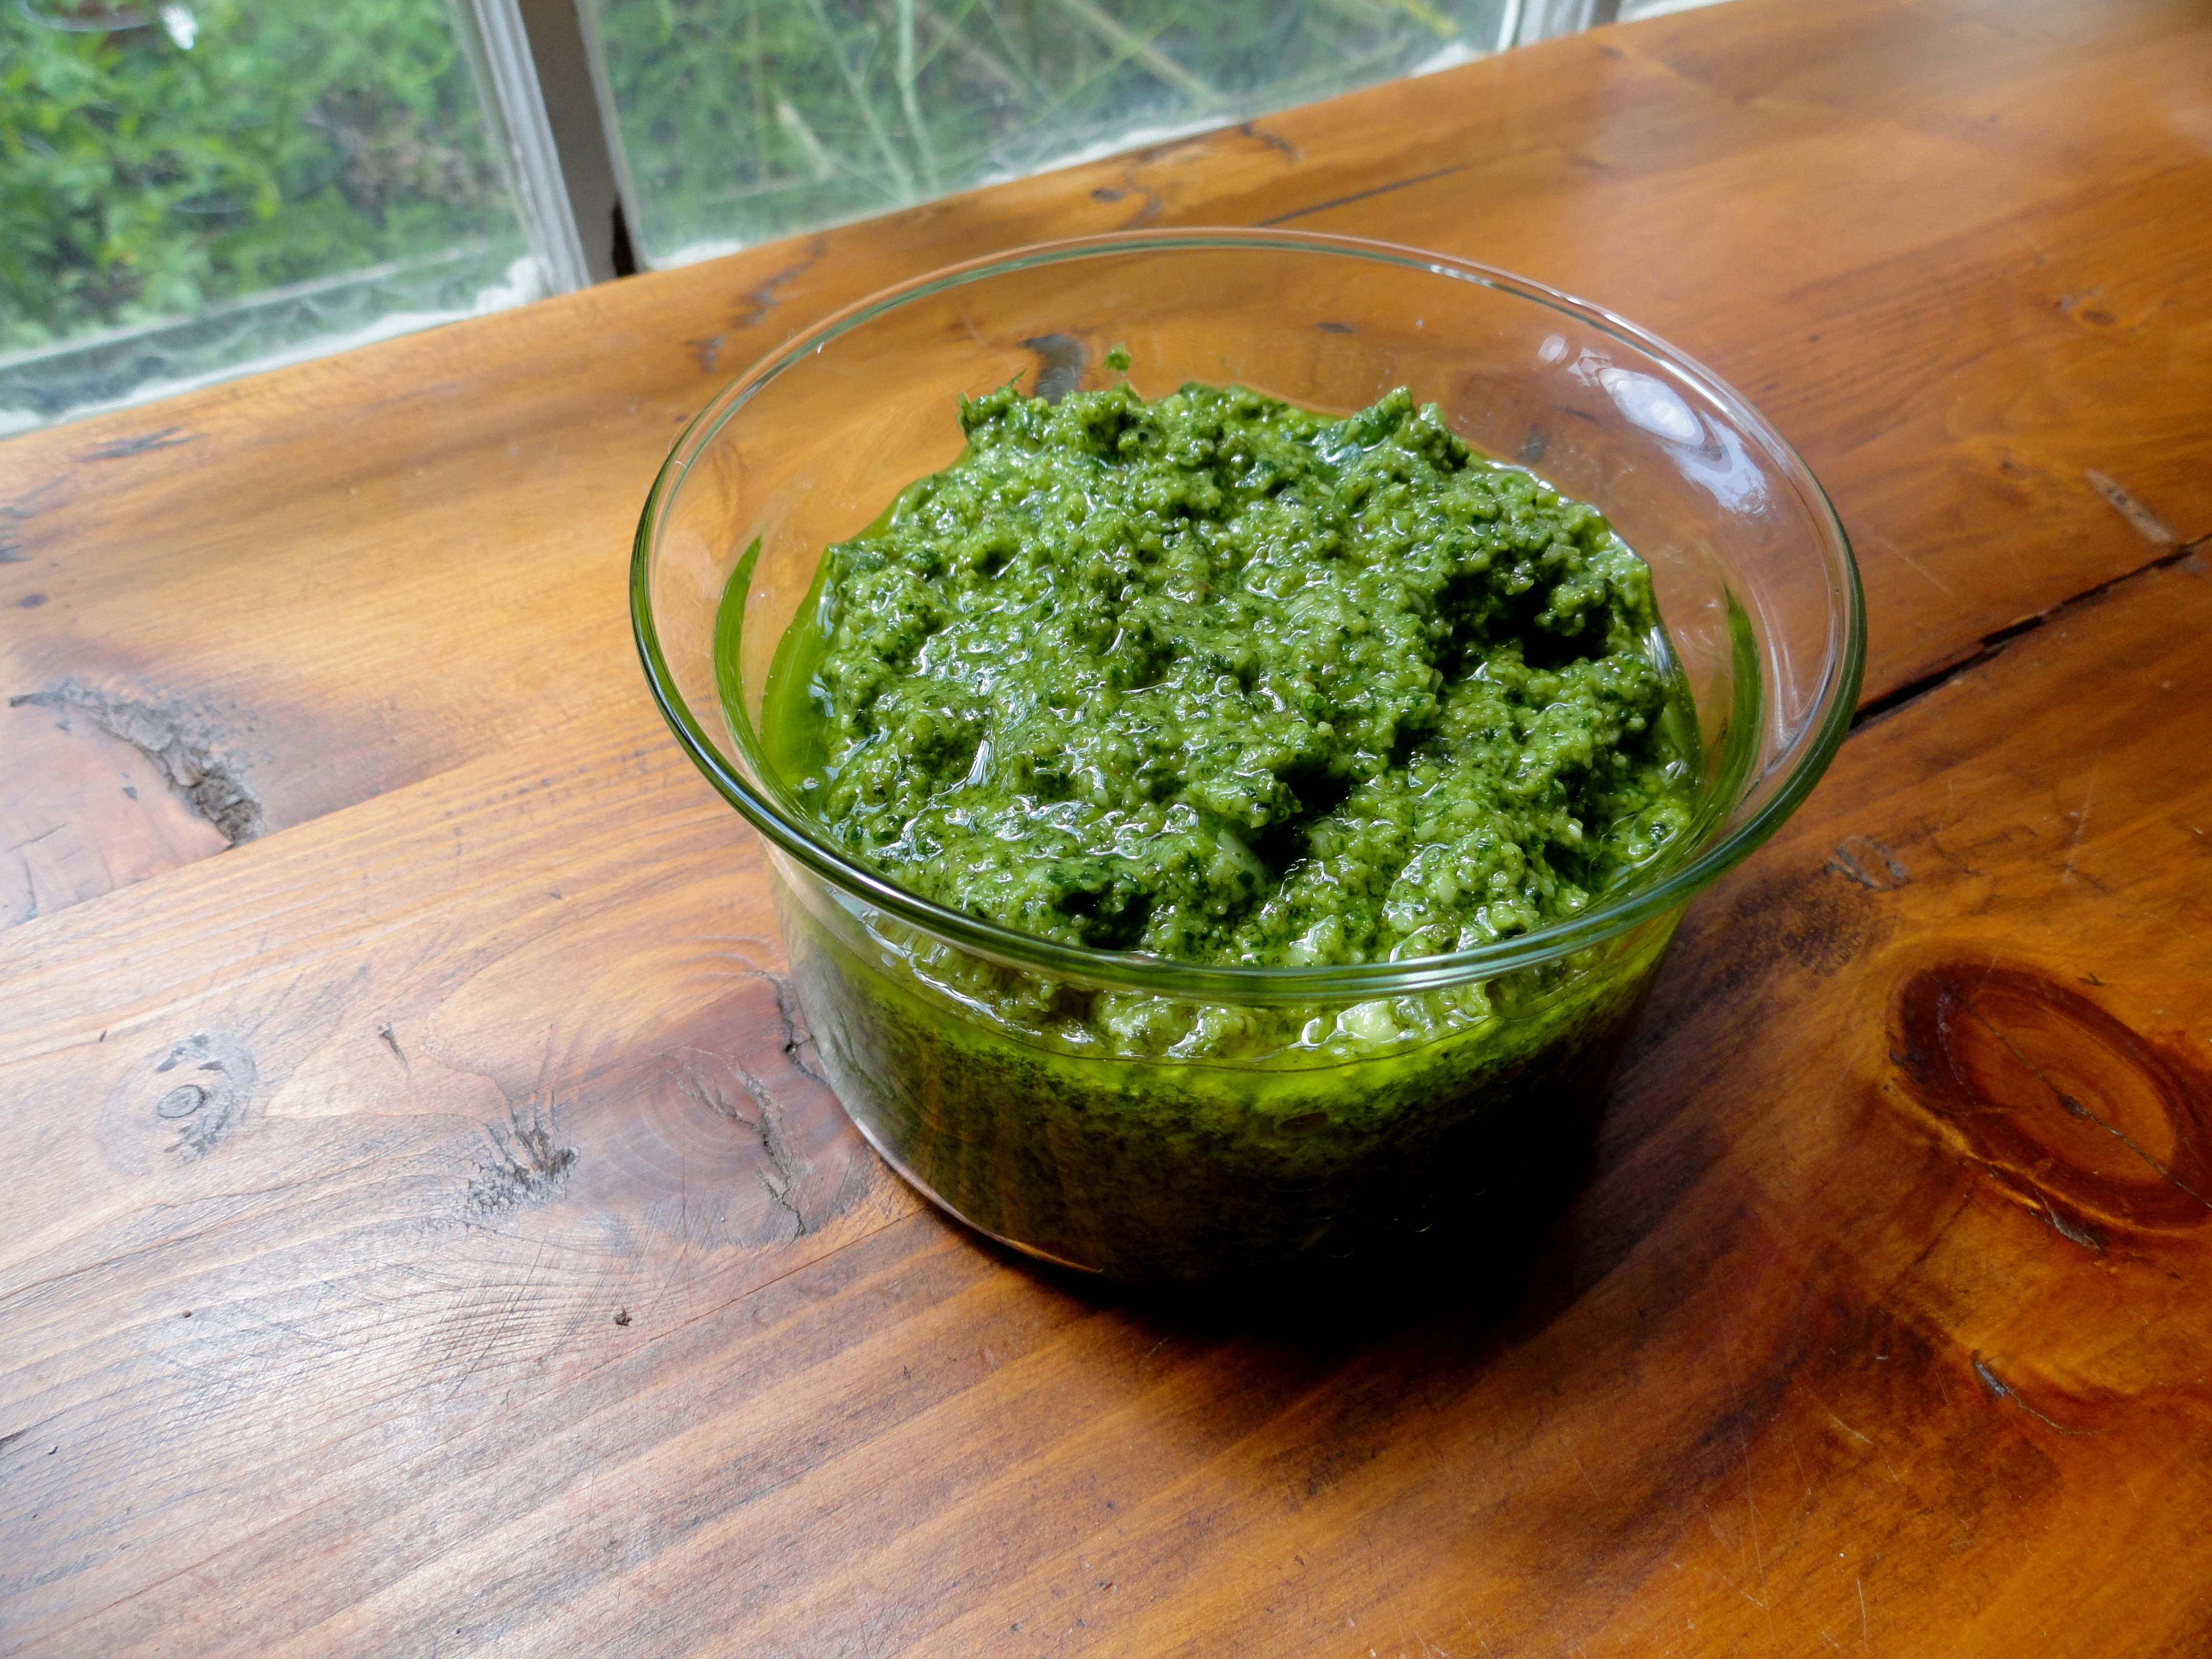
So then, pesto can count as a veggie too? I hope so, because right about now (with the heat & the humidity) there isn’t a whole lot of cooking being done in the Paulsen house.

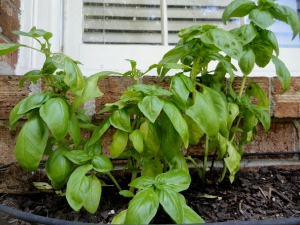
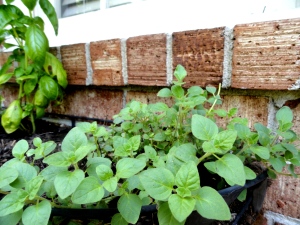
We’ve been eating our way through such massive amounts of pesto that I need to find a way to get my basil to grow faster. Even with 8 basil plants, I have to supplement the recipe with other herbs besides the most common ingredient. Luckily, the kids don’t care…so we’ve added arugula, mint, oregano, and even rosemary. My most favorite addition is the arugula. Probably because I can get a huge bag of it at the Farmer’s Market and produce a lot of pesto that way.


Here is my favorite way to make pesto. It is super flexible, so feel free to add more herbs, skip the nuts to watch calories, or play around with the olive oil portion until you get a consistency you like. The biggest difference in my pesto recipe is that I recommend sauteing the garlic for a few minutes to reduce the heartburn/acid reflux (getting old, aren’t I?) that raw garlic seems to bring about.

Ingredients

5 cups green herbs, arugula, and/or spinach
1/2 cup hard nuts (be adventuresome, try something besides pine nuts)
6 garlic cloves
1 cup olive oil
3/4 cup freshly grated top quality Parmesan cheese (but guess what…any ‘hard’ cheese will work. I tried cheddar (make sure you use real white cheddar) the other day and it was pretty good)
kosher salt & fresh ground black pepper

Preparation

Place peeled garlic cloves in a food processor and chop slightly. (Or chop by hand. I use my processor to chop so that I don’t have to dirty up a cutting board. Oh, lazy me.) On medium heat, saute the minced garlic for 2 to 3 minutes. Place garlic back into food processor.

Add nuts to the garlic, and chop/blend/puree in your processor until finely chopped. Add herbs, a teaspoon or so of kosher salt, and grind the pepper until you get tired of grinding. Next, start your food processor, and add the olive oil through the side spout. Or, you can do as I sometimes lazily do, and just dump the olive oil on top of the herbs and puree/blend. But if you want to watch how much olive oil you are adding, the side spout should do the trick nicely.

Now, add in the cheese and blend/puree again until you reach your desired consistency. Hmmm…at this point you taste and  think, God…how thankful I am that you made basil or arugula or anything green. (On another note, what do you think God’s favorite color is? I think green for sure. But blue is a top contender with all that sky above the basil plants!) Okay, so back to pesto!!!

You can totally make this in a blender, but I have to say, the blender I used to own was crap. Crap with a capital C. I couldn’t do anything with that blender. But some people say they love their blender. I happen to have a NINJA that I adore. It works extremely hard all summer longer blending together pesto for my family. Thank God for NINJAs and basil!

Oh, this recipe makes about 2 to 3 cups of pesto…so half the recipe if you aren’t into eating pesto as much as we are! You can freeze extra pesto in ice cube trays and just place in a resealable bag once the ‘pesto cubes’ are frozen.

Our favorite pesto dishes are obviously over pasta, but its even pretty tasty over a nice juicy steak.

Have a great Friday and stay cool!

Jess

06-13-2012

The Tomato Sandwich

Today, I pay homage to my most favorite food. One day, hopefully long away in the future, when I breathe my last breath, I pray I have just finished A TOMATO SANDWICH, made by Southern hands.

I simply think there is no better creation than some fine mayo slathered on some thick bread loaded down with too many to count slices of tomatoes; and of course, lets not forget….way too much salt & pepper on those things. Hmmm….

Fisherman looks on in disbelief as I eat my piece of heaven and cannot believe there are two tomatoes worth of slices on that bad boy, or that there is no bacon or lettuce anywhere to be found. OF COURSE THERE ISN’T. BLT’s are good – but they aren’t a tomato sandwich. There is a vast difference. And in my mind, to be truly Southern – 1. You need to be born in the south and 2. You need to relish a pure & simple tomato sandwich.  (I can’t wait to hear your thoughts on my Southern comments!!!) 😉

So how do I create such a delectable sandwich?

First, you must start with the proper ingredients….good, real Mayo….not Miracle Whip…the real deal.

Second, thick crusty bread…think day old bread to sop up all that juice.

Third, so many tomato slices that they are falling out of the sandwich.

And lastly, a VERY generous helping of kosher salt & fresh ground pepper. (Yes, I will probably pass from too high blood pressure, but life without some salt would be very sad indeed.)

You’ve got to sprinkle the salt & pepper two times on each side to reach the desired amount. And getting the spice all over the bread adds some special umpf!

Now eat that summer goodness and wash it all down with some Southern style sweet tea.

Love ya’ll,

Jessica

P.S….don’t even think about trying this in the winter or any other time when fresh off the vine tomatoes aren’t available!

06-09-2012

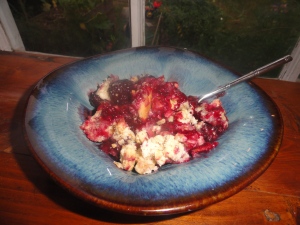
Blackberry and Blueberry Crumble Pie

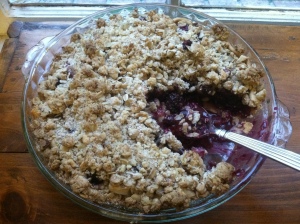
I just have to say…I LOVE berry crumbles! They have to be one of the easiest desserts to make…Whip together a few ingredients, and voila! Today I used fresh from the farm berries but even in winter, crumbles taste great with frozen berries.

To try something different though, I added a pie crust which soaked up some of the juices and was still flaky and delightful.  And the ginger in this recipe adds a spicy kick for a little something more.  Hmmm…life is good!

Recipe Cost
Since most of the ingredients are on stock in my pantry, I only added the price of berries and a pie crust to come up with a total of $8 for this amazingly delish dessert. To buy a dessert this yummy at your local bakery, you’d spend close to $20. Quite the savings to make at home!

Ingredients
For the Pie Crust:
Knock yourself out making one from Grandma’s scratch recipe, or do as I do and buy refrigerated dough. One of these days, I’m going to figure out how to make a crust but for the moment, I am pretty intimidated on that front and blame it on my baking roller.  If you are just as intimidated with the daunting task of dough rolling, make sure to buy refrigerated not frozen pie crusts. Frozen pie crusts in those tin pans produce mushy crust; whereas a refrigerated one placed in your glass pie plate will produce a flaky and delectable crust.

For the Filling:
4 cups fresh blackberries and/or blueberries
1/2 cup sugar
1/4 cup flour
2 teaspoons lemon juice (~1/2 of a lemon)
1/2 Tbsp fresh minced ginger or 1 1/2 tsp grated ginger
1 Tbsp finely chopped fresh mint

For the Crumble:
1 cup flour
3/4 cup old fashioned oats
1/4 cup coarsely chopped hard nuts (almonds, walnuts, hazelnut, etc.)
1/4 cup granulated sugar
1/4 cup brown sugar
4 ounces butter, at room temperature
dash of kosher salt

For the crust ~ Preheat the oven to 350 degrees. Place pie crust in a glass pie plate and add dry beans to the top for a weight. Blind bake the pie crust for 10 minutes. Remove from the oven, remove beans or dry weights and allow to cool.

Don’t do like me and forget to add the weights/dry beans…the middle will puff up and the sides collapse into the middle!

For the filling ~ In a large, non-reactive bowl, stir together the sugar, flour, lemon juice, ginger, and mint. Next, gently mix in the berries and allow to sit for at least 10 minutes.

Pour into crust once crumble topping is made.

The berries took on a shiny sheen all by themselves. No matter the lighting, the photo looked like steam was rising.

For the crumble ~ In a mixing bowl, stir together the dry ingredients and then whisk in the butter.

You can also use a fork or your fingers. Basically, as the name implies, you just want the mixture to be crumbly looking. Place crumble mixture on top of berries in pie dish.

Bake in preheated oven for approximately 40 minutes, until golden brown.

ENJOY!!!

XoXo, Jess

Printable Recipe

Ingredients
For the Pie Crust:
9″ refrigerated pie crust

For the Filling:
4 cups fresh blackberries and/or blueberries
1/2 cup sugar
1/4 cup flour
2 teaspoons lemon juice (~1/2 of a lemon)
1/2 Tbsp fresh minced ginger or 1 1/2 tsp grated ginger
1 Tbsp finely chopped fresh mint

For the Crumble:
1 cup flour
3/4 cup old fashioned oats
1/4 cup coarsely chopped hard nuts (almonds, walnuts, hazelnut, etc.)
1/4 cup granulated sugar
1/4 cup brown sugar
4 ounces butter, at room temperature
dash of kosher salt

For the crust ~ Preheat the oven to 350 degrees. Place pie crust in a glass pie plate and add dry beans to
the top for a weight. Blind bake the pie crust for 10 minutes. Remove from the oven, remove beans or dry
weights and allow to cool.

For the filling ~ In a large, non-reactive bowl, gently mix together the sugar, flour, lemon juice, ginger,
and mint. Gently mix in the berries and allow to sit for at least 10 minutes. Pour into crust once crumble
topping is made.

For the crumble ~ In a mixing bowl, stir together the dry ingredients and then whisk in the butter. Y ou
can also use a fork or your fingers. Basically , as the name implies, you just want the mixture to be crumbly
looking. Place crumble mixture on top of berries in pie dish.

Bake in preheated oven for approximately 40 minutes, until golden brown.

02-05-2012

Coeur a la Creme with Raspberry and Grand Marnier Sauce

DECADENT…RICH…STUNNING 

I’m a huge Barefoot Contessa fan and for year’s I’ve wanted to make Ina’s Coeur a la Creme from Barefoot in Paris but I was afraid it would be too hard to reproduce this beautiful dessert. Luckily, I was wrong! This is probably one of the best desserts I have ever eaten and it was also one of the simplest to make. I think this is what I’ll be making for my birthday in the years to come. It truly tastes amazing and I hope you will try making this at home yourself.

It’s also the ultimate Valentines dessert, so WOW your significant other this year!

I thought I’d do a photo recipe first since this is such a neat dessert to make and then I’ll have the actual recipe listed out.

Tips:
*Allow cream cheese to come to room temperature. If not, your mold may not drain very well. I allowed mine to sit out for about 2 hours.
*This makes a lot but don’t be tempted to overfill the mold. You’ll want the cream to come to a flat top so you can maintain the heart shape once you invert it.
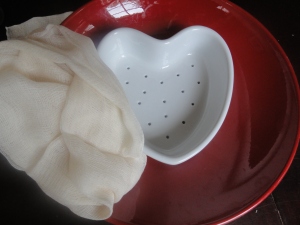
*You can find a heart shaped sieve and cheesecloth at your local cooking store. I got mine from Coastal Cupboard here in Mount Pleasant.

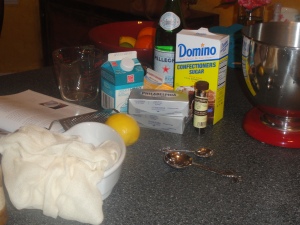
The ingredients are pretty simple…cream cheese, confectioner’s sugar, grated lemon zest, whole cream (just go for it and use the heavy full of calories stuff, some things you shouldn’t skimp on!), vanilla beans, and pure vanilla extract.

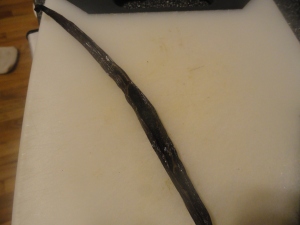
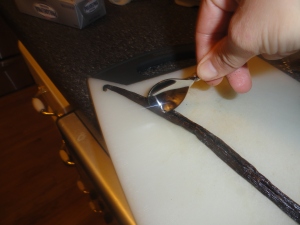
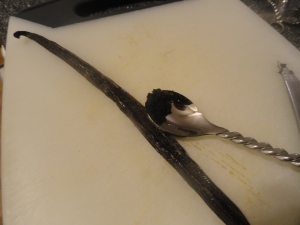
First off, you’ll want to scrape the vanilla bean so you’ll cut through one side of the bean, lengthwise. Then scrape with a spoon down the middle and sides.

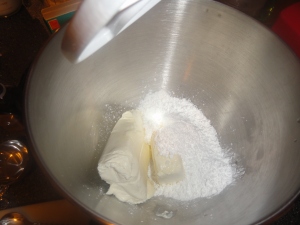
Next, start mixing the cream cheese and confectioner’s sugar…and make sure you start on low speed before going faster.  I started out on high speed and oh, the mess I got to clean up!

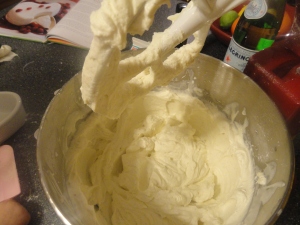
After beating for two minutes, change out the paddle attachment for the whisk (I forgot to do this) and beat in all the remaining ingredients until it looks like really thick whipping cream. Delish!!

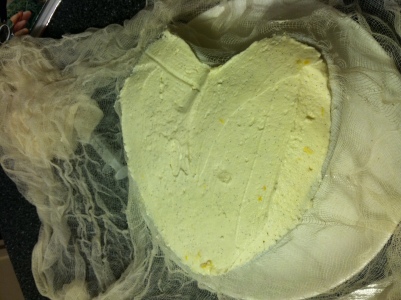
Now place your sieve dish onto a plate (to catch the drainage) and drape the cheesecloth over the sieve and plate. Pour the cream mixture into the sieve dish and level off so that you have a straight edge. Cover with the cheesecloth on top and refrigerate overnight.

And don’t worry if you’re thinking…how will I keep from eating it now? It makes a lot of cream so you’ll have plenty to taste even before it has set overnight! Trust me, there was a lot when I made it.

So the next day…you’ll make the raspberry sauce which is delightful all by itself.

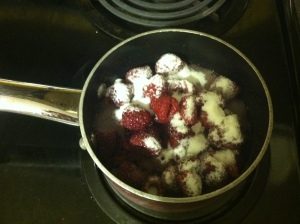
You’ll combine raspberries (I used frozen instead of fresh and it turned out just fine), water, and sugar and then boil to reduce.

For the jam, I used a homemade berry jam instead of just raspberry jam. I think any jam or preserve that is a berry will work fine. You’ll combine the reduced berries, berry jam, and grand marnier together in a food processor. Also, it makes a lot of sauce. You could half this raspberry sauce and still have plenty for the dessert. Or you could just make the whole amount and drink what you don’t use. I’m not kidding…the sauce is really tasty!

Once the sauce is made, you can chill it or you can just go ahead and plate the dessert…who cares if it gets a little warmed from the sauce?

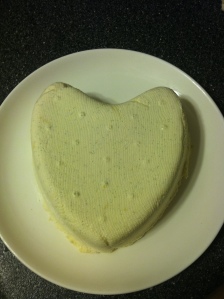
I was nervous to invert it, but it really came out fairly easy. Choose a plate with a curved lip so it will hold your sauce and after removing the cheesecloth on top, turn the mold over on top of the plate and slowly lift up. The creme will slide out and you’ll have a beautiful heart impression.

Now pour the sauce around the side, scatter some raspberries on top….and ENJOY!!!

Here is Ina’s Garten’s official recipe.

Coeur a la Creme with Raspberry and Grand Marnier Sauce
Copyright 2004, Ina Garten, Barefoot Contessa in Paris Cookbook and Food Network

Ingredients

12 ozs cream cheese, at room temperature
1 1/4 cup confectioners’ sugar
2 1/2 cups cold heavy cream
2 teaspoons pure vanilla extract
1/4 teaspoon grated lemon zest
Seeds scraped from 1 vanilla bean
Raspberry and Grand Marnier Sauce, recipe follows

Directions

Place the cream cheese and confectioners’ sugar in the bowl of an electric mixer fitted with the paddle attachment and beat on high speed for 2 minutes.  Scrape down the beater and bowl with a rubber spatula and change the beater for the whisk attachment.  With the mixer on low speed, add the heavy cream, vanilla, lemon zest, and vanilla bean seeds and beat on high speed until the mixture is very thick, like whipped cream,

Line a 7” sieve with cheesecloth so the ends drape over the sides and suspend it over a bowl, making sure that these is space between the bottom of the sieve and the bottom of the bowl for the liquid to drain.  Pour the cream mixture into the cheesecloth, fold the ends over the top, and refrigerate overnight.

To serve, discard the liquid, unmold the cream onto a plate, and drizzle Raspberry and Grand Marnier Sauce around the base.  Serve with raspberries and extra sauce.

For the Raspberry and Grand Marnier Sauce:

  • 1 half-pint raspberries
  • ½ c. sugar
  • 1 c. seedless raspberry jam
  • 2 T. orange-flavored liqueur

Place raspberries, sugar, and ¼ c. water in a small saucepan.  Bring to a boil, lower the heat, and simmer for 4 minutes.  Pour the cooked raspberries, the jam, and orange liqueur into the bowl of a food processor fitted with the steel blade and process until smooth.  Chill.

12-18-2011

Pasta e Fagioli Soup

If you’re anything like me, you are really beginning to feel overwhelmed with the thought that Christmas is only 1 week away! You are asking yourself…why did I sign myself up for so many activities and responsibilities this week?? Note to self for next year…say no to every invitation the week before Christmas!

So in case you are like me, you will probably appreciate an easy and affordable meal that is delicious and quick. The best part is you probably have most of the ingredients on hand so no need for another trip to the grocery store. Serve this with crusty french bread & a spicy Malbec, and you have a nice meal to calm your nerves during this hectic week.

This recipe is a variation of Giada De Laurentiis’ recipe…primarily, I added heirloom tomatoes I had canned this summer and increased the amount of bacon…because really, shouldn’t we all eat more bacon? I think so!!!

Price Note: This recipe serves 4-6 and if using homemade stock and canned tomatoes, the price per serving is less than $1 a person.

Ingredients
2 tsp finely chopped fresh rosemary
1 bay leaf
1 tablespoon olive oil
1 tablespoon butter
1 cup chopped onion
6-8 ozs bacon, chopped
4 garlic cloves, minced
4 cups homemade chicken stock
1 pint canned tomatoes or 1 can (14.5 ozs) diced tomatoes with Italian seasonings
2 cans (14.5 ozs) red kidney beans, rinsed and drained well
1 cup small to medium sized macaroni shells
kosher salt
fresh ground black pepper

Recipe
Heat the olive oil & butter in a dutch oven over medium heat. Add the onion and saute approximately 5 minutes, stirring frequently.  Add the chopped bacon and saute until pieces begin to crisp up, approximately 7 minutes. (Don’t fret if all the pieces don’t crisp up…only about 1/2 of mine were crisp by the end). Stir in the garlic and saute 1 more minute. Add the chopped rosemary, bay leaf, stock, tomatoes, beans, a dash of salt, and approximately 1/2 tsp fresh ground black pepper. Bring to a boil, then reduce heat to a simmer for 10 minutes, stirring occasionally.

In a blender or food processor, puree 1 1/2 cup of the soup mixture until smooth, then return the puree to the dutch oven. Increase heat to high and bring to a boil. Add in pasta then reduce heat to medium high. Stir occasionally and allow to boil for approximately 8 minutes, until pasta is tender but still firm to bit.

Season with fresh ground pepper and remove the bay leaf. I doubt you’ll need more salt since this has bacon.

Ladle up & Enjoy!

And good luck this week with your hectic schedule. I hope you make time for refreshing moments with deep breaths.

Jessica

12-01-2011

Greens, Greens, and MORE Greens

So, if you’ve read today’s earlier post, you’ll find that I have 4 different types of greens on hand at the moment!!!!! Think that is just a little too much? Well, I do! So I need your help – I’m not sure what all the different types of greens are – and am hoping someone out there might. I know I’ve got some Bok Choy in there but have never cooked with it and would love a recipe for that too.

Any takers on what this is?

I really want to figure out what the above green is…I am hoping you can cook it just like spinach or arugula. The leaves are more tender than traditional greens, such as collards, kale, etc.

On that note… During our winters in Charleston, we have greens in abundance but Southern Style collard greens are quickly becoming BORING! So, imagine what a glorious sight this book was at the library tonight!

Hopefully, I can find some good recipes in this book to share with you. And if you have any creative ways to use greens, please pass them along.

Your Faithful Greens Eater,
Jessica

12-01-2011

Greens for the land of Husker’s

Hello!!! I hope all of you had wonderful Thanksgivings and ate lots of healthy foods! My family and I went on a week long trip to visit extended family in the land of cornfields, pivots, and cows….aka…Nebraska. And oh yes, the land of Huskers!

We had such a fantastic time but I do have to say, eating healthy wasn’t #1 on my priority list. (Imagine at every meal….blueberry pie, pecan pie, cherry pie, not to mention – everyone’s favorite…pumpkin pie! And oh yes, in the land of Husker’s they categorize corn and potatoes as vegetables. Ha!) When I haven’t had greens in a while my body begins to crave them and sometimes that makes me go just a tad overboard. Hence, I now have 4 heads of various greens in my fridge, 10 tangerines on the counter, and a smothering of other fall veggies and fruits in my crisper!

Today’s recipe takes advantage of fall greens, creamy blue cheese grits, and very flavorful pork!

I am definitely not a photo genius but today’s pictures are on the very poor side. The grits came out a little runny when I made the recipe tonight (blaming husband for throwing away the recipe). I also hope that when you sit down to enjoy this meal you’ll have on lovely serenading music in the background. The background noise my husband and I enjoyed was our son yelling that it wasn’t time to eat but time for more FOOTBALL! Obviously, he still wishes to be back in Husker country.


I made the same recipe a few weeks ago with local greens and think the picture is a little better than tonight's.

All of the ingredients, except for the greens (because I was too impatient to wait a day), were local. Here are prices on how to serve up this winter goodness on a budget.

1 lb Local Pork Tenderloin: $10
20 ozs Fresh Spinach: $6
4 ozs Local Blue Cheese: $4
1 cup Local Milk: $1 (way overestimated)
1 1/2 cups Local Grits: $1
2 cups Homemade Chicken Stock: Free

Total Cost: $22/4 servings = $5.50 a person

Recipe

Ingredients for Pork Tenderloin
1 lb local pork tenderloin
1/2 cup lemon juice (2 lemons)
grated lemon zest from 1 to 2 lemons
1/4 cup olive oil
3 garlic cloves, minced
2 tsp fresh tarragon, chopped
3 tsp fresh rosemary, chopped
2 tsp dijon mustard

Recipe for Pork Tenderloin
In a small bowl, whisk together all the ingredients except for the tenderloin. Pour marinade into a gallon sized Ziploc bag and add tenderloin. Place in refrigerator for 4 – 8 hours.

When ready to cook, preheat oven to 400 degrees. Next, coat a shallow baking dish with olive oil and remove the tenderloin from the marinade. Throw marinade away and place tenderloin in baking dish. Bake in preheated oven for 15 – 20 minutes, until the internal temperature reaches 140 degrees. Remove from oven and place on a rectangle of aluminum foil, folding tightly all around to allow the pork to rest and become really juicy. Allow to sit for 10 minutes. When you cut into the pork, it will still be pink inside but is safe to eat. (Please disregard my pictures of my pork – my meat thermometer needed to be thrown away years ago – so I ended up overcooking mine. But even overcooked, it was still really flavorful. This marinade is my go-to marinade for pork tenderloin. You can really taste the lemon, mustard, and herbs in each bite.)

Ingredients for Grits
1 1/4 cups local grits
1 1/2 – 2 cups homemade chicken stock
1/2 – 1 cup water
1/2 cup local milk or cream
4 ozs local blue cheese

Recipe for Grits
Over medium heat, bring 1 1/2 cups stock and 1/2 cup water to a rapid boil. VERY SLOWLY whisk in the grits while stirring constantly. (This slow process and the constant stir is important to having no lumps in your grits). Lower the heat to medium low and simmer for 20 minutes, stirring every few minutes. Add in additional stock and/or water if consistency is not looking creamy enough. After those 20 minutes, you will add in 1/2 cup of the milk/cream and simmer for another 10 – 15 minutes. Once desired consistency is reached, remove from heat and stir in blue cheese. Season with kosher salt and fresh ground pepper as needed. (When cooking grits, don’t be afraid to add in additional liquid if your grits look a little too dry before they are finished cooking).

Ingredients for Greens
20 ozs fresh greens – spinach or arugula (see below)
2 garlic cloves, minced
olive oil

Recipe for Greens
Over medium heat, saute minced garlic in olive oil for 1 minute. Add fresh greens and a few drops of water. Allow to cook for approximately 5 minutes, until almost wilted through. Season with kosher salt and fresh ground pepper as needed.

(I tried this last week with collard greens and even though I sauteed for about 15 minutes they were still not tender enough, in my opinion. However, I think that if I had left out more of the ‘rib’ of the collards they would have been just fine. So you may want to give collard or kale a try in this recipe. If so, let me know how it turns out!)

Now serve up & ENJOY!!!

Jessica


11-14-2011

Shrimp Chowder

I have an admission I need to make….I can sometimes be a perfectionist…and I am always a procrastinator…so sometimes I have these ideas in my head of how I want my blog pages to be perfect but that takes time and then I get overwhelmed and decide to just ‘work on it tomorrow’ and then finally it’s two weeks later and I’ve barely updated any of the pages. So, its going to take me a while to get the pages and my blog to look like the picture in my head. But I’ve realized, that doesn’t mean I can’t keep posting. So… I’m going to try to add content to the pages each week or so and will try to write a new post each Sunday – Thursday evening. I hope you enjoy these recipes and thoughts in my head.

This next recipe…Shrimp Chowder is so yummy.

Don't I look divine?

The best part is that there is no milk  – none – and is still really creamy!  (The secret is in pureeing the starchy ingredients!)

NOTE: This recipe does require a bit of chopping veggies. If time allows, I suggest chopping earlier in the day so you don’t feel rushed when making this for dinner. I promise though, it is worth all the chopping!

Ingredients

1 lb local shrimp
1/2 to 1 cup chopped yellow onion
1 cup thinly sliced or chopped carrots
1 cup chopped red bell pepper
4 cloves garlic, chopped
3 cups frozen corn
2 lbs baby red potatoes
3 cups chicken stock, click here for a homemade stock recipe
2 tbsp chopped fresh cilantro
kosher salt
ground black pepper
crushed red pepper or ground cayenne pepper

Recipe 

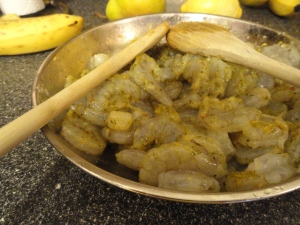
Preheat oven to 425 degrees. Peel shrimp and devein. Rinse and then dry off with paper towels. Place in small bowl and drizzle with olive oil and sprinkle with salt and pepper. If desired, add some dried spices to them…I used a french herb mix I had on hand. Place shrimp in fridge.

Fresh from the Charleston Harbor

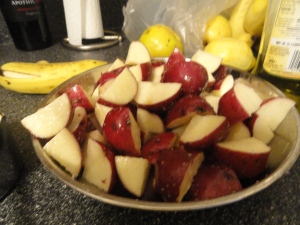
Place chopped potatoes in a small bowl and generously drizzle with both olive oil and kosher salt.

Roast potatoes in preheated oven for 25-40 minutes. While potatoes roast, use a food processor to puree 2 cups of corn with 1 cup chicken broth. Set this aside for later.

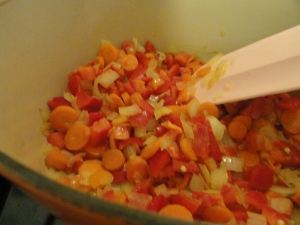
Next, heat 1-2 tsp of olive oil over medium heat and saute onion and carrots for 10 minutes, stirring often. Add bell pepper, sprinkle kosher salt over mixture and stir.

Let the mixture cook for a while so everything is very tender.

Cook another 5 more minutes and then stir in minced garlic to the mixture. Saute for 1 more minute, then stir in corn puree, remaining 1 cup of corn kernels, and 1 cup chicken stock. Turn the heat down to low.

At this point your potatoes are probably finished roasting…Here is what mine looked like…

Crunchy on the outside and soft on the inside

So now place 1/2 of those potatoes into a food processor and puree with the remaining 1 cup of chicken stock.

The puree will be very thick!

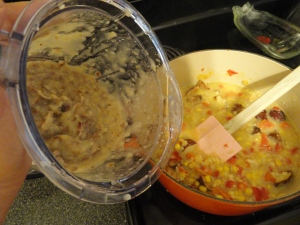
Pour the puree into the soup with the remaining roasted potatoes. (If desired, cut the remaining roasted potatoes into smaller bite size pieces with kitchen shears.) Add the chopped cilantro and season generously with kosher salt and fresh ground pepper. Allow to simmer on low heat. If your chowder is too thick, add water or chicken stock to reach desired consistency.

What the chowder will look like before the shrimp is added.

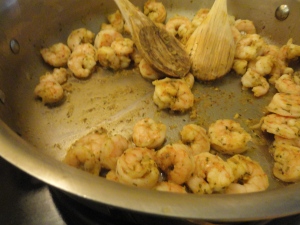
With the chowder slightly simmering, place a saute pan over medium heat and add approximately 2 tsp olive oil. Cook the shrimp in this pan until just cooked through – a few minutes on each side. The shrimp will end up cooking a bit more in the chowder so you don’t want them to get overdone in the saute pan.

Once the shrimp are cooked, transfer to the chowder and allow to simmer on low heat for 5 minutes. Taste soup again and season with salt and pepper as necessary.

Now it’s time to serve it up and enjoy!

I need to learn a new word for "Enjoy"!

I sprinkled cayenne pepper on mine as I love a kick. I hope you enjoy this dish as much as I do!

Jessica

PS…for budget calculations…this recipe comes out to $15-$20 to make and that includes shrimp at $7/lb. You should get 6 to 8 servings out of this recipe.

10-26-2011

The cost of a chicken

Last week at my local grocer I stood before the freezer door contemplating the cost of a whole chicken. It’s $1.69/lb at Harris Teeter but here it was approximately $4/lb. Wow! But I knew that if I got the chicken from HT I wouldn’t be able to eat it because I can’t stomach the thought of the conditions those chicken were raised in. Plus, I think ‘real’ farm raised chicken has more flavor and simply tastes better.

So I decided to buy that $4/lb chicken determined to make the most out of every ounce.

That brings me to share my love of quality chicken stock. Stock is so versatile. You can use it in homemade soups, rice, grits, sauces….just about anywhere. But, quality stock comes at a price. At the average grocery store it’s about $3.39 for 32 ozs. At the local grocer I frequent, there homemade chicken stock is $4.50 for 32 ozs. That may not be bad if I only used stock once in a while but I use way more than that. So below are my math calculations of how buying local can be done on a budget.

$13.62 – cost of local whole chicken compared to $6.50 of inferior whole chicken

What I got from it:

I was able to get 8 servings of meat from this chicken. We used in enchiladas and roasted chicken with veggies and mashed potatoes.

128 ounces of chicken stock. This equates to $18 of stock from the local grocer.

So I believe, I more than made up for the higher cost of the chicken!

My recipe for making chicken stock:

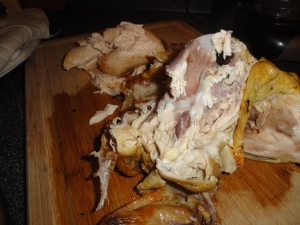
I personally like to roast my chicken first as I think it makes the meat more moist and its a lot easier to pull chicken off the bone than to ‘rummage’ through the stock for it. We have a beer can chicken pottery dish that allows you to fill the middle container with, you guessed it….beer, or any other juice/liquid you prefer. You roast this for approximately 75 minutes at 375 degrees. Once roasted, it should look like this…

Roasted Beer Can Chicken

You’ll next want to pull all the chicken off the bones and chop up, as needed, for other recipes.

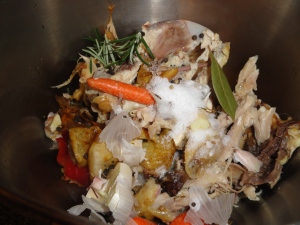
Now place all the bones and skin from the chicken carcass into a stockpot.  NOTE: You WILL NOT put the chicken into the stock.

And yes, you have to get your hands dirty! But I promise after the first time you do this, you’ll be ashamed of how much chicken you’ve wasted in the past! Or at least I was! I remember buying rotisserie chicken from the grocery store and only pulling meat from the breasts and then chucking everything else. Not smart!

Pull all the meat off the chicken

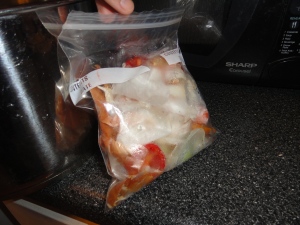
Next, you’ll want to add some veggies to impart extra depth.  You can either add in chopped up onions, garlic, carrots, mushrooms, etc. Or you can use leftover veggies scraps from your week of cooking. I save the peels and ends of veggies and store in the freezer in a Ziploc bag. Then, all I have to do is take out of the freezer and place into the stock pot. 

Vegetable peels and such stashed in the freezer

All these veggies will provide really great flavor

Next, add in whole peppercorns (ground pepper works too), a dash of salt, two or three bay leaves, and sprigs of fresh herbs (here I included rosemary).

The salt in this recipe is completely optional

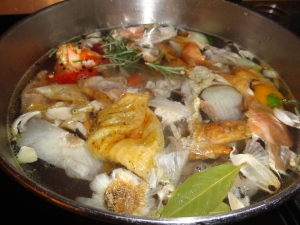
Fill the stock pot with water, leaving about three inches of space at the top. You can use a strainer to put the bones and veggies in but I’ve found this leaves less room for water, therefore, less stock in the end. On medium heat, bring to a slow simmer and reduce heat as necessary to keep this at a slow simmer. I’m constantly adjusting the temp so it will simmer and not boil. Maybe you’ll be better at this than me! Allow to simmer for approximately 1 to 3 hours – depending upon how much time you have. This is a good recipe for when you have nothing else going on and will be at home for a while.

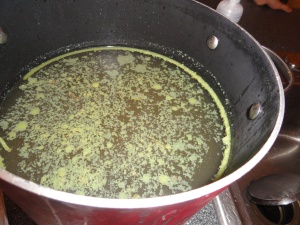
Once complete, strain off the liquid from the solids and then allow the stock to cool down. Once cool, place in the refrigerator overnight.

Leave just about this much room at the top

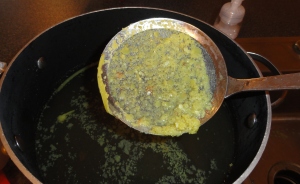
Here’s a picture of my chicken stock the next morning. The fat will rise to the top and you’ll want to skim that off.

Voila....chicken stock the next morning

Mesh strainer used to remove fat solids

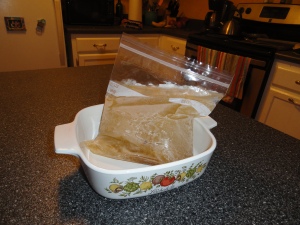
Now you are ready to put into containers and freeze! I use either quart size Ziploc bags or plastic containers, that can be frozen. I place anywhere from two to four cups in a container. Once you’ve gotten them labeled with the amount and the date, place in the freezer. The stock will store for 3 months in the freezer.

So the next time you need stock for homemade chicken noodle soup, it’s as easy as opening up the freezer door!

Frozen Chicken Stock

Also, don’t be afraid to start small in this recipe! Local chicken, in my opinion, is best but that doesn’t mean I’ve never used a rotisserie chicken from the grocery store for this recipe. You can use the bones the same way you would here. I would recommend though not using the skin as it will probably have lots of sodium from the seasoning they use on the chicken.

So make some stock and send me a picture!