07-20-2012

Peach Jam (no pectin)

It’s Canning Week at Simple Bites, so I’m linking up there and sharing a recent canning experience…

Having two young kids in our house = A LOT of jam & preserves consumption…

And while we could keep Smucker’s in business for the next eighteen years, I figure they’ll do just fine without us, and so, I make our own jam.  I much rather prefer the taste of my homemade preserves, and this way, I get to control what goes into them.

So a few weeks ago, I had a 1/2 bushel of organic peaches show up at the front door from our local grocer, love KTC!, and they were so yummy and delish, juicy and fresh!

But, I had no fruit pectin in the house and to be honest, I was bound & determined to not buy any. The first ingredient is typically maltdextrin or dextrose. Now granted, those are not the worst types of sugars to put into your body. But sometimes, a girl just wants it au natural! My grandma didn’t have artificial pectin to put in her peach jam, so I was pretty sure I could find a way to make do without. And girl, did I ever! You simply need time. Not something we always have on our side these days, but its pretty neat to make something the same way your grandparents did.

(And, I simply KNOW you are wondering…pectin is a naturally occurring substance found in fruit which is what makes the jam ‘set’ or reach the desired gelling consistency. Foregoing artificial pectin (for fruits with very low natural pectin) requires more cooking time prior to canning, but it also reduce the amount of sugar called for. So really, a plus plus scenario! No artificial crapness & less sugar!)

Okay, now back to reality and a simple recipe you can make at home yourself!

Peach Jam

Ingredients
1/2 bushel ripe peaches
3 cups organic sugar
1 cup honey

Yields ~ 9 half pints

First off, you’ll need to peel the peaches first and I promise, its not as hard as you may think. Simply score an ‘x’ on the underside of each knife and place into a roiling boil of water. After 30-60 seconds you’ll see the skin start to peel away from this ‘x’. Plunge peaches into ice cold water and the peel will be super easy to remove.

I need a video here to show you how easy it is, but just trust me!

Place quartered peaches into a food processor and blend until slightly pureed.

This is where I begin to fall in love, all over again, with my NINJA processor. Oh wait, I never fell out of love with it! It is my go-to kitchen appliance. I LOVE IT!!!

Now add your sugar & honey. And then pour yourself a glass of chilled white wine.

You’ll need the wine, since this next process takes an hour plus, but once again, worth it to not have to use store bought pectin. When you begin the process the consistency looks pretty soupy and runny.

Foam will begin to appear but after 15-20 minutes the foam will begin to disappear. You can also skim off if desired. That is too much work for me, so I just leave it!

In about an hour and fifteen minutes, you will have a thick and gelled consistency. Notice, it’s so thick that it has a hard time getting through the slots in the spoon. This is the consistency you are looking for.

Ladle into hot jars, leaving 1/4″ headspace. Cover with lids & rings. And then process for 10 minutes in a hot water bath.

For complete canning process tips, I recommend Ball’s online guide.

Thanks for humoring my no pectin kick! I definitely use pectin at times but sometimes it’s neat to do something the oooolllllld school way.

So what’s been your favorite canning recipe this summer?

Happy Canning!

Jess

~~~

Peach Jam
Yields ~ 9 half pints

Ingredients

1/2 bushel peaches
3 cups organic sugar
1 cup honey

Preparation

Fill a heavy stockpot with water and bring to a roiling boil. Nearby, place a large bowl filled half full with very cold ice water. Score an ‘x’ on the bottom of each peach.

Blanche peaches for 30-60 seconds in boiling water and then plunge into the ice water. Once slightly cooled, remove skin from peach, pull apart from the stone pit, and place into a food processor or blender. Once all peaches have been peeled, chop the peaches, in processor, until chunky or slightly pureed.

Place chopped peaches into a heavy stockpot, adding sugar and honey. Bring to a slow boil over medium heat. Reduce heat to medium low and simmer for approximately one hour and fifteen minutes; until jam has reach desired gelling ‘set’ consistency. Stir every few minutes while it cooks. Also, approximately ten to fifteen minutes into the simmering process, you can (optional) remove foam from the top of mixture with a metal slotted spoon.

Once desired consistency is reached, ladle hot jam into hot, sterilized half-pint canning jars, leaving a 1/4 inch headspace.  Wipe jar rims and cover with lids & rings. Process filled jars in a boiling water bath for 10 minutes.

*Note* I was extremely exhausted when I began this recipe and ended up only getting 1/2 of the peaches peeled and chopped before calling it a night. To retain the bright peach color overnight, I put a few teaspoons of asorbic acid (vitamin C powder) in with the pureed mix and refrigerated until I could begin again the next morning. I am happy to report, the color stayed beautiful and the taste was unaltered. 

07-09-2012

Tomato, Caramelized Onions, and Gorgonzola Pie

Happy (late!) 4th of July!! I hope everyone had a wonderful holiday and indulged in lots of food, laughter, and relaxation. Fisherman was on vacation and we had a wonderful Staycation. I feel like it was Christmas in July considering the copious amounts of food I ate over the last week.

So what have I been eating??? I’m so glad you asked! Fresh mahi mahi, roasted corn salad, pasta salad, BBQ, hmmmm….there isn’t a lot I haven’t consumed this past week. But my favorite dish was a Tomato Gorgonzola Pie that I adapted from a Gourmet Magazine Cookbook.

I probably shouldn’t admit this, since I am so proud to be Southern, but up until I made this tomato pie, I had never eaten one in my life. Crazy, isn’t it! And there’s no holding me back now.

The best part was that it took me no more than 45 minutes, start to finish. That includes the lets find where I hid the gorogonzola in the fridge and let me go pick some tomatoes and get side tracked into watering the garden. Sorry, this may be a long blog post….its just been a while since I’ve posted and I have all these thoughts I want to share with ya’ll, but I get distracted with kids and life and blah blah, okay back to the pie…

~~~

So to start, you’ll need a pie crust, Gorgonzola cheese, onions, and tomatoes….pretty simple, right!

After placing crust into your pie pan, place pie weights…or dry beans…onto the pie with aluminum foil to keep the middle of the pie from rising while you pre-bake the crust. You need to bake the crust beforehand since you only put it under a broiler once the ingredients are added.

Add some olive oil and your onions into a heavy pan and start the caramelizing process. I just LOOOVE caramelized onions! Even Fisherman loves & appreciates them and he isn’t the biggest foodie on the block.

Also, don’t be afraid to try caramelizing red onions. I did half white & half red the second time I made this and they tasted great. (And yes, I did make & eat this pie TWICE in the past week! Shows you how good it is!)

Good advice for caramelizing onions is to turn your back to them. Find something else to do, you don’t need to stir constantly, just every few minutes.

Now see all those brown bits of good onion residue? Scrape those bad boys up and stir in with the onions. They have all sorts of good flavor! And yep, this picture was from Pie #1 when I only used white onions.

Your piecrust should now be finished baking, so place caramelized onions in first…

…then your cheese, tomato, cheese layers…

…broil for a few minutes until cheese slightly browns, garnish with fresh basil and…

…Voila…Eat that pie up!!!

I hope you like as much as I did!!!

Jessica

Tomato, Caramelized Onions, and Gorgonzola Pie

Ingredients
1 9″ prepared pie crust
2 large onions (yellow or red), very thinly sliced
1 cup crumbled Gorgonzola cheese
5 medium sized ripe tomatoes, thinly sliced
Handful of fresh basil for garnishing

Preheat oven to 375 degrees.  Place pie crust into a glass pie pan. Line pie pan with aluminum foil and fill with pie weights/dried beans/or raw rice. Bake approximately 20 minutes until pasty is pale golden brown around rim. Remove weights and bake another 8 minutes until golden brown all over. If edge of crust looks to dark, place tin foil around the edges for remaining bake time.

While crust is baking, heat a few tablespoons of olive oil in a heavy skillet over medium heat and cook onions for approximately 20-25 minutes until they are caramelized in color. Sprinkle the onions with kosher salt a few times while cooking and stir every few minutes. As the onions begin to soften and brown, there will be residue at the bottom of the pan; stir these brown goodie bits into the onions.

Preheat oven broiler.

Spread caramelized onions over bottom of pie shell and top with 3/4 cup of the cheese. Arrange tomatoes, slightly overlapping, in circles over the cheese. Sprinkle tomatoes with kosher salt and fresh ground black pepper. Sprinkle remaining 1/4 cup of cheese over the tomatoes and drizzle a tablespoon of olive oil over the top.

Broil the pie until the cheese slightly browns, approximately 3 to 4 minutes. Garnish with fresh basil if desired.
06-13-2012

The Tomato Sandwich

Today, I pay homage to my most favorite food. One day, hopefully long away in the future, when I breathe my last breath, I pray I have just finished A TOMATO SANDWICH, made by Southern hands.

I simply think there is no better creation than some fine mayo slathered on some thick bread loaded down with too many to count slices of tomatoes; and of course, lets not forget….way too much salt & pepper on those things. Hmmm….

Fisherman looks on in disbelief as I eat my piece of heaven and cannot believe there are two tomatoes worth of slices on that bad boy, or that there is no bacon or lettuce anywhere to be found. OF COURSE THERE ISN’T. BLT’s are good – but they aren’t a tomato sandwich. There is a vast difference. And in my mind, to be truly Southern – 1. You need to be born in the south and 2. You need to relish a pure & simple tomato sandwich.  (I can’t wait to hear your thoughts on my Southern comments!!!) 😉

So how do I create such a delectable sandwich?

First, you must start with the proper ingredients….good, real Mayo….not Miracle Whip…the real deal.

Second, thick crusty bread…think day old bread to sop up all that juice.

Third, so many tomato slices that they are falling out of the sandwich.

And lastly, a VERY generous helping of kosher salt & fresh ground pepper. (Yes, I will probably pass from too high blood pressure, but life without some salt would be very sad indeed.)

You’ve got to sprinkle the salt & pepper two times on each side to reach the desired amount. And getting the spice all over the bread adds some special umpf!

Now eat that summer goodness and wash it all down with some Southern style sweet tea.

Love ya’ll,

Jessica

P.S….don’t even think about trying this in the winter or any other time when fresh off the vine tomatoes aren’t available!

06-09-2012

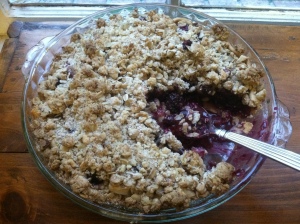
Blackberry and Blueberry Crumble Pie

I just have to say…I LOVE berry crumbles! They have to be one of the easiest desserts to make…Whip together a few ingredients, and voila! Today I used fresh from the farm berries but even in winter, crumbles taste great with frozen berries.

To try something different though, I added a pie crust which soaked up some of the juices and was still flaky and delightful.  And the ginger in this recipe adds a spicy kick for a little something more.  Hmmm…life is good!

Recipe Cost
Since most of the ingredients are on stock in my pantry, I only added the price of berries and a pie crust to come up with a total of $8 for this amazingly delish dessert. To buy a dessert this yummy at your local bakery, you’d spend close to $20. Quite the savings to make at home!

Ingredients
For the Pie Crust:
Knock yourself out making one from Grandma’s scratch recipe, or do as I do and buy refrigerated dough. One of these days, I’m going to figure out how to make a crust but for the moment, I am pretty intimidated on that front and blame it on my baking roller.  If you are just as intimidated with the daunting task of dough rolling, make sure to buy refrigerated not frozen pie crusts. Frozen pie crusts in those tin pans produce mushy crust; whereas a refrigerated one placed in your glass pie plate will produce a flaky and delectable crust.

For the Filling:
4 cups fresh blackberries and/or blueberries
1/2 cup sugar
1/4 cup flour
2 teaspoons lemon juice (~1/2 of a lemon)
1/2 Tbsp fresh minced ginger or 1 1/2 tsp grated ginger
1 Tbsp finely chopped fresh mint

For the Crumble:
1 cup flour
3/4 cup old fashioned oats
1/4 cup coarsely chopped hard nuts (almonds, walnuts, hazelnut, etc.)
1/4 cup granulated sugar
1/4 cup brown sugar
4 ounces butter, at room temperature
dash of kosher salt

For the crust ~ Preheat the oven to 350 degrees. Place pie crust in a glass pie plate and add dry beans to the top for a weight. Blind bake the pie crust for 10 minutes. Remove from the oven, remove beans or dry weights and allow to cool.

Don’t do like me and forget to add the weights/dry beans…the middle will puff up and the sides collapse into the middle!

For the filling ~ In a large, non-reactive bowl, stir together the sugar, flour, lemon juice, ginger, and mint. Next, gently mix in the berries and allow to sit for at least 10 minutes.

Pour into crust once crumble topping is made.

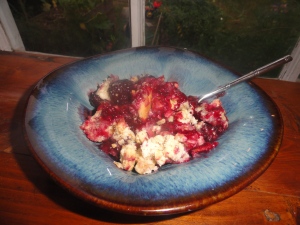
The berries took on a shiny sheen all by themselves. No matter the lighting, the photo looked like steam was rising.

For the crumble ~ In a mixing bowl, stir together the dry ingredients and then whisk in the butter.

You can also use a fork or your fingers. Basically, as the name implies, you just want the mixture to be crumbly looking. Place crumble mixture on top of berries in pie dish.

Bake in preheated oven for approximately 40 minutes, until golden brown.

ENJOY!!!

XoXo, Jess

Printable Recipe

Ingredients
For the Pie Crust:
9″ refrigerated pie crust

For the Filling:
4 cups fresh blackberries and/or blueberries
1/2 cup sugar
1/4 cup flour
2 teaspoons lemon juice (~1/2 of a lemon)
1/2 Tbsp fresh minced ginger or 1 1/2 tsp grated ginger
1 Tbsp finely chopped fresh mint

For the Crumble:
1 cup flour
3/4 cup old fashioned oats
1/4 cup coarsely chopped hard nuts (almonds, walnuts, hazelnut, etc.)
1/4 cup granulated sugar
1/4 cup brown sugar
4 ounces butter, at room temperature
dash of kosher salt

For the crust ~ Preheat the oven to 350 degrees. Place pie crust in a glass pie plate and add dry beans to
the top for a weight. Blind bake the pie crust for 10 minutes. Remove from the oven, remove beans or dry
weights and allow to cool.

For the filling ~ In a large, non-reactive bowl, gently mix together the sugar, flour, lemon juice, ginger,
and mint. Gently mix in the berries and allow to sit for at least 10 minutes. Pour into crust once crumble
topping is made.

For the crumble ~ In a mixing bowl, stir together the dry ingredients and then whisk in the butter. Y ou
can also use a fork or your fingers. Basically , as the name implies, you just want the mixture to be crumbly
looking. Place crumble mixture on top of berries in pie dish.

Bake in preheated oven for approximately 40 minutes, until golden brown.

04-30-2012

Do you CSA? Part 2

In case you missed my post, Do you CSA, click here, so the following will make more sense!

So I’ve finally made my decision…shopping at the Farmer’s Market from a plethora of vendors is just too much fun to pass up!

I know I could still buy from other vendors even if I have a CSA, but I’m on a budget here. If I spend my $20 with one farmer, then I’ll not have any MULA for the golden beets from Owl’s Nest or no fresh berries from Maple Ridge Farms. And it’s so much fun, each week, to speak with the different farmers, buy some baby crookedneck squash here and a fresh off the vine tomato there. (No, its not tomato season here at all, I am just anxiously awaiting the day!)

Thank you to EVERYONE that shared your comments, your thoughts, and feedback. I thought everyone would push me to the CSA so it was great to see all the varied opinions.

I’ve been working on recipes a lot lately so hopefully I can get some up soon. Think…swiss chard and ground pork stew, chicken & pork bolognese, quiche, pesto….hmmm…I love me some food.

Have a great day!

Jessica

04-18-2012

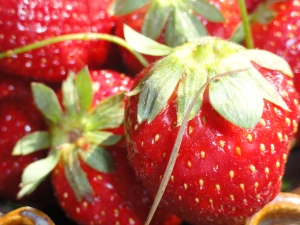
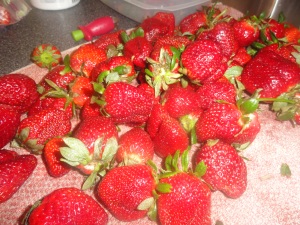
What to do with all these strawberries???

(You’ll probably think I’m crazy after you read the following first sentence, or maybe you already think I am!, but I promise….there are many uses for strawberries!)

I just got back from picking 35 pounds of strawberries!!!!!! Yes, I’m sure you are thinking….what in the world would make someone pick that many and how in the world will she eat them all???

Well, here goes… Last summer we picked about 20 pounds of strawberries and they lasted us about 8 months. So this year, I’m trying to get enough to last us the whole year through. Think I have enough??

The reason I do this, is because U-Pick farms have strawberries at a much lower price, you get more nutrients from the fruit because there is minimal time from farm to table, you get dirt in your toes (have you figured out yet that I really like dirt?), and it provides a great outdoor activity for the kids!

So how much lower is the price?? Maple Ridge Farms, the U-pick farm I LOVE, has their strawberries at $1.50/pound and if you buy more than 20 pounds, the price is $1.25/pound! So its’ a no-brainer for me! Pick away!!

But what to do with all of these strawberries? By the time we get home I am seeing red, red, and more red, and I begin to ponder…maybe I really am crazy?

#1. Berry Jam…the best part about making jam is that the berries do not have to be fresh, you can use frozen. So just freeze, see below for notes on that, and then save making jam for a day when you have more time.

#2. Fruit Smoothies…we make fruit smoothies all the time. We just throw in whatever berries and fruit we have on hand, add some yogurt, and 100% juice, and puree away.

#3. Eat them frozen, straight from the bag…(blaming a little sister for going through the strawberries so fast last year – she  probably ate 2 gallon size bags by herself in the 6 weeks she lived with us!)

#4. Let defrost and eat with a fork….yes, they will be mushy and your kids might protest but why not start early teaching kids about the seasonality of eating local produce and if they want to eat strawberries in December, then there has to be a compromise….they’ll still get that same flavor but the consistency will be different.

#5. Berry Muffins

#6.  Top homemade Belgium waffles with them and icecream

#7. Cobbler, Pies, Scones, the dessert list could go on & on

#8. Strawberry soup perhaps??? Not really sure of any other ideas at this point!

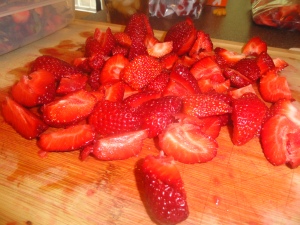
To preserve the fruit, you first rinse off in a cold water bath in your sink, then you hull them with a magic strawberry huller and then slice to desired size and place in a gallon sized ziploc freezer bag.

And yes, we do have a stand alone freezer in our garage that we use for storage.

If you live in the Lowcountry and have a strawberry craving, I suggest Maple Ridge Farms in Canadys, SC…they have the perfect soil for growing sweet fruit and their strawberries are not dusty & dirty because they do not have the sandy soil you find on the islands around Charleston. The farm is in Colleton County, about an hour drive from Charleston, but I think its well worth it. Fritz and his wife are so down to earth and enjoy talking to you about how they farm the land.

The strawberries should be around for another month and at this point, near the end of the season, they are sweeter!

Other U-Pick Farms in the Charleston area…Ambrose Farms and Boone Hall Plantation.

For U-Pick Farms throughout the US, check out the Pick Your Own website.

You may have decided I’m crazy for picking 35 pounds, but hopefully this post will inspire you to pick some berries this summer!

And if you have any suggestions of how I can use up all these strawberries, I’d love to hear!!!

Happy Fruit Eating Season!

Jessica

04-05-2012

April is Eat Local Month

Looking to do something new with the family this month or a fun event centered around really fresh food? Then check out Lowcountry Local First’s Eat Local Month. From farm tours to an all you should eat breakfast, there is something for everyone. Take the kids to visit a farm and see a chicken up close and personal or enjoy a date with your significant other at the Chef’s Potluck. All of these events promise lots of fun, a bit of education, and perhaps – even some dirt on your toes.

I volunteer with Lowcountry Local First and simply love all the work they do. They obviously keep it all local!

If you plan to be at any of these events, please let me know. I know I definitely will be at Chef’s Potluck ~ Jessica

03-28-2012

Pork Tacos

Lately its been Mexican dishes coming out the wazoo at my house! We hosted a wedding shower at the house for dear friends and made pork & chicken tacos with a whopping 8.5 pounds of meat! I obviously missed the memo that there were only 15 people coming! So as you can imagine, we’ve had lots of tacoy type dishes for the last week.

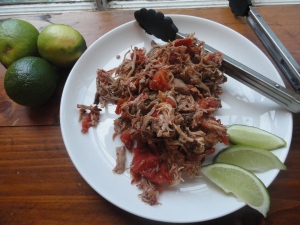
Here is the base recipe I used for the pork…I cooked the chicken in a separate crock pot and just altered the amount of ingredients. The meat was very tasty, juicy, and well flavored.
Ingredients
6-8 pound boston butt (about the smallest you can find these is normally7 lbs.)
3 tbsp chili powder
3 tbsp dried oregano
3 tbsp unsweetened cocoa powder
2 tsp kosher salt
3 cups salsa
2 bay leaves

Directions
Place chili powder, oregano, cocoa powder, salt, salsa, and bay leaves into the bottom of crockpot and stir to mix. Remove excess fat from pork and rinse off. Place pork on top of the liquid mixture in crockpot. Cook for approximately 8 hours on low heat. When the pork is falling apart and is extremely ford tender, it easily pulls apart, it is finished.

Discard liquid from crockpot and pull pork apart with two forks and don’t be afraid to use your hands if necessary. I completed this task on my cutting board but you might find it easier to do it directly in the crockpot. Just make sure you discard the liquid prior to this task! You could save the liquid as a sauce for the tacos, but I found it to be greasy from all the pork drippings and just too much liquid.
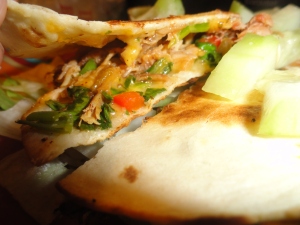
Heap up your tacos with plenty of pork and lots of side fixings…salsa, limes, cilantro, cheese, & guacomole.

Enjoy!

Jess

I forgot to take a picture of an actual taco with all that meat, but here it is in a quessadila.

03-10-2012

Keegan-Filion Farm Meat Share

A good friend of ours, author Aaron Newton of A Nation of Farmers, has a rule for his family. They only eat meat if they know the first name of the person who raised the animal. When he first shared this new way of eating, I thought – wow, what a great idea…but is it all that realistic? Is it really possible if you’re not extremely entrenched in your local farming community? I could understand the desire but I just wasn’t sure about the realistic possibilities.

I’m pretty lucky and blessed that my Fisherman Husband catches all the seafood we consume but what opportunities were there for meat consumption from local farmers? A few local cattle farms offer meat shares or packages but these were only for beef. And while I love beef, I have to admit that I always dreamed of a farm that could offer a variety of meat choices.

Luckily for me, my dream came true! Keegan-Filion Farm in Walterboro, SC began an assorted meat share program this January which runs similar to a CSA. Each month you receive 20 pounds of various cuts of pork, beef, and chicken. The meat is pasture raised, antibiotic free, and you can feel good knowing it has been humanely processed.

They have 3 and 6 month shares available. The 6 month share comes out to $110/month which is only $5.50/lb. I think this is a fantastic price! You can get to know the farmers, Annie & Marc, visit their farm, read their newsletters, etc. It makes you feel great to support a local farm, it allows you to have healthier cuts of meat for better health, and it gives you a clear conscious that the animals had a good life. If you don’t believe me on the importance of a good life for animals, watch Food, Inc. and then go visit Keegan-Filion or another local farm. It’ll make you see the drastic difference in how these animals are treated. And, if that wasn’t enough, the meat simply tastes better. It has more flavor and depth than anything you’ll find at the grocery store.

We got quite the assortment in our share this month…beef roast, pork chops, ground pork, whole chickens, kielbasa, flank steaks, ground beef, and the list goes on!

Click here to learn more or visit their website.

If you are interested in other Lowcountry livestock farms click here. Cordray Farms in Ravenel, SC offers an 1/8 side of beef share which is a great way to get about 50 pounds of beef at a very good price. The smallest size many farms offer is 1/2 a side of beef, so the 1/8 of a share is a great option.

Don’t live in the Lowcountry and interested in finding livestock farms near you? Eat Wild’s website includes 1,300 farms throughout the US and Canada, so there is a good bet you could find a local farm in your area.

So here’s to more of us eating meat from farmer’s we know on a first name basis!

Jess

02-05-2012

Coeur a la Creme with Raspberry and Grand Marnier Sauce

DECADENT…RICH…STUNNING 

I’m a huge Barefoot Contessa fan and for year’s I’ve wanted to make Ina’s Coeur a la Creme from Barefoot in Paris but I was afraid it would be too hard to reproduce this beautiful dessert. Luckily, I was wrong! This is probably one of the best desserts I have ever eaten and it was also one of the simplest to make. I think this is what I’ll be making for my birthday in the years to come. It truly tastes amazing and I hope you will try making this at home yourself.

It’s also the ultimate Valentines dessert, so WOW your significant other this year!

I thought I’d do a photo recipe first since this is such a neat dessert to make and then I’ll have the actual recipe listed out.

Tips:
*Allow cream cheese to come to room temperature. If not, your mold may not drain very well. I allowed mine to sit out for about 2 hours.
*This makes a lot but don’t be tempted to overfill the mold. You’ll want the cream to come to a flat top so you can maintain the heart shape once you invert it.
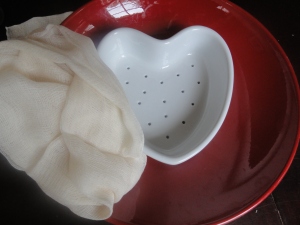
*You can find a heart shaped sieve and cheesecloth at your local cooking store. I got mine from Coastal Cupboard here in Mount Pleasant.

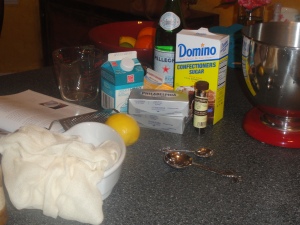
The ingredients are pretty simple…cream cheese, confectioner’s sugar, grated lemon zest, whole cream (just go for it and use the heavy full of calories stuff, some things you shouldn’t skimp on!), vanilla beans, and pure vanilla extract.

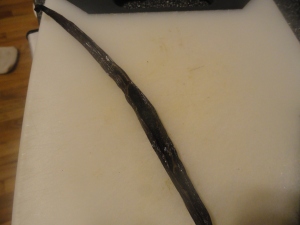
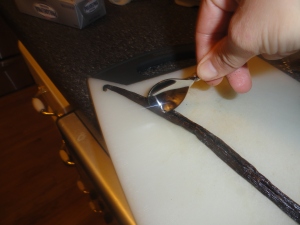
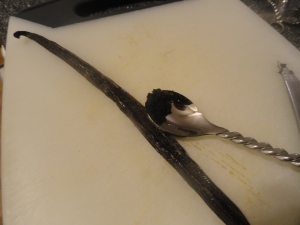
First off, you’ll want to scrape the vanilla bean so you’ll cut through one side of the bean, lengthwise. Then scrape with a spoon down the middle and sides.

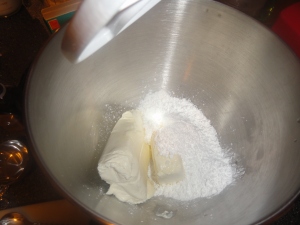
Next, start mixing the cream cheese and confectioner’s sugar…and make sure you start on low speed before going faster.  I started out on high speed and oh, the mess I got to clean up!

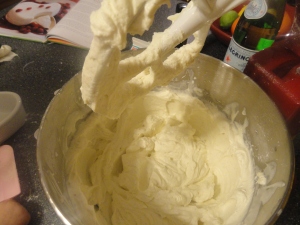
After beating for two minutes, change out the paddle attachment for the whisk (I forgot to do this) and beat in all the remaining ingredients until it looks like really thick whipping cream. Delish!!

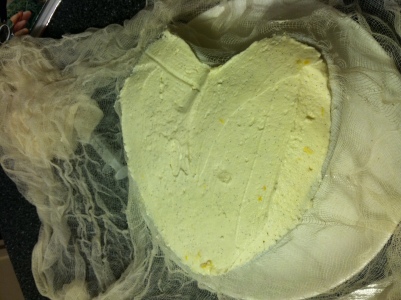
Now place your sieve dish onto a plate (to catch the drainage) and drape the cheesecloth over the sieve and plate. Pour the cream mixture into the sieve dish and level off so that you have a straight edge. Cover with the cheesecloth on top and refrigerate overnight.

And don’t worry if you’re thinking…how will I keep from eating it now? It makes a lot of cream so you’ll have plenty to taste even before it has set overnight! Trust me, there was a lot when I made it.

So the next day…you’ll make the raspberry sauce which is delightful all by itself.

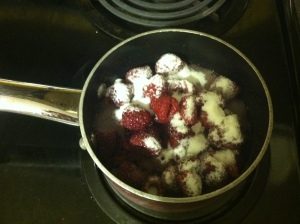
You’ll combine raspberries (I used frozen instead of fresh and it turned out just fine), water, and sugar and then boil to reduce.

For the jam, I used a homemade berry jam instead of just raspberry jam. I think any jam or preserve that is a berry will work fine. You’ll combine the reduced berries, berry jam, and grand marnier together in a food processor. Also, it makes a lot of sauce. You could half this raspberry sauce and still have plenty for the dessert. Or you could just make the whole amount and drink what you don’t use. I’m not kidding…the sauce is really tasty!

Once the sauce is made, you can chill it or you can just go ahead and plate the dessert…who cares if it gets a little warmed from the sauce?

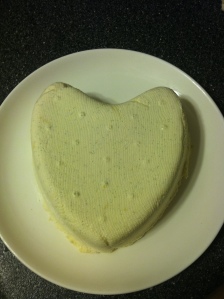
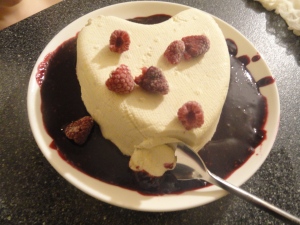
I was nervous to invert it, but it really came out fairly easy. Choose a plate with a curved lip so it will hold your sauce and after removing the cheesecloth on top, turn the mold over on top of the plate and slowly lift up. The creme will slide out and you’ll have a beautiful heart impression.

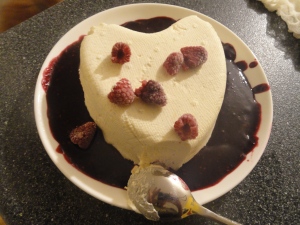
Now pour the sauce around the side, scatter some raspberries on top….and ENJOY!!!

Here is Ina’s Garten’s official recipe.

Coeur a la Creme with Raspberry and Grand Marnier Sauce
Copyright 2004, Ina Garten, Barefoot Contessa in Paris Cookbook and Food Network

Ingredients

12 ozs cream cheese, at room temperature
1 1/4 cup confectioners’ sugar
2 1/2 cups cold heavy cream
2 teaspoons pure vanilla extract
1/4 teaspoon grated lemon zest
Seeds scraped from 1 vanilla bean
Raspberry and Grand Marnier Sauce, recipe follows

Directions

Place the cream cheese and confectioners’ sugar in the bowl of an electric mixer fitted with the paddle attachment and beat on high speed for 2 minutes.  Scrape down the beater and bowl with a rubber spatula and change the beater for the whisk attachment.  With the mixer on low speed, add the heavy cream, vanilla, lemon zest, and vanilla bean seeds and beat on high speed until the mixture is very thick, like whipped cream,

Line a 7” sieve with cheesecloth so the ends drape over the sides and suspend it over a bowl, making sure that these is space between the bottom of the sieve and the bottom of the bowl for the liquid to drain.  Pour the cream mixture into the cheesecloth, fold the ends over the top, and refrigerate overnight.

To serve, discard the liquid, unmold the cream onto a plate, and drizzle Raspberry and Grand Marnier Sauce around the base.  Serve with raspberries and extra sauce.

For the Raspberry and Grand Marnier Sauce:

  • 1 half-pint raspberries
  • ½ c. sugar
  • 1 c. seedless raspberry jam
  • 2 T. orange-flavored liqueur

Place raspberries, sugar, and ¼ c. water in a small saucepan.  Bring to a boil, lower the heat, and simmer for 4 minutes.  Pour the cooked raspberries, the jam, and orange liqueur into the bowl of a food processor fitted with the steel blade and process until smooth.  Chill.