04-19-2012

Do you CSA?

Hello Father,

I have a confession. I love gardening, I love farmers, I love dirt. But I just can’t imagine joining a CSA. I want freedom of choice, to pick my veggies just the way I want, when I want. You see, God, signing up for a CSA requires commitment. And, I have come to realize that I don’t necessarily enjoy commitments. (I can’t even keep up with once a week pilates.) I do go to the Farmer’s Market faithfully and I shop at the local grocer each week. But I still feel unfaithful to the farmer by not participating in a CSA. Does my selfishness of wanting to choose my veggies each week mean I’m not really supporting the farmer? That rain or shine, drought or flood, he’ll have money to keep his farm afloat no matter how the produce turns out?

Help me out,

Jessica

****

I really am serious. Even though I encourage all my friends to participate in one, I have a huge commitment issue with CSA’s (Community Supported Agriculture). And until this past Tuesday I kept telling myself that if there was a farm that had a pick-your-own veggie CSA that I would participate. But then you find that ‘answer’ and realize, you’re still hesitant.

You see, I love going to the different vendors at the market and choosing a tomato here, a carrot bunch there, and a pile of lettuce greens at the next one. And my worry is this, if I commit to spending my $20/week with only one vendor – will I regret it? I definitely won’t regret the quality – its the best there is, but will I regret not getting to spend my $ with lots of vendors in lieu of spending it with one?

What do you think? Do you like your CSA? Do you have one where you choose your veggies or do you get an exciting surprise bag each week? Should I just go for it and try it out? And if you are a farmer…I’d love to know your thoughts on CSA participants versus farmer’s market buyers? Do you get as much $ from going to the Farmer’s Market or would you rather have it all in CSA participants?

Thanks for helping me with my dilemma! Jessica

03-28-2012

Pork Tacos

Lately its been Mexican dishes coming out the wazoo at my house! We hosted a wedding shower at the house for dear friends and made pork & chicken tacos with a whopping 8.5 pounds of meat! I obviously missed the memo that there were only 15 people coming! So as you can imagine, we’ve had lots of tacoy type dishes for the last week.

Here is the base recipe I used for the pork…I cooked the chicken in a separate crock pot and just altered the amount of ingredients. The meat was very tasty, juicy, and well flavored.

Ingredients
6-8 pound boston butt (about the smallest you can find these is normally7 lbs.)
3 tbsp chili powder
3 tbsp dried oregano
3 tbsp unsweetened cocoa powder
2 tsp kosher salt
3 cups salsa
2 bay leaves

Directions
Place chili powder, oregano, cocoa powder, salt, salsa, and bay leaves into the bottom of crockpot and stir to mix. Remove excess fat from pork and rinse off. Place pork on top of the liquid mixture in crockpot. Cook for approximately 8 hours on low heat. When the pork is falling apart and is extremely ford tender, it easily pulls apart, it is finished.

Discard liquid from crockpot and pull pork apart with two forks and don’t be afraid to use your hands if necessary. I completed this task on my cutting board but you might find it easier to do it directly in the crockpot. Just make sure you discard the liquid prior to this task! You could save the liquid as a sauce for the tacos, but I found it to be greasy from all the pork drippings and just too much liquid.

Heap up your tacos with plenty of pork and lots of side fixings…salsa, limes, cilantro, cheese, & guacomole.

Enjoy!

Jess

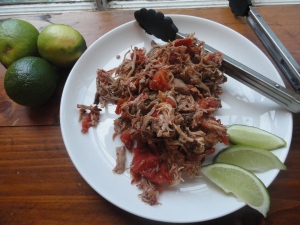
I forgot to take a picture of an actual taco with all that meat, but here it is in a quessadila.

02-05-2012

Coeur a la Creme with Raspberry and Grand Marnier Sauce

DECADENT…RICH…STUNNING 

I’m a huge Barefoot Contessa fan and for year’s I’ve wanted to make Ina’s Coeur a la Creme from Barefoot in Paris but I was afraid it would be too hard to reproduce this beautiful dessert. Luckily, I was wrong! This is probably one of the best desserts I have ever eaten and it was also one of the simplest to make. I think this is what I’ll be making for my birthday in the years to come. It truly tastes amazing and I hope you will try making this at home yourself.

It’s also the ultimate Valentines dessert, so WOW your significant other this year!

I thought I’d do a photo recipe first since this is such a neat dessert to make and then I’ll have the actual recipe listed out.

Tips:
*Allow cream cheese to come to room temperature. If not, your mold may not drain very well. I allowed mine to sit out for about 2 hours.
*This makes a lot but don’t be tempted to overfill the mold. You’ll want the cream to come to a flat top so you can maintain the heart shape once you invert it.
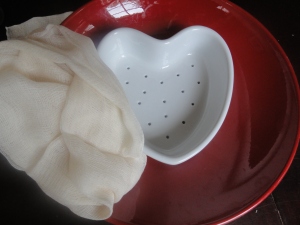
*You can find a heart shaped sieve and cheesecloth at your local cooking store. I got mine from Coastal Cupboard here in Mount Pleasant.

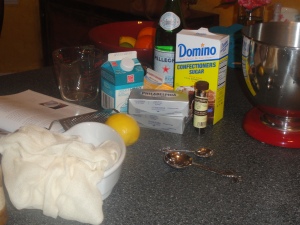
The ingredients are pretty simple…cream cheese, confectioner’s sugar, grated lemon zest, whole cream (just go for it and use the heavy full of calories stuff, some things you shouldn’t skimp on!), vanilla beans, and pure vanilla extract.

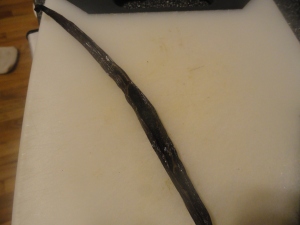
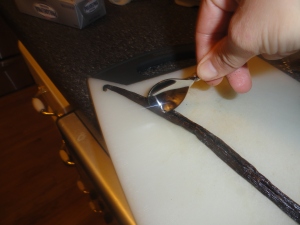
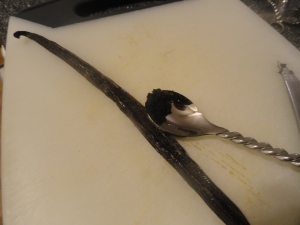
First off, you’ll want to scrape the vanilla bean so you’ll cut through one side of the bean, lengthwise. Then scrape with a spoon down the middle and sides.

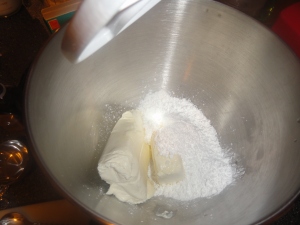
Next, start mixing the cream cheese and confectioner’s sugar…and make sure you start on low speed before going faster.  I started out on high speed and oh, the mess I got to clean up!

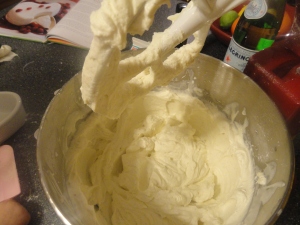
After beating for two minutes, change out the paddle attachment for the whisk (I forgot to do this) and beat in all the remaining ingredients until it looks like really thick whipping cream. Delish!!

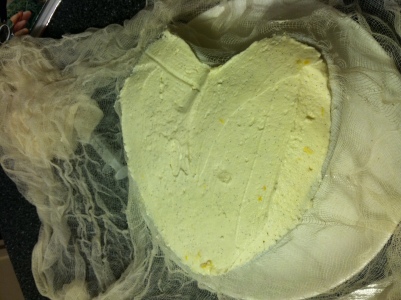
Now place your sieve dish onto a plate (to catch the drainage) and drape the cheesecloth over the sieve and plate. Pour the cream mixture into the sieve dish and level off so that you have a straight edge. Cover with the cheesecloth on top and refrigerate overnight.

And don’t worry if you’re thinking…how will I keep from eating it now? It makes a lot of cream so you’ll have plenty to taste even before it has set overnight! Trust me, there was a lot when I made it.

So the next day…you’ll make the raspberry sauce which is delightful all by itself.

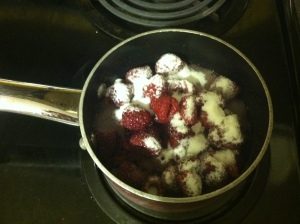
You’ll combine raspberries (I used frozen instead of fresh and it turned out just fine), water, and sugar and then boil to reduce.

For the jam, I used a homemade berry jam instead of just raspberry jam. I think any jam or preserve that is a berry will work fine. You’ll combine the reduced berries, berry jam, and grand marnier together in a food processor. Also, it makes a lot of sauce. You could half this raspberry sauce and still have plenty for the dessert. Or you could just make the whole amount and drink what you don’t use. I’m not kidding…the sauce is really tasty!

Once the sauce is made, you can chill it or you can just go ahead and plate the dessert…who cares if it gets a little warmed from the sauce?

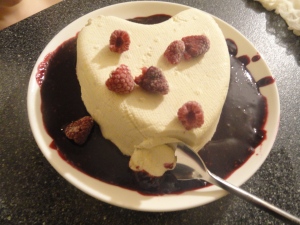
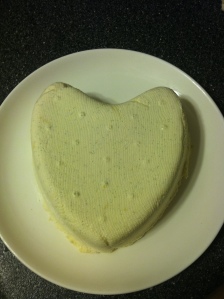
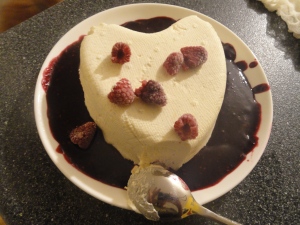
I was nervous to invert it, but it really came out fairly easy. Choose a plate with a curved lip so it will hold your sauce and after removing the cheesecloth on top, turn the mold over on top of the plate and slowly lift up. The creme will slide out and you’ll have a beautiful heart impression.

Now pour the sauce around the side, scatter some raspberries on top….and ENJOY!!!

Here is Ina’s Garten’s official recipe.

Coeur a la Creme with Raspberry and Grand Marnier Sauce
Copyright 2004, Ina Garten, Barefoot Contessa in Paris Cookbook and Food Network

Ingredients

12 ozs cream cheese, at room temperature
1 1/4 cup confectioners’ sugar
2 1/2 cups cold heavy cream
2 teaspoons pure vanilla extract
1/4 teaspoon grated lemon zest
Seeds scraped from 1 vanilla bean
Raspberry and Grand Marnier Sauce, recipe follows

Directions

Place the cream cheese and confectioners’ sugar in the bowl of an electric mixer fitted with the paddle attachment and beat on high speed for 2 minutes.  Scrape down the beater and bowl with a rubber spatula and change the beater for the whisk attachment.  With the mixer on low speed, add the heavy cream, vanilla, lemon zest, and vanilla bean seeds and beat on high speed until the mixture is very thick, like whipped cream,

Line a 7” sieve with cheesecloth so the ends drape over the sides and suspend it over a bowl, making sure that these is space between the bottom of the sieve and the bottom of the bowl for the liquid to drain.  Pour the cream mixture into the cheesecloth, fold the ends over the top, and refrigerate overnight.

To serve, discard the liquid, unmold the cream onto a plate, and drizzle Raspberry and Grand Marnier Sauce around the base.  Serve with raspberries and extra sauce.

For the Raspberry and Grand Marnier Sauce:

  • 1 half-pint raspberries
  • ½ c. sugar
  • 1 c. seedless raspberry jam
  • 2 T. orange-flavored liqueur

Place raspberries, sugar, and ¼ c. water in a small saucepan.  Bring to a boil, lower the heat, and simmer for 4 minutes.  Pour the cooked raspberries, the jam, and orange liqueur into the bowl of a food processor fitted with the steel blade and process until smooth.  Chill.

01-11-2012

What muffins should I make tomorrow?

I’m taking a break today from baking and wanted to know what kind of muffin you’d like me to bake next? Something savory or something heart healthy? I’d love to have an actual muffin name so just write in your favorite muffin.

I have tried & true berry muffin recipes but thought ya’ll might want something different than the norm.

Happy Baking,

Jess

01-10-2012

Banana Bread Muffins

I have never been so thrilled or excited to see and taste these muffins. I am not a big lover of banana bread because normally, in my opinion – and its all about me, they are way overpowered with bananas. But these have a hint of banana and also have coconut, applesauce, and molasses for depth of flavor. The coconut makes it sweet and provides an interesting texture, but again, not so much to make it all about one flavor. These simply are scrumptious!

Yum!

Banana Bread Muffins
Yields 24 muffins 

2 cups all purpose flour
1 tsp baking soda
1/2 tsp kosher salt
1/2 cup quick-1 minute oatmeal
1/2 cup pecans or walnuts
2 to 2.5 medium bananas
1 brown egg, lightly beaten, preferably from a local farm
1 tsp pure vanilla extract
3/4 cup granulated cane sugar, preferably organic
1/2 cup butter
1/2 cup applesauce
1/3 cup shredded coconut
1/8 cup molasses

Preparation

Preheat oven to 350 degrees and line muffin pan with paper liners.

Mash bananas in small bowl, stirring in vanilla, then set aside. In a food processor chop pecans and set aside.  Next, chop oats in processor and then combine, in a large bowl, with flour, baking soda, and salt.

Melt butter in a separate bowl and then stir in sugar until it has completely dissolved.

Next, mix in the applesauce, molasses, beaten egg, and coconut; stirring well.

Thought this picture was neat

Make a well in the bottom of the dry mixture and stir in butter mixture until almost combined but not completely.

Here is what the 'well' should look like before mixing in liquid ingredients

Then mix in the banana mixture and pecans, being careful to not over stir. Fill muffin cups with 1 1/2 to 2 tbsps of batter.

How full my muffin liners were

Bake at 350 degrees for 15-18 minutes, turning pan halfway through.

Enjoy!

Jessica

01-09-2012

Lemon Poppyseed Muffins

Welcome to Muffin Week!!! I have lots of tasty muffins in store for you this week and today’s muffins include one of my favorite ingredients – poppy seed. You’ll find that I went a tad (okay, maybe more than a tad) overboard on the poppy seed, so feel free to use less. I just love their crunch!

I cannot explain how many times I’ve tried creating a lemon poppyseed muffin but I could never figure out the right proportion of ingredients. It is normally too greasy or too spongy and no matter how much I altered butter/oil/milk/egg I could never get them right. Well this one worked perfect! I found a recipe for a poundcake muffin and decided to use half the yogurt, added in milk, and a lot more poppy seed.

So without further adieu….

Lemon Poppyseed Muffins
Adapted from Joy of Baking
Yields 12 – 15 muffins

Ingredients

2 cups all purpose flour
3+ tbsp poppyseeds
1/4 tsp kosher salt
1/2 tsp baking soda
4 ounces plain yogurt
4 ounces whole milk
4 ounces unsalted butter, softened
1 cup organic cane sugar
1 large brown egg, preferably from a farm, lightly beaten
grated lemon zest from 1 large lemon
1 tbsp pure vanilla extract

Preparation

Preheat oven to 400 degrees and line a muffin pan with paper liners.

In a large mixing bowl, stir together the flour, poppy seeds, salt, and baking soda. In another bowl, mix together the yogurt, milk, lemon zest, and vanilla extract.

Using an electric mixer, beat the softened butter and sugar until it is light and fluffy, approximately 5 minutes. Mix in the egg, beating well to ensure it is mixed thoroughly. Now, beat in the liquid milk mixture, scraping down the sides as needed.

Next, make a well in the bottom of your dry mixture bowl. (I forgot to take a picture of this step, but basically you just want there to be an empty spot in the bottom middle of your dry mixture.) Pour the liquid into this well and stir until just combined. BE CAREFUL – the more you stir, the less your muffins will rise and be airy. So do not overmix/overstir, etc.

Fill muffin tins approximately 1/2 to 2/3  full and bake for 15-18 minutes in preheated oven. I hope you enjoy as much as I did!

There are lots of tried & true ways to make your muffins turn out just right – where they look great and taste even better. Click here to view Joy of Baking’s helpful hints for making muffins.

And I’d love to know…What is your favorite type of muffin?

Jess

10-18-2011

Shrimp – it’s whats in season…

Shrimp & Grits...Delicous!

So here in Charleston, SC we’re knee deep into shrimping season and I’m lucky to have an avid fisherman for a husband. We end up with an abundance of shrimp in our freezer, so over the next few months you’ll probably see more than a fair share of shrimp recipes on the blog. Tonight I made my version of shrimp and grits – perfect for fall weather when the temps are falling and the breeze is blowing.

If an item is local there will be an * next to the ingredient. View Local Food Sources to find where and how you can obtain local ingredients.

Ingredients for the Shrimp and Sauce:

1 lb local shrimp*

1/2 cup chopped onion

3 garlic cloves, minced

1/4 cup Lemon Juice

1/2 cup White Wine

28 ozs diced tomatoes with juice*

12 ozs frozen sliced okra

8 ozs frozen corn kernels

1 tsp. fresh herbs such as tarragon, basil, thyme, etc.*

Parmesan or Cheddar cheese

Cracked red pepper

Recipe for the  Shrimp:

Peel & devein shrimp – I have a Crab Zipper for this and LOVE it! I can peel & devein a pound of shrimp in 5-7 minutes!

The Crab Zipper

Marinate in Italian Seasoning of your choice for at least 30 minutes. While sauce is cooking, saute drained shrimp in a separate pan over medium heat for only a few minutes each side. Shrimp cook very quickly and once pink I like to remove as they will cook a little more once I add them into the sauce. Cooking the shrimp separately from the sauce allows them to be seared on outside and retain more juices inside.

Recipe for the Sauce:

Heat approximately 1 tbsp olive oil in a large saucepan over medium heat. Add diced onions and saute for approximately 5 minutes, stirring occasionally. Add a dash of salt and continue to cook another minute or two before adding minced garlic. You are looking for the onions to turn translucent in color.  Once garlic has been added, saute for 1 minute. Add diced tomatoes, lemon juice, white wine, and okra and bring to slight simmer. Reduce heat to medium low and simmer for approximately 15 minutes. Add corn, prepared shrimp, and 1 tsp. of chopped fresh herbs. Simmer for 3 minutes until corn and shrimp are heated through. Season to taste with salt and pepper.

Simmering Sauce

Ingredients for the Grits: 

1 cup grits *

4 cups Chicken Broth*

2 cups warm water

1 cup Cream, half & half, or whole milk*

Recipe for the Grits:

Bring 3 cups chicken broth to boil and gradually whisk in grits. Whisk well to avoid clumps. Reduce heat to low and allow grits to simmer for approximately 20 – 25 minutes, stirring occasionally. You will continually add more broth or water to grits as they become thicker. When last 5 minutes of cooking remains, stir in cream. Once off heat, season with salt & pepper to taste.

Spoon grits into each bowl and place sauce & shrimp over grits. Sprinkle with cheese and cracked pepper for a kick. Enjoy!